Replacing the lower duct hose on your Shark Rocket vacuum can feel like a challenge, especially if you’ve never repaired a vacuum before. But with the right guidance, even first-timers can handle this job safely and confidently. This article will walk you through every step, from understanding what the lower duct hose is, to tools you’ll need, to detailed instructions for removing and installing the new part.
Along the way, you’ll find practical tips, answers to common questions, and insights that most beginners miss. If you want your Shark Rocket running at full power again, you’re in the right place.
What Is The Lower Duct Hose And Why Does It Matter?
The lower duct hose is a flexible tube inside your Shark Rocket vacuum that carries dust, dirt, and debris from the floor head up into the dust cup. When this hose tears, splits, or clogs, your vacuum loses suction and may scatter dirt instead of collecting it. Many users don’t realize that a small crack in this hose can cause a major drop in cleaning performance—even if the motor is working fine.
Not all vacuum hoses are the same. The lower duct hose on Shark Rocket models is designed to twist and flex as you steer the vacuum. It’s built for tight spaces and hard corners, but this also means it can wear out faster than other parts.
A damaged hose can let in air, reducing suction and making the vacuum much less effective.
If you notice weak suction, visible cracks, or hear a whistling sound, it’s time to check your lower duct hose. Replacing it is much cheaper than buying a new vacuum, and can make your machine feel brand new.
When Should You Replace The Lower Duct Hose?
Many Shark Rocket owners wonder if they need to replace the hose now, or if they can wait. Here are common signs that the lower duct hose needs attention:
- Loss of suction power: If your vacuum leaves dirt behind or picks up less than usual, a hose leak is a likely cause.
- Visible cracks or splits: Even small holes can ruin suction.
- Whistling, hissing, or air sounds: These noises often mean air is escaping through a tear.
- Dirt escaping from the vacuum: If you see dust around the hose area, it’s probably leaking.
- Frequent clogs: A damaged hose can trap debris, causing blockages.
Don’t ignore these signs. Many people continue vacuuming with a broken hose, which can damage the motor over time. Replacing the hose quickly helps avoid bigger problems and saves money.
Tools And Parts You Need For The Job
You don’t need a workshop or special skills to replace the Shark Rocket’s lower duct hose. But you do need a few basic tools and the correct replacement part.
Here’s what you’ll need:
- Replacement lower duct hose (make sure it matches your Shark Rocket model)
- Phillips screwdriver (usually size #2)
- Flathead screwdriver (for prying apart clips or covers)
- Small needle-nose pliers (to remove stubborn debris or clips)
- Clean cloth or paper towels (for wiping dust and dirt)
- Flashlight (helpful for seeing inside tight spaces)
- Work gloves (optional but recommended for safety)
Not all replacement hoses are created equal. Some cheaper hoses may not fit tightly, leading to poor suction or even damaging your vacuum. Buy the hose from an official Shark supplier or a trusted online seller. Check the model number on your vacuum (usually on a sticker under the dust cup or near the power cord) and match it to the hose listing.
Preparing Your Shark Rocket For Repair
Before you start, it’s important to get your vacuum ready for safe, clean work. Here’s how:
- Unplug the vacuum. Never work on any electrical device while it’s plugged in.
- Empty the dust cup. Remove all dirt and debris from the vacuum to prevent mess.
- Clean the area. Use a dry cloth to wipe down the vacuum. This prevents dust from falling inside during the repair.
- Lay out your tools and new hose. Arrange everything on a flat, well-lit surface.
Many beginners skip cleaning the vacuum before repair. This can let dirt fall into the motor or onto your floor, making the job harder. Taking a few minutes to clean saves time later.
Removing The Lower Duct Hose: Step-by-step Instructions
The exact steps may vary slightly by Shark Rocket model, but most follow a similar process. Here’s a detailed guide:
1. Separate The Handheld Unit From The Floor Head
Most Shark Rocket vacuums have a release button near the base. Press this button and gently pull the main body away from the floor nozzle. Set the main unit aside.
2. Locate The Lower Duct Hose
The lower duct hose is usually visible at the swivel joint where the floor head meets the wand. On some models, it’s inside a plastic cover or housing.
3. Remove The Screws Holding The Cover
Use your Phillips screwdriver to remove the screws around the hose cover. Place the screws in a small cup so you don’t lose them. Some models have two screws; others may have up to six.
4. Open The Hose Cover
Carefully lift or pry the cover off with your flathead screwdriver. Be gentle to avoid cracking the plastic. If the cover feels stuck, double-check for hidden screws or clips.
5. Disconnect The Old Hose
The hose is usually attached at both ends with simple clips or tabs. Press these gently and slide the hose out of its sockets. If the hose is stuck, use needle-nose pliers to help pull it free.
6. Check For Debris Or Clogs
Before installing the new hose, look inside the sockets and surrounding area for dirt or debris. Wipe them clean with a cloth.
7. Compare The Old And New Hose
Place the new hose next to the old one. Check that they are the same length and shape. The ends should fit snugly into the sockets. If the new hose is a different size, double-check that you have the correct model.
8. Dispose Of The Old Hose
Don’t just throw the old hose in the trash. If it’s badly clogged, you may want to cut it open to see what was inside. This can help you spot the cause of frequent clogs or loss of suction.
Installing The New Lower Duct Hose
Now that the old hose is out, you’re ready to install the new part.
1. Attach One End Of The New Hose
Push one end of the new hose into the lower socket until it clicks or feels secure. You may need to twist gently to seat it fully.
2. Attach The Other End
Connect the other end to the upper socket. Again, make sure it clicks in place and feels tight. A loose connection can cause air leaks and poor suction.
3. Test The Fit
Wiggle the hose gently to check for movement. It should not pull out easily. If it feels loose, remove and re-seat it.
4. Reattach The Hose Cover
Place the plastic cover back over the hose area. Align the screw holes and press the cover into place.
5. Insert And Tighten The Screws
Replace the screws and tighten them with your Phillips screwdriver. Don’t overtighten, as this can crack the plastic.
6. Reattach The Main Unit
Snap the handheld unit back onto the floor head. Make sure everything clicks into place.
7. Plug In And Test The Vacuum
Plug your Shark Rocket in and turn it on. Test the suction and listen for any strange noises. If everything sounds and feels normal, you’re done.
Replacing the lower duct hose takes about 30 to 45 minutes for most users. If you’re careful and follow each step, the process is straightforward.
Common Mistakes To Avoid
Many beginners make small errors that can cause big problems. Here are mistakes to watch out for:
- Forgetting to unplug the vacuum. This can cause electric shock.
- Losing screws or parts. Use a small cup or tray to keep everything together.
- Using the wrong hose model. Always match the model number.
- Forcing parts together. If something doesn’t fit, double-check the instructions.
- Skipping cleaning. Dirt left inside can block the new hose or cause odors.
- Not tightening screws enough. Loose covers can rattle or let in air.
- Not testing after reassembly. Always check suction and performance before regular use.
Avoiding these mistakes makes the repair smoother and prevents new problems later.
How To Choose The Right Replacement Hose
Not all hoses sold online or in stores are genuine Shark parts. Here’s how to choose wisely:
- Check your vacuum’s model number. Find it on the label near the dust cup or power cord.
- Buy from official sellers. Look for Shark’s logo or authorized dealers.
- Read reviews. Other buyers often mention if a hose fits or causes problems.
- Compare prices. Very cheap hoses may be poor quality or the wrong size.
- Check the return policy. If the hose doesn’t fit, you should be able to return it.
Some sellers offer “universal” hoses that claim to fit many models. These often don’t fit tightly and can cause air leaks. Always choose a hose designed for your exact Shark Rocket version.
Understanding Shark Rocket Models: Are They All The Same?
The Shark Rocket series includes several models, and not all use the same lower duct hose. Here’s a comparison of three popular models:
| Model | Lower Duct Hose Shape | Attachment Type | Common Issues |
|---|---|---|---|
| HV300 | Straight | Clip-in | Cracking near swivel |
| HV320 | Curved | Twist-lock | Blockages from hair |
| HV380 | Flexible spiral | Push-fit | Detachment during use |
Always check your model and hose shape before buying a replacement. Using the wrong part can damage your vacuum or void the warranty.
Cleaning And Maintaining Your New Lower Duct Hose
Once you’ve installed the new hose, good maintenance helps it last longer. Here’s how:
- Check for clogs monthly. Shine a flashlight into the hose and look for blockages.
- Avoid vacuuming large debris. Items like rocks, coins, or large food pieces can tear the hose.
- Clean hair and string. Long hair can wrap around the inside of the hose, slowing airflow.
- Store the vacuum upright. Twisting the hose too far when storing can cause cracks.
A well-maintained hose can last several years. If you have pets or vacuum daily, check the hose more often.

Credit: www.amazon.com
Troubleshooting After Replacement
If your Shark Rocket isn’t working well after replacing the lower duct hose, don’t panic. Here are common issues and how to solve them:
1. Poor Suction
- Check that both ends of the hose are seated fully.
- Look for clogs in the main wand or floor head.
- Inspect the dust cup and filters. Dirty filters can reduce suction.
2. Strange Noises
- Listen for whistling or rattling. This usually means a loose connection or missing screw.
- Remove and re-seat the hose to ensure a tight fit.
3. Vacuum Won’t Turn On
- Double-check that the vacuum is plugged in.
- Check for jammed switches or triggers, especially near the hose area.
- Inspect the power cord for damage.
4. Hose Keeps Detaching
- Verify that you have the correct hose model.
- Check for broken clips or sockets.
If you still have problems, consult the Shark Rocket manual or customer support.
How Long Does A Lower Duct Hose Last?
Most Shark Rocket lower duct hoses last between 1 and 3 years with regular use. If you vacuum every day or have pets, the hose may wear out faster. Here’s a quick comparison of hose lifespan by usage type:
| Usage Type | Expected Hose Life | Maintenance Needed |
|---|---|---|
| Light (1-2 times/week) | 2-3 years | Monthly check |
| Medium (3-5 times/week) | 1-2 years | Bi-weekly check |
| Heavy (daily, with pets) | 6-12 months | Weekly check |
Replacing the hose as soon as you notice problems prevents motor damage and keeps your vacuum working well.

Credit: www.amazon.com
Expert Tips For A Smooth Replacement
Replacing the lower duct hose isn’t difficult, but these expert tips can make the process even easier:
- Take photos as you go. Snap a picture after each step. This helps you remember how things fit together.
- Label your screws. If your vacuum has screws of different sizes, place each group in a separate cup or bag and label them.
- Test the hose before full reassembly. Plug in the vacuum and check suction with the cover off (be careful of moving parts).
- Don’t use glue or tape for repairs. Temporary fixes can cause bigger problems. Always use a proper replacement hose.
- Keep your manual handy. If you’re unsure about any step, refer to the manual or look for diagrams.
Many people overlook the value of taking photos or labeling screws, but these steps prevent confusion later—especially if you’re interrupted or need to pause the repair.
Safety Considerations
While replacing the lower duct hose is generally safe, here are some important safety tips:
- Always unplug the vacuum before starting.
- Wear gloves if you’re sensitive to dust or dirt.
- Don’t force parts. If something won’t move, double-check the instructions.
- Keep small parts away from children and pets.
- Avoid using metal tools near the motor or electrical components.
Most accidents happen when people rush or skip steps. Taking your time and following instructions helps prevent problems.
Cost Of Replacing The Lower Duct Hose
The cost to replace a Shark Rocket lower duct hose depends on your model and where you buy the part. On average:
- Official Shark replacement hose: $15–$30 USD
- Third-party replacement hose: $10–$20 USD
- Professional repair service: $40–$70 USD (including labor)
Doing the repair yourself saves money and gives you a better understanding of your vacuum. Buying official parts may cost more, but they usually fit better and last longer. If you’re unsure, check the price and warranty policy before buying.
For more information on Shark Rocket parts and repairs, you can visit the official Shark website at SharkClean Support.
Why Not Just Tape Or Glue The Hose?
Many people try to save time and money by taping or gluing a cracked hose. While this might work for a few days, it’s not a real fix. Tape often peels off, and glue can clog the hose or make the problem worse.
A patched hose may also restrict airflow, reducing suction and putting stress on the motor.
It’s best to replace the hose completely. This restores your vacuum’s power and prevents further damage.

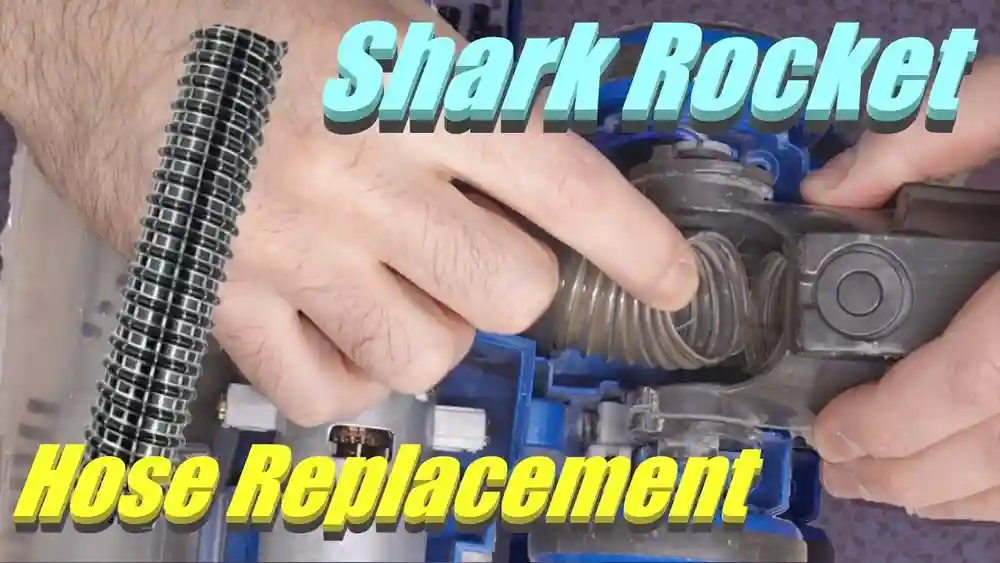
Credit: www.youtube.com
Environmental Tips: Disposing Of The Old Hose
Vacuum hoses are usually made from plastic and rubber. Before throwing out your old hose, check if your local recycling center accepts these materials. Some areas recycle vacuum parts, while others do not. If you have other broken vacuum parts, collect them and recycle them together.
Disposing of vacuum hoses responsibly helps reduce plastic waste.
Real User Experiences: What Surprises Most People?
After replacing the lower duct hose, many Shark Rocket owners are surprised by:
- How much suction improves. A new hose can make the vacuum feel twice as strong.
- How much dirt was inside the old hose. Pet hair, food crumbs, and even small toys often hide inside.
- How easy the repair is. Many first-timers finish in under an hour.
- Noise reduction. Cracks in the old hose can make the vacuum much louder.
One non-obvious insight: if you notice a burning smell or hear grinding noises, check the hose area for hidden clogs or trapped objects. Sometimes the hose splits because something sharp or hard got sucked up and jammed inside.
Can You Upgrade Your Hose?
Some users wonder if they can upgrade to a more durable or flexible hose. Shark offers a few improved hoses for newer Rocket models, made from stronger materials or with extra flexibility. However, only upgrade if the new hose is designed for your model.
Using a hose from another model can cause poor fit or air leaks.
If you want to upgrade, ask the seller if the hose is compatible with your exact Shark Rocket model.
Preventing Future Hose Damage
Once you’ve replaced your lower duct hose, you can help it last longer by:
- Avoiding sharp objects like glass, pins, or nails
- Checking for stuck items after each use
- Cleaning the filters regularly
- Not pulling the vacuum by the hose
- Storing the vacuum in a cool, dry place
These habits reduce wear and tear and help your vacuum last longer.
Frequently Asked Questions
How Do I Find The Model Number Of My Shark Rocket?
The model number is usually on a sticker near the dust cup or on the back of the main unit. It may start with “HV” followed by numbers (like HV320). Always use this number when ordering parts.
What If I Install The Hose But Still Have Poor Suction?
Check for clogs in the wand, floor head, or filters. Sometimes dirt builds up in these areas, blocking airflow even after a new hose is installed. Clean all parts before reassembling.
Can I Use A Generic Hose From Another Vacuum Brand?
No. Generic hoses often do not fit Shark Rocket models correctly and may cause leaks or damage. Always buy a hose made for your specific model.
How Often Should I Check My Lower Duct Hose?
Check the hose every 2–3 months for cracks, clogs, or wear. If you have pets or use the vacuum daily, check more often.
Is It Safe To Repair The Hose With Duct Tape Or Glue?
Temporary repairs with tape or glue are not safe or effective. They can reduce suction, let dirt escape, and may damage the vacuum further. Always replace the hose instead.
Replacing the lower duct hose on your Shark Rocket vacuum is a smart, cost-effective repair that restores performance and extends the life of your machine. With clear instructions and a little patience, almost anyone can do this repair at home.
Take care of your new hose, and your Shark Rocket will keep your floors clean for years to come.