Getting your home clean often means reaching those tough, narrow spots where dust likes to hide. Many people own a Shark vacuum for its strong suction and smart design, but using it right makes all the difference. If you want to clean tight corners, edges, or even inside your car, the crevice tool is your best friend. Still, some users find it tricky to attach or use this tool. Maybe you’ve tried to click it on and it just doesn’t fit, or you’re unsure which end goes where. Don’t worry. With the right steps and practical tips, you can attach the crevice tool to your Shark vacuum quickly and safely.
You’ll also discover there are small details that even experienced users miss, like understanding the type of crevice tool your Shark vacuum uses or how attachments affect suction power. This guide will give you everything you need, whether you’re new to vacuums or just want to clean more effectively.
You’ll finish with the confidence to reach every corner of your home, without damaging your vacuum or struggling with attachments.
Understanding The Shark Vacuum And Its Attachments
Before you start, it’s important to know what makes the Shark vacuum special. Shark is one of the most popular vacuum brands in the world, with millions of units sold every year. The company offers many models, from upright to stick to handheld versions. Each model comes with a set of attachments. One of the most useful is the crevice tool.
What Is A Crevice Tool?
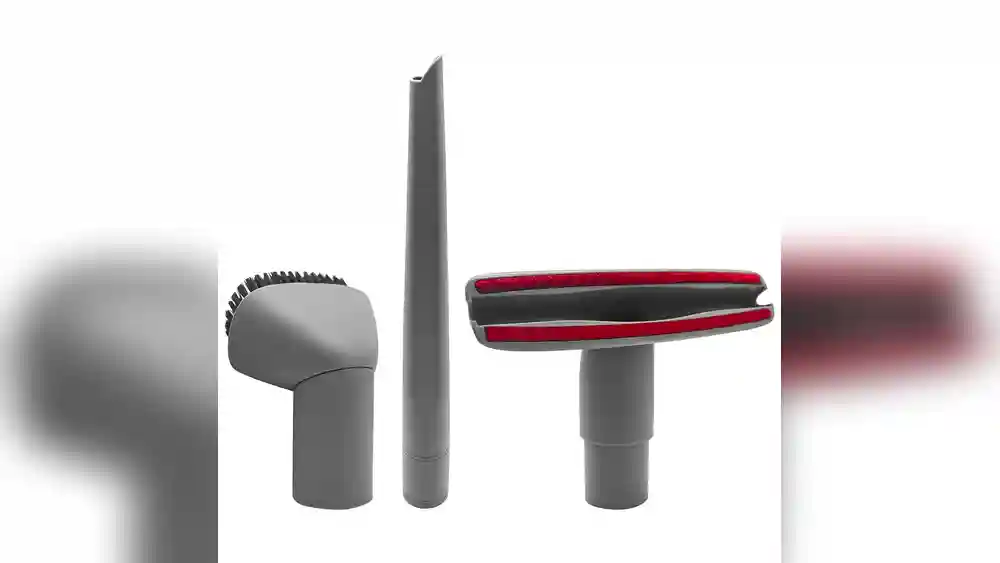
The crevice tool is a long, narrow attachment, usually with a slanted tip. It’s designed to reach spaces that the main vacuum head can’t, such as:
- Between sofa cushions
- Along baseboards
- Window tracks
- Car interiors
- Edges of stairs
The shape allows you to concentrate the vacuum’s suction in one small area. This means you can pick up dirt and debris that would otherwise be missed.
Why Attachments Matter
Attachments make your vacuum more versatile. If you only use the main floor head, you’ll leave dust in small corners and cracks. By attaching the right tool, you get a deeper clean. Most Shark vacuums come with at least three attachments:
- Crevice tool
- Dusting brush
- Upholstery tool
Some advanced models offer more, like a pet hair tool or motorized brush. Always check your model’s manual to see what’s included.
Types Of Crevice Tools For Shark Vacuums
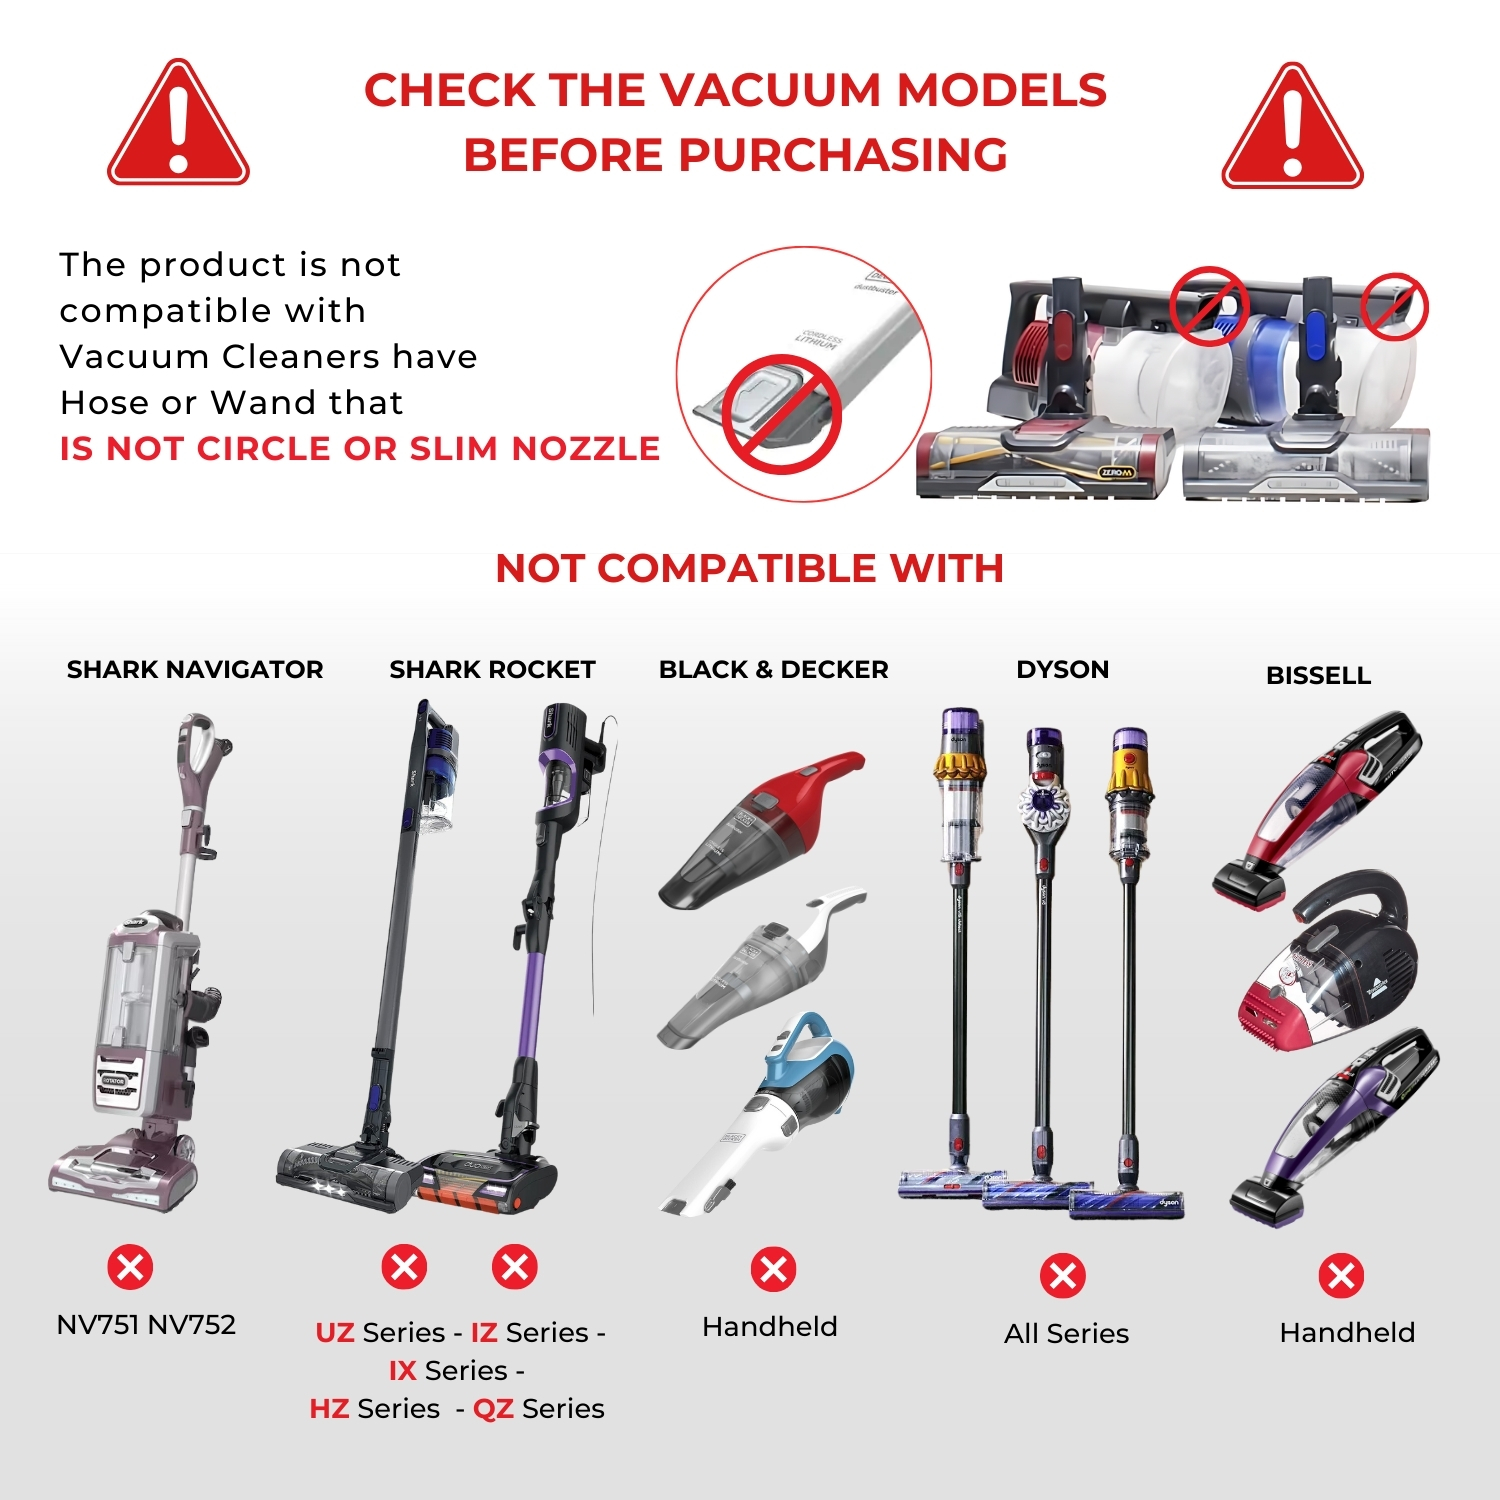
Not all Shark vacuums use the same crevice tool. Understanding the kind you have will make attachment easier and avoid frustration.
Standard Crevice Tool
This is the most common type. It’s a simple, solid plastic tube, about 8–12 inches long, with a narrow opening.
Flexible Crevice Tool
Some Shark models come with a flexible or bendable version. This lets you reach around corners or into awkward spaces.
Extendable Crevice Tool
A few high-end models include a crevice tool that extends or telescopes. This is helpful for reaching farther without moving heavy furniture.
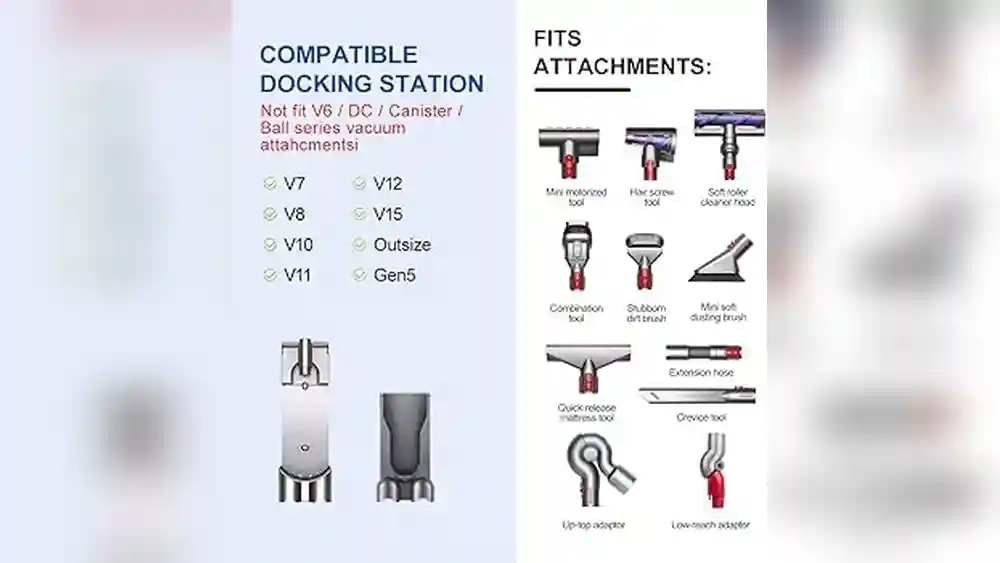
Compatibility Chart
Here’s a quick comparison of which crevice tools fit different Shark vacuum types:
| Shark Model Type | Standard Crevice Tool | Flexible Crevice Tool | Extendable Crevice Tool |
|---|---|---|---|
| Upright | Yes | Some | Rare |
| Stick | Yes | Some | Some |
| Handheld | Yes | No | No |
| Robot | No | No | No |
Insight: Many users try to force an attachment from one Shark vacuum onto another. This can break the tool or reduce suction. Always match the tool to your vacuum model.
Locating The Crevice Tool And Its Slot
When you open your Shark vacuum box, it’s easy to mix up attachments or miss one completely. The crevice tool is often stored in the vacuum’s onboard tool storage or in a plastic bag with other accessories.
How To Find The Crevice Tool
- Check the manual – Most Shark vacuums include a diagram of each attachment.
- Look for a long, narrow piece – The crevice tool stands out because of its shape.
- Onboard storage – Some models have a clip or slot on the vacuum’s body for tool storage.
- Accessory bag or box – If it’s not on the vacuum, look in the packaging.
Identifying The Attachment Slot
Shark vacuums have one or more places where you can attach tools:
- Wand or hose end – Most attachments go here.
- Directly to the handheld unit – For stick or convertible vacuums.
Tip: If you try to attach a tool and it feels loose or wobbly, you might be using the wrong slot or not pushing it in firmly enough.
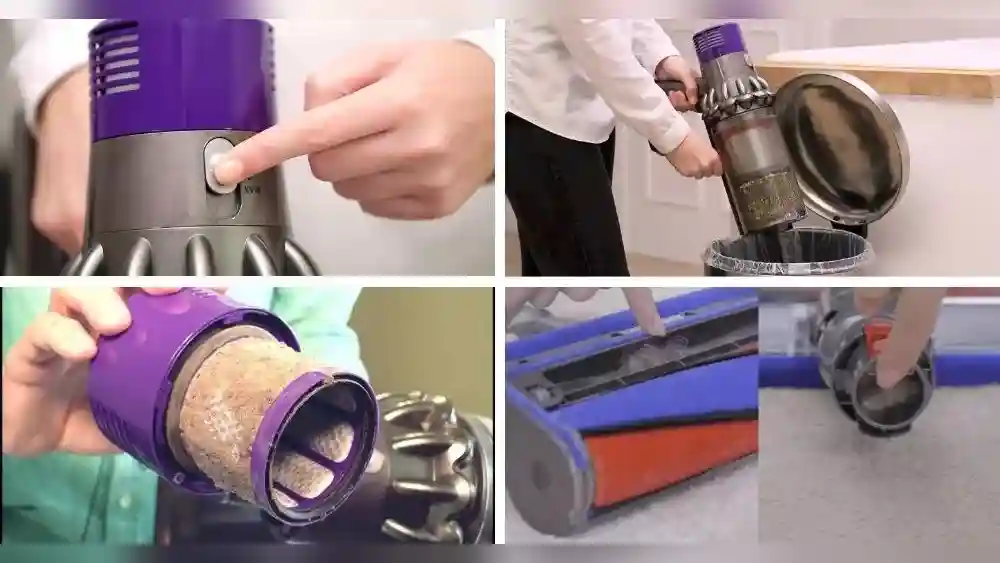
Preparing Your Shark Vacuum
Before attaching any tool, you should always get your vacuum ready. This step is important but often skipped.
Safety First
- Unplug the vacuum if you’re using a corded model.
- For cordless models, make sure the vacuum is turned off.
Clear The Area
Remove any large objects or clutter near your cleaning spot. This prevents accidents and makes it easier to use the crevice tool.
Check For Blockages
Before attaching the crevice tool, check the hose or wand for any blockages. Dirt or hair can get stuck and reduce suction.
Hidden Insight: Many people attach tools without checking for blockages, leading to weak suction and poor results.

Credit: www.onegoodthingbyjillee.com
Step-by-step: How To Attach The Crevice Tool To Your Shark Vacuum
Now let’s get practical. Attaching the crevice tool is easy once you know the steps. Here’s how to do it safely and correctly.
Step 1: Detach The Wand Or Hose
Most Shark vacuums require you to remove the main wand or flexible hose before attaching a tool.
- For upright models, press the wand release button and pull the wand out.
- For stick vacuums, detach the main floor head by pressing the release button.
- For handheld models, find the nozzle where attachments fit.
Step 2: Identify The Attachment End
The crevice tool has two ends:
- The narrow end is for cleaning.
- The wide or round end is for attaching to the vacuum.
Step 3: Align The Tool
Line up the wide end of the crevice tool with the opening on the wand or hose. There may be a small notch or groove to help guide it.
Step 4: Push And Click
Push the tool firmly onto the wand or hose until you hear a click or feel it lock into place. On some models, there’s no click, but the tool should fit snugly without wobbling.
Important Note: Don’t twist or force the tool. If it doesn’t fit, check the alignment or try another slot.
Step 5: Test The Fit
Gently tug the crevice tool. It should stay in place. If it falls off easily, try reattaching it.
Step 6: Power On And Use
Once the crevice tool is secure, you can plug in or turn on your Shark vacuum. Start cleaning tight spaces with ease.
Attaching The Crevice Tool To Different Shark Models
Shark offers many vacuum models, and the attachment method can change a little. Here’s how to attach the crevice tool to the most popular types.
Upright Shark Vacuums
- Remove the main wand by pressing the wand release button.
- Attach the crevice tool to the wand or hose end.
- Make sure it clicks into place.
- For deep cleaning, you can attach the crevice tool directly to the hose for more flexibility.
Shark Stick Vacuums
- Detach the main floor nozzle.
- Attach the crevice tool to the stick or handheld unit.
- Some models allow you to use the crevice tool with the extension wand for longer reach.
Shark Handheld Vacuums
- Find the attachment nozzle at the front of the vacuum.
- Insert the crevice tool’s wide end until it fits snugly.
- Handheld vacuums usually don’t have clicks, but the fit should feel tight.
Shark Cordless Vacuums
- Turn off and remove any batteries if possible.
- Attach the crevice tool in the same way as stick or handheld models.
Special Cases
Some older Shark vacuums use a twist-lock system. In this case, you align arrows or notches and twist until it locks. If your model is very old, check the manual or look online for your specific version.
Common Mistakes To Avoid
Even simple tasks can go wrong. Here are the most frequent errors and how to avoid them:
- Using the wrong tool – The crevice tool is narrow. Don’t confuse it with the dusting brush.
- Attaching to the wrong slot – Double-check that you’re using the hose or wand slot.
- Not pushing firmly enough – If the tool is loose, it may fall off during use.
- Forcing the tool – If it doesn’t fit, don’t force it; this can break the attachment.
- Ignoring blockages – Always clear any debris before attaching tools.
- Skipping the manual – Each Shark model is a bit different. A quick look at your manual can save time.
How Proper Attachment Affects Cleaning Performance
It’s not just about fitting the tool. How you attach it changes how well your Shark vacuum works.
Suction Power
A snug fit means maximum suction. If there’s a gap between the tool and the wand, you’ll lose power, and the tool won’t pick up dirt well.
Airflow
All Shark attachments are designed to keep airflow strong. If the crevice tool is not attached correctly, airflow is lost, and cleaning performance drops.
Dust Containment
A loose attachment can leak dust back into your home. A proper fit keeps all dirt inside the vacuum.
Pro Tip: Sometimes, older attachments wear out and no longer fit tightly. In this case, order a replacement crevice tool from Shark or a trusted retailer.
Credit: vacext.com
Tips For Using The Crevice Tool Effectively
Attaching the tool is just the start. To get the best results, follow these expert tips:
Move Slowly
Because the crevice tool focuses suction in a small area, moving too fast can leave dirt behind. Go slowly for a deeper clean.
Use Short Bursts
For sticky debris or pet hair, use short, repeated strokes instead of one long pass.
Angle The Tool
The slanted tip is designed for corners. Angle the tool to fit snugly along edges for better results.
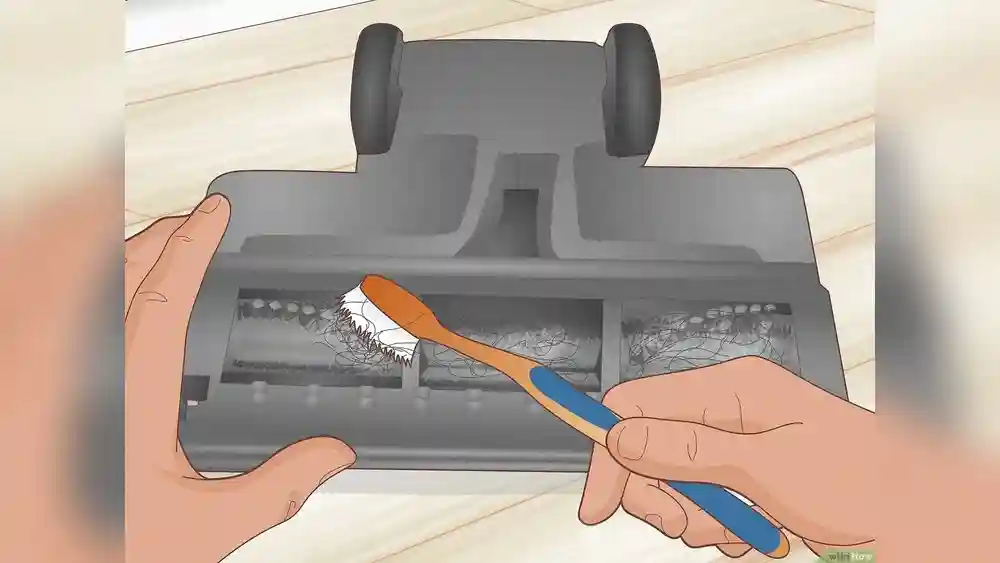
Clean The Tool Regularly
Dust and hair can get stuck inside the crevice tool. Every few uses, rinse it with warm water and let it dry completely.
Use Extension Wands
If your vacuum includes an extension wand, attach the crevice tool to it. This helps reach under furniture or up high.
Hidden Insight: The crevice tool is not just for tight spaces. It’s great for cleaning computer keyboards, car vents, and even behind appliances.
Cleaning And Maintaining Your Crevice Tool
To keep your Shark vacuum working well, you need to maintain all parts, including the attachments.
How To Clean The Crevice Tool
- Remove the tool from the vacuum.
- Use a small brush or cloth to clear out dust and hair.
- For sticky dirt, wash with warm soapy water.
- Let it air dry completely before reattaching.
How Often To Clean
- Every 3–5 uses for regular cleaning.
- After vacuuming very dirty or sticky areas.
Checking For Damage
Inspect your crevice tool for cracks or splits. A damaged tool can cause suction loss and may scratch surfaces.
Practical Example: If you vacuum up glass shards or sharp objects, check the tool’s tip for cracks before the next use.
Replacing A Lost Or Broken Crevice Tool
Sometimes tools get lost or break. Shark vacuums are popular, so you can find replacement crevice tools easily.
Where To Buy
- Shark’s official website
- Major retailers like Amazon, Walmart, or Target
- Vacuum repair shops
Choosing The Right Replacement
Match the replacement tool to your Shark vacuum model. If unsure, check the manual or look up your model number online.
Price Range
Most crevice tools cost between $10 and $25, depending on the model and material.
Insight: Aftermarket or generic tools might not fit as well as official Shark attachments.
When To Use The Crevice Tool Vs. Other Attachments
Using the right tool makes cleaning faster and more effective. Here’s a quick comparison of the crevice tool and other popular Shark attachments:
| Attachment | Best For | Not Ideal For |
|---|---|---|
| Crevice Tool | Corners, edges, tight spaces | Large open areas |
| Dusting Brush | Delicate surfaces, blinds, shelves | Heavy dirt, sticky debris |
| Upholstery Tool | Sofas, mattresses, car seats | Tight corners |
Advanced Techniques: Using The Crevice Tool For Special Jobs
You can do more than just corners with your crevice tool. Here are some advanced uses:
Cleaning Car Interiors
- Use the tool to clean between seats, in cup holders, and along door edges.
- For best results, remove floor mats first.
Window Tracks And Sliding Doors
- Run the crevice tool along the track to remove built-up dust and debris.
- Use a small brush first for heavy dirt, then vacuum.
Under Appliances
- Attach the crevice tool to an extension wand.
- Slide under refrigerators, stoves, or washing machines to catch hidden dust.
Keyboard And Electronics
- Use the crevice tool with low suction to clean between keyboard keys or computer vents.
Expert Insight: Always avoid picking up liquids or large, sharp objects with the crevice tool. These can damage your vacuum or cause clogs.
Troubleshooting: If The Crevice Tool Won’t Attach
Sometimes, things don’t go as planned. Here’s how to fix common issues:
Tool Doesn’t Fit
- Double-check the tool and slot. Are you using the right attachment?
- Clean any debris from the connection points.
Tool Falls Off
- Make sure you’ve pushed the tool on firmly.
- If it’s worn out, order a new one.
No Suction
- Check for blockages in the wand, hose, or tool.
- Make sure the vacuum is assembled correctly.
Attachment Is Stuck
- Gently twist and pull, but don’t force it.
- If still stuck, check for dirt or broken pieces in the connection.
Pro Tip: Keeping connection points clean helps all attachments fit better and last longer.
Keeping Your Shark Vacuum And Attachments Organized
Organization makes cleaning faster and prevents loss of tools.
Onboard Storage
Many Shark vacuums have special slots or clips for storing attachments. Use these to keep the crevice tool handy.
Tool Bags Or Boxes
If your model doesn’t have onboard storage, use a small box or bag to keep all attachments together.
Labeling
If you have multiple vacuums or attachments, use a label to mark each tool. This avoids confusion.
How Long Does A Crevice Tool Last?
A well-made crevice tool can last for years, but its life depends on use and care.
- Average lifespan: 3–5 years with regular use.
- Frequent replacement: If you use it for heavy jobs or with sticky dirt.
Insight: Regular cleaning and gentle use extend the life of your tools.

Credit: www.amazon.com
Shark Vacuum Crevice Tool: Facts And Figures
To help you understand the value and use of the crevice tool, here’s a summary of key data:
| Feature | Details |
|---|---|
| Length | 8–12 inches (standard), up to 18 inches (extendable) |
| Material | Durable plastic, sometimes rubberized tips |
| Fit | Snap-on, friction fit, or twist-lock depending on model |
| Price | $10–$25 (official Shark part) |
| Compatibility | Most Shark uprights, sticks, handhelds (except robots) |
Safety Reminders When Using Attachments
- Never vacuum up water or wet dirt with the crevice tool.
- Avoid picking up sharp objects that could puncture the tool.
- Keep fingers away from the tip when the vacuum is on.
- If the tool cracks or breaks, replace it immediately.
Note: For more on cleaning safety, visit the U.S. Consumer Product Safety Commission.
Frequently Asked Questions
How Do I Know If My Crevice Tool Is Compatible With My Shark Vacuum?
Check your vacuum’s manual or look for the model number on the vacuum body. Most Shark crevice tools are designed for specific models. If you’re buying a replacement, match the tool to your vacuum model to ensure a proper fit.
Can I Use The Crevice Tool On Wet Surfaces?
No, the crevice tool is for dry cleaning only. Using it on wet surfaces can damage your vacuum and may cause electric shock. Always use the tool on dry dust, dirt, or debris.
Why Does My Crevice Tool Keep Falling Off?
If the tool is loose, it may not be pushed on all the way. Try reattaching it firmly. If it’s still falling off, the tool or wand may be worn out. In this case, replace the attachment for a better fit.
How Do I Clean The Crevice Tool After Using It?
Remove the tool from the vacuum. Use a brush or cloth to remove dust and hair. For sticky dirt, wash it with warm, soapy water and let it air dry completely before using again.
Where Can I Buy A Replacement Crevice Tool For My Shark Vacuum?
You can buy replacements from Shark’s official website, major retailers, or vacuum repair stores. Always check the compatibility with your vacuum model before buying.
---
Understanding how to attach the crevice tool to your Shark vacuum is key for a clean home, especially in hard-to-reach spaces. With the right steps, careful use, and regular maintenance, you can make the most of every cleaning session. Don’t overlook the small details—choosing the correct tool, attaching it securely, and keeping it clean will help your Shark vacuum work better and last longer.
With these insights, you’re ready to tackle every corner and crevice with confidence.