The Shark Ion robot vacuum has become a reliable helper for many people who want to keep their floors clean with minimal effort. These robotic vacuums use advanced sensors to avoid stairs and other drop-offs, making them safe in multi-level homes. However, over time, dust, pet hair, and debris can cover the cliff sensors, causing the vacuum to malfunction or stop working. Regular cleaning of these sensors is not just a suggestion—it’s necessary for reliable performance. Many users overlook this simple maintenance step and end up frustrated when their robot gets stuck, stops, or acts strangely.
If you want your Shark Ion to work its best, you must learn how to clean the cliff sensors properly. This process is simple but requires care and attention to detail. People often make mistakes, such as using the wrong cleaning tools or missing hidden dust, which can reduce the sensor’s effectiveness.
In this guide, you’ll discover exactly how to clean the cliff sensors step by step, learn why this maintenance matters, what to avoid, and how to keep your Shark Ion running smoothly for years. Even if you’re not a technical person, you’ll find the instructions clear and easy to follow.
Understanding Cliff Sensors On Shark Ion
Cliff sensors are small electronic devices located on the bottom of the Shark Ion robot vacuum. Their main purpose is to detect edges, such as stairs or ledges, to prevent the robot from falling. These sensors work by emitting infrared signals and measuring the reflection.
If the sensor does not detect a reflection, it means there is a drop, so the robot changes direction.
Most Shark Ion models have four to six cliff sensors arranged near the front and sides. These are small, dark, window-like spots. If these sensors become dirty, the robot may think there is always a drop, causing it to avoid areas or stop cleaning altogether. Dust, pet hair, and even oily fingerprints can interfere with the sensor’s infrared beam.
A common sign of dirty cliff sensors is when the robot stops frequently, backs up for no reason, or gives a “cliff error” message. Sometimes, it will refuse to clean certain areas or get stuck at the edge of a rug.
Understanding how these sensors work and how they become dirty will help you clean them correctly and prevent unnecessary repairs.
Why Cleaning Cliff Sensors Is Critical
Ignoring cliff sensor cleaning can lead to several problems. The most obvious is false cliff detection. The robot may avoid safe surfaces or stop cleaning, thinking it is near stairs. This can leave entire rooms uncleaned. In rare cases, if the sensors are blocked but still partially working, the robot might actually fall down stairs or ledges.
Dirt-covered sensors also force the robot to work harder, which can drain the battery faster. Sometimes, users spend money on repairs or replacements when a simple cleaning would fix the issue. Regular cleaning not only saves money but also extends the life of your Shark Ion. Most manufacturers, including Shark, recommend cleaning the sensors every two weeks or more often if you have pets or dusty floors.
One overlooked detail is that humidity and oily substances (like kitchen grease or spilled drinks) can make dirt stick harder to the sensors. So, if you use your Shark Ion in a kitchen or high-traffic area, cleaning may be needed more often.
Tools And Materials Needed
Before starting, gather the right tools. Using the wrong cleaning supplies can damage the sensors or leave streaks that confuse the vacuum.
You will need:
- A clean, dry microfiber cloth – This picks up dust without scratching the sensor surface.
- A soft brush (like a clean, dry paintbrush or makeup brush) – For removing loose debris and pet hair.
- Cotton swabs – For reaching into small gaps and corners.
- Mild isopropyl alcohol (70%) – For stubborn dirt or greasy marks. Avoid strong cleaners.
- A flashlight – To check that the sensors are clean and free of residue.
Do not use paper towels, rough sponges, or strong chemicals. These can scratch the sensors or leave fibers behind.
Preparing Your Shark Ion For Sensor Cleaning
Start by turning off your Shark Ion. If possible, remove the battery (check your model’s manual if you’re unsure). This step is crucial for safety and to avoid triggering any error codes.
Place the robot upside down on a clean, soft surface, such as a towel. This prevents scratching the robot body and gives you clear access to the bottom. It’s best to work in a well-lit area so you can see all sensors and dirt.
Remove any obvious debris from the wheels, brushes, or charging contacts. Sometimes, hair or large dust balls can get in the way during cleaning. If your robot has detachable brushes or wheels, take them off for easier access to the sensors.
Step-by-step Guide: Cleaning Cliff Sensors
1. Locate The Cliff Sensors
Look for small, dark, glass-like windows on the underside of your Shark Ion. Most models have four sensors: one near each front corner and two on the sides. Some newer models have up to six. Use your flashlight to highlight any dust or debris.
2. Remove Loose Debris
Use the soft brush to gently sweep away dust, pet hair, or crumbs from around the sensors. Brush in one direction to avoid pushing dirt into the sensor window. If hair is wrapped around the sensor or nearby parts, carefully pull it away with your fingers or tweezers.
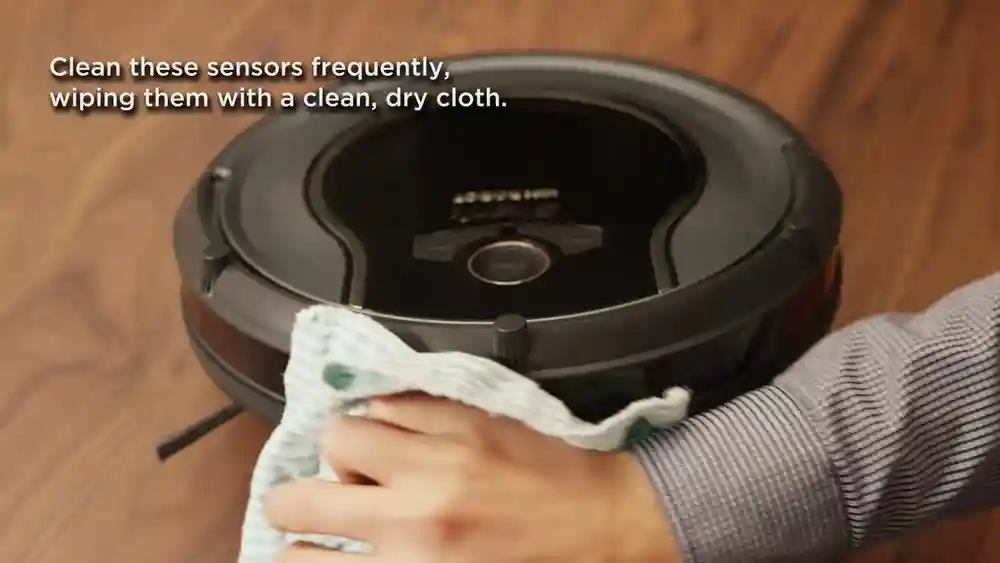
3. Wipe Sensors With A Microfiber Cloth
Take your clean, dry microfiber cloth and gently wipe each sensor window. Move in a circular motion and avoid pressing too hard. The goal is to lift off fine dust without scratching the glass or plastic cover.
For sensors near tight spaces, wrap the cloth around your finger or a cotton swab and wipe carefully.
4. Use Cotton Swabs For Corners
Dip a cotton swab in a small amount of 70% isopropyl alcohol (not dripping wet—just damp). Clean the edges and corners of each sensor window. This removes stubborn dirt, oily residue, or sticky spots that the cloth cannot reach.
Never pour liquid directly onto the sensors or the robot. Always apply alcohol to the swab or cloth first.
5. Check Your Work
Shine the flashlight on each sensor. Clean sensors should look shiny and free of streaks or haze. If you still see smudges or dust, repeat the process with a new cloth or swab.
6. Let It Dry
Allow the sensors to air-dry for a few minutes before turning the robot back on. Even small amounts of moisture can confuse the sensors or cause short circuits.
7. Reassemble And Test
Replace any parts you removed. Turn your Shark Ion right side up and power it on. Run a short cleaning cycle near a stair or ledge to check if the sensors are working correctly. The robot should approach the edge, slow down, and turn away smoothly.
Common Mistakes And How To Avoid Them
Many people make simple errors when cleaning cliff sensors. Here are some common mistakes and what you can do to avoid them:
1. Using Water Directly
Never spray water or liquid cleaner directly on the sensors. Even a few drops can enter the housing and cause permanent damage.
2. Using Rough Materials
Paper towels, kitchen sponges, or abrasive cloths can scratch the sensor’s surface. Use only microfiber cloths or soft brushes.
3. Forgetting To Power Off
Cleaning with the robot powered on can cause error messages, accidental starts, or even small shocks. Always turn off the device.
4. Skipping Regular Cleaning
Waiting until the robot malfunctions can shorten its life. Clean the sensors every two weeks or more often in dusty homes.
5. Ignoring Sticky Residue
If you cook often or have pets, sticky dirt can build up. Dry wiping may not be enough—use a damp (not wet) alcohol swab for these spots.
6. Not Checking All Sensors
Some Shark Ion models have more than four cliff sensors. Check your manual or inspect the bottom carefully to avoid missing any.
7. Not Letting Sensors Dry
Even a tiny bit of alcohol or moisture left on the sensors can cause errors. Wait a few minutes before use.
These simple tips can help you maintain your Shark Ion and avoid unnecessary frustration or costly repairs.
How Often Should You Clean Cliff Sensors?
Frequency depends on your home environment and usage. For most users, cleaning every two weeks is enough. However, if you have:
- Multiple pets
- High foot traffic
- Lots of rugs or carpets
- Use the robot daily
. . . then you should check and clean the sensors every week.
Homes with little dust or minimal use can extend cleaning to once a month. Always check the sensors after any major cleaning jobs, such as after renovations, moving, or holiday events.
Signs Your Cliff Sensors Need Cleaning
Your Shark Ion will show certain behaviors if the cliff sensors are dirty. Watch for these signs:
- The robot stops in the middle of the floor and beeps or displays an error.
- The vacuum keeps turning away from safe areas, especially near dark rugs or patterned floors.
- It refuses to move forward, even on flat surfaces.
- The robot gets stuck at the edge of carpets or thresholds.
- You see obvious dust or pet hair on the sensor windows.
Some users notice the robot acting strangely only in certain rooms. This can mean the sensors are only partially blocked, or that lighting and floor color are affecting detection. Regular sensor checks can prevent these surprises.
Advanced Tips For Stubborn Dirt And Sensor Issues
Sometimes, basic cleaning is not enough. If your Shark Ion still reports errors or behaves oddly after cleaning, try these advanced tips:
1. Use Compressed Air
For dust trapped deep inside the sensor housing, a short burst of compressed air can help. Hold the can upright and use gentle, short bursts. Do not blow air too close or too long, as this can force dust further inside.
2. Repeat Alcohol Cleaning
If greasy residue remains after the first cleaning, repeat the cotton swab with alcohol step. Let the sensor dry completely before testing.
3. Check For Sensor Damage
Inspect the sensors for cracks, chips, or deep scratches. Physical damage can cause permanent errors and may require professional repair.
4. Update Your Robot’s Firmware
Some sensor issues are related to software, not hardware. Check the Shark app or website for firmware updates, which can improve sensor performance.
5. Contact Shark Support
If you’ve tried everything and the robot still has problems, contact Shark customer support. They can help troubleshoot or arrange for repairs.
What If Cleaning Does Not Fix The Problem?
If cleaning does not solve the cliff sensor issue, the problem may be deeper. Possible causes include:
- Sensor misalignment (from a drop or impact)
- Internal wiring issues
- Software glitches
- Permanent sensor damage
You can try a full reset by removing the battery and leaving it out for 10 minutes. Reinstall the battery and test again. If the robot still fails, it may need professional service.
Keep in mind that Shark Ion cliff sensors are not designed to be replaced by users. Trying to open or repair the sensor yourself can void the warranty.
How Cliff Sensors Differ Across Shark Ion Models
Not all Shark Ion models have the same number or type of cliff sensors. Here’s a quick comparison of common models:
| Model | Number of Cliff Sensors | Location | Special Features |
|---|---|---|---|
| Shark Ion R85 | 4 | Front corners, sides | Standard detection |
| Shark Ion R75 | 4 | Front corners, sides | Wi-Fi enabled |
| Shark Ion R101AE | 6 | Front, sides, back | Self-empty base |
Check your user manual or the Shark website for your specific model’s sensor placement. Missing even one sensor during cleaning can lead to ongoing issues.
How Dirty Cliff Sensors Affect Performance
Cliff sensors are one of the most sensitive parts of your Shark Ion. Even a thin layer of dust can block the infrared signal, causing “phantom cliffs.” Here’s how dirty sensors can impact performance:
| Problem | Result | Possible Solution |
|---|---|---|
| Blocked sensors | Robot stops, “cliff error” appears | Clean sensors thoroughly |
| Partial blockage | Robot avoids certain areas | Inspect and clean all sensors |
| Sticky residue | Robot acts erratic, ignores cliffs | Use alcohol swab cleaning |
A well-maintained sensor system will allow the robot to clean efficiently, cover more ground, and avoid unnecessary stops.

Credit: www.amazon.com
How To Prevent Sensor Blockages
Prevention is easier than repair. Here are practical steps to keep your cliff sensors clean longer:
- Vacuum and sweep floors regularly to reduce dust and pet hair.
- Avoid running the robot on wet or sticky surfaces (kitchens after cooking, recently mopped floors).
- Check for spills or oily spots before using the robot.
- Keep pets away from the robot during cleaning to reduce hair buildup.
- Wipe the robot’s bottom (not just the sensors) with a dry cloth weekly.
Some advanced users install small strips of clear tape over the sensors to make cleaning easier. If you try this, make sure the tape is perfectly clear and does not leave a sticky residue.
The Science Behind Cliff Sensor Technology
Cliff sensors in Shark Ion robots use infrared (IR) technology. Each sensor emits a beam of IR light and measures how much reflects back. When the robot is over a solid floor, the IR beam bounces back strongly. When it reaches a step or drop, the beam does not return, triggering the robot to stop or change direction.
Several factors can affect sensor accuracy:
- Dirt and dust block the IR beam.
- Very dark or shiny floors can absorb or reflect the IR beam differently, causing false readings.
- Sunlight or strong overhead lights can interfere with IR detection.
- Pet hair or debris can cause partial signals, confusing the robot.
Understanding this technology helps you realize why keeping sensors clean and floors free of obstacles is so important.

Credit: www.youtube.com
How To Clean Other Sensors And Parts
While you’re cleaning the cliff sensors, it’s a good idea to clean other key parts of your Shark Ion:
1. Side And Edge Sensors
These help the robot follow walls and avoid obstacles. Wipe gently with a microfiber cloth.
2. Charging Contacts
Dirty contacts can prevent proper charging. Clean with a dry cloth and, if needed, a cotton swab with a little alcohol.
3. Main Brushes And Wheels
Remove hair, dust, and threads. Clean with a brush or your fingers—never use water.
4. Dustbin And Filters
Empty and wash as recommended in your manual. Clean filters improve suction and air quality.
Regular full maintenance keeps your robot running like new and prevents sensor issues from returning.
How To Test Cliff Sensors After Cleaning
After cleaning, it’s important to test that the cliff sensors are working. Here’s a simple way to check:
- Place the Shark Ion on a table or countertop (with a clean surface and no clutter).
- Turn it on and start a cleaning cycle.
- Watch as it approaches the edge—it should slow down and turn away before falling.
- Repeat on another edge to confirm all sensors are working.
If the robot does not stop or turns too late, repeat the cleaning steps or check for damage.
When To Call A Professional
If you’ve tried all cleaning steps and your Shark Ion still has sensor problems, it may be time for professional help. Contact Shark support or a certified repair center if:
- The robot ignores cliffs and falls
- Cliff errors happen every run despite cleaning
- Physical damage is visible on the sensors
- The robot will not start at all
Do not attempt to open the sensor housing or replace sensors yourself, as this can void your warranty.
How Clean Sensors Extend Robot Life
Clean cliff sensors not only prevent accidents but also help your robot last longer. Dust and dirt inside the sensors can cause them to overheat or fail early. Regular cleaning means fewer repairs, better battery life, and consistent performance.
According to Shark’s own data, users who follow the recommended cleaning schedule report 30% fewer sensor-related errors and longer vacuum life. Taking a few minutes to clean sensors every two weeks can save you money and frustration in the long run.
Real-world User Experiences
Many Shark Ion owners share stories online about how dirty cliff sensors caused problems. For example, one user found their robot stuck in the middle of the kitchen every day. After cleaning the sensors, the robot worked perfectly again.
Another user noticed the vacuum avoiding a dark rug after a holiday party. Sticky residue from spilled drinks had blocked the sensors. Careful cleaning fixed the issue.
These stories show that sensor cleaning is not just a technical detail—it’s a key part of owning a robot vacuum.
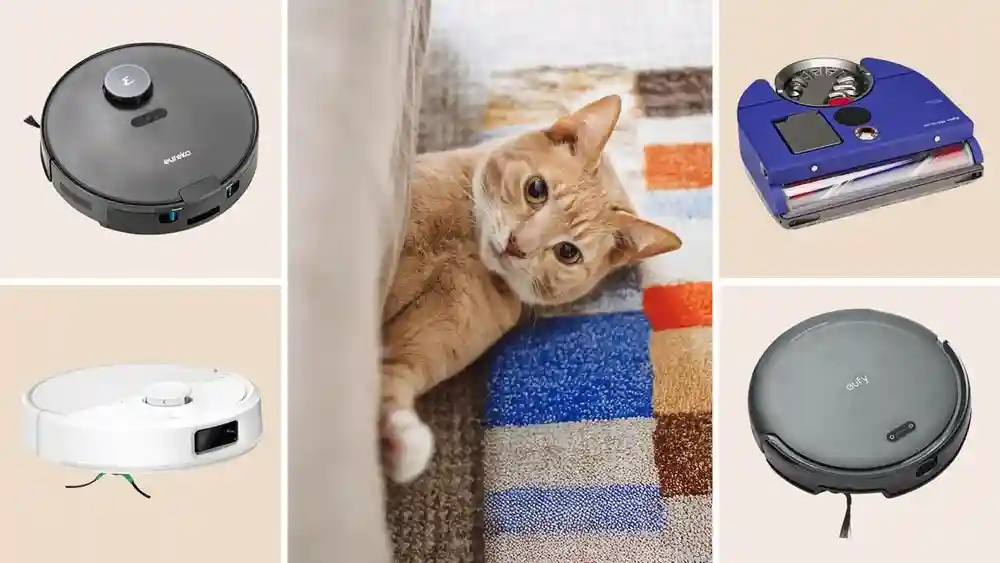
How Shark Ion Cliff Sensors Compare To Other Brands
Shark Ion cliff sensors are similar to those in other brands like Roomba or Eufy, but there are some differences in placement, sensitivity, and cleaning needs.
| Brand | Sensor Type | Cleaning Frequency | Replacement Cost |
|---|---|---|---|
| Shark Ion | Infrared | Every 2 weeks | High (professional only) |
| Roomba | Infrared | Weekly | Medium (user-replaceable) |
| Eufy | Infrared | Monthly | Low (DIY possible) |
Shark Ion sensors are reliable but require careful cleaning. Other brands may allow easier replacement but can be more sensitive to certain floor types. Always follow the cleaning instructions for your specific brand and model.

Credit: www.ifixit.com
Environmental Factors That Affect Cliff Sensor Performance
Some homes are tougher on robot vacuums than others. If you have:
- Dark or patterned floors – These can sometimes fool the sensors, making cleaning more important.
- High humidity – Can cause dust to stick more firmly.
- Direct sunlight – Strong light can confuse IR sensors.
- Pet hair – Long hair can wrap around the sensors or housing.
If you notice frequent sensor issues, check your home’s environment and adjust your cleaning schedule. Sometimes, moving the charging base or using the robot at different times of day can reduce problems.
Quick Maintenance Checklist
Here’s a simple checklist to keep your Shark Ion sensors and robot in top shape:
- Turn off and unplug before cleaning.
- Clean cliff sensors with a microfiber cloth every two weeks.
- Use a cotton swab and alcohol for sticky spots.
- Check and clean side sensors and charging contacts monthly.
- Remove hair and dust from brushes and wheels weekly.
- Test sensors on an edge after cleaning.
- Update firmware as needed.
- Check for physical damage or cracks.
- Avoid using on wet or dirty floors.
- Contact support for ongoing issues.
Print or save this checklist as a reminder. Consistent maintenance is the key to a happy, long-lasting Shark Ion.
Frequently Asked Questions
How Do I Know If My Shark Ion Cliff Sensors Are Dirty?
Common signs include the robot stopping for no reason, turning away from safe areas, or showing a cliff error message. You may also see visible dust, pet hair, or smudges on the sensor windows.
Can I Use Water Or Glass Cleaner To Clean Cliff Sensors?
No, you should never use water or strong cleaners directly on the sensors. Use a dry microfiber cloth for dust and a cotton swab with 70% isopropyl alcohol for stubborn dirt. Water can damage the electronics inside.
How Often Should I Clean The Cliff Sensors?
For most homes, clean the sensors every two weeks. If you have pets, lots of dust, or heavy robot use, check and clean weekly. In low-dust homes, once a month may be enough.
Will Cleaning The Sensors Void My Shark Ion Warranty?
No, cleaning the sensors as described here is recommended by Shark and will not void your warranty. However, opening the sensor housing or trying to replace sensors yourself may void the warranty.
Where Can I Find More Information About Shark Ion Maintenance?
You can find more detailed guides and official support at the Shark Clean Support Center.
Taking care of your Shark Ion cliff sensors is a small task that makes a big difference. With regular cleaning and the right tools, your robot vacuum will avoid stairs, clean efficiently, and last for years. Don’t wait for problems—make sensor maintenance part of your routine and enjoy worry-free cleaning every day.