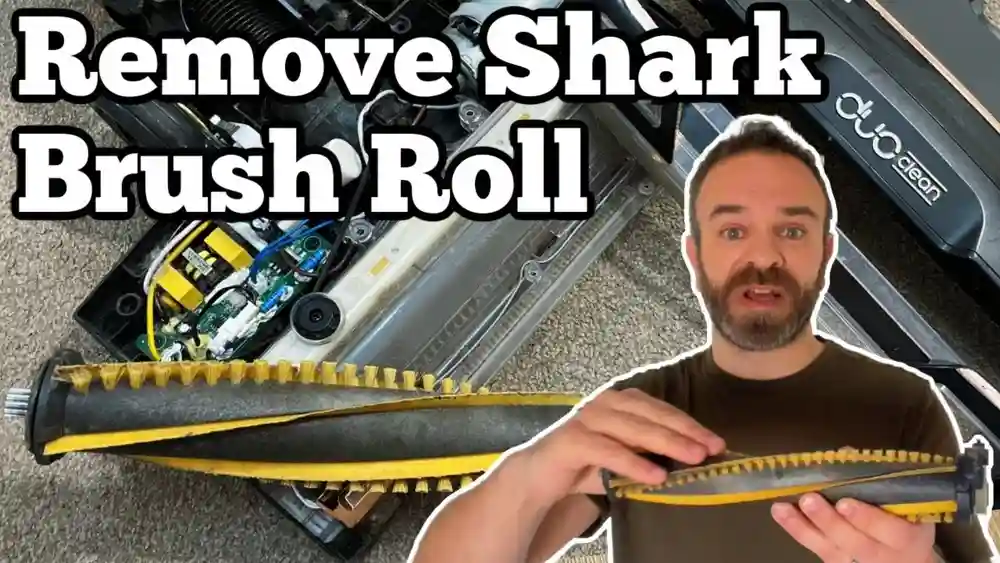
Keeping your Shark Navigator vacuum in top condition means more than just emptying the dust cup. One of the most crucial parts is the brush roll—the spinning part at the bottom that picks up dirt, hair, and debris. Over time, this brush can get tangled with hair or clogged with lint, which can reduce the vacuum’s cleaning power and even damage the motor if not addressed. Many owners overlook cleaning the brush roll or don’t realize how much it impacts performance. Learning to clean it properly helps your vacuum last longer, keeps your floors cleaner, and saves you from costly repairs. In this guide, you’ll learn step by step how to clean the brush on a Shark Navigator, what tools to use, safety tips, and expert advice for the best results.
Why Cleaning The Brush Roll Matters
Most people notice when their vacuum starts to miss dirt or make strange noises. Often, the reason is a clogged or tangled brush roll. The brush roll is designed to lift dirt from carpets and hard floors, but when it’s covered in hair or threads, it can’t spin freely. This puts extra stress on the vacuum’s motor and can lead to overheating. In fact, studies show that vacuums with clean brush rolls pick up up to 40% more dirt compared to those with tangled brushes.
A clean brush roll also means fewer allergens in your home. Dust and pet dander trapped in the bristles can get released back into the air if not removed regularly. This is especially important for allergy sufferers or families with children, as dirty vacuums can recirculate these particles into the air you breathe.
Regular cleaning can reduce sneezing, coughing, and other allergy symptoms.
Finally, cleaning the brush roll prevents bad odors and extends the life of your vacuum belts and motor. When hair and dirt build up, the belt can slip or stretch, causing the vacuum to lose power. A well-maintained brush roll keeps the motor running at its best, reduces the risk of overheating, and can even cut down on electricity use because the vacuum won’t have to work as hard.
Over time, these small steps can save you money on repairs and replacement parts.
Some users may not realize that a dirty brush roll can also leave streaks or marks on floors, especially if sticky substances build up on the bristles. This can make your cleaning efforts less effective and even damage delicate flooring.
By keeping the brush roll clean, you protect your investment in both your vacuum and your home’s surfaces.
Understanding Your Shark Navigator Brush Roll
Before you start cleaning, it’s important to know the specific type of brush roll your Shark Navigator uses. There are several models, and while the basic process is similar, some have removable brush rolls while others are fixed. Check your vacuum’s manual for details, but most Shark Navigators fall into one of these categories:
- Removable brush roll: Can be taken out for deep cleaning.
- Fixed brush roll: Stays in place; you clean it while still attached.
- Self-cleaning brush roll: Has special features but still needs manual cleaning sometimes.
Some models have extra features, like LED lights or a lift-away canister, that can affect how you access the brush roll. Knowing your model helps avoid mistakes and speeds up the process.
For example, the Shark Navigator Lift-Away makes it easy to reach the brush roll by removing the canister, but the Swivel Pro requires a bit more work to access the screws. The newer Zero-M models have a self-cleaning brush roll, which reduces hair tangles but doesn’t completely eliminate the need for hands-on maintenance.
If you’re not sure which model you have, look for the model number on the label, usually found underneath the vacuum or inside the dust cup area.
Understanding your brush roll type also helps you buy the right replacement parts if needed. Using the wrong brush roll can cause poor performance or damage the vacuum.
Tools And Supplies You Will Need
Gathering the right tools makes the job much easier. Here’s what you’ll need:
- Scissors (preferably with a rounded tip for safety)
- Small screwdriver (Philips or flathead, depending on your model)
- Tweezers or a seam ripper (for stubborn hair or string)
- Soft cleaning brush (an old toothbrush works well)
- Microfiber cloth
- Mild soap (optional, for sticky messes)
- Vacuum user manual (for reference)
- Gloves (optional, for hygiene)
If you have sensitive skin or allergies, wearing gloves can make the process more comfortable. The user manual is especially helpful if you forget how the brush roll fits or need to look up part numbers.
Some Shark Navigator owners keep a small tray or organizer with these tools near their cleaning closet. This way, everything is ready for quick maintenance, and you don’t have to search for a screwdriver or clean scissors every time you need to clean the brush roll.
A flashlight can also be useful, especially in homes with low light or if you need to see deep inside the brush roll compartment. If you have pets, consider a lint roller or sticky tape to pick up loose hair from the brush roll after cutting.
Step-by-step Guide: How To Clean The Brush On Shark Navigator
Cleaning your Shark Navigator’s brush roll is straightforward if you follow these steps. Each stage is important to ensure you don’t miss any trapped debris or damage your vacuum.
1. Power Off And Unplug
Safety comes first. Always unplug the vacuum before starting. Even when powered off, there’s a risk of accidental activation or electric shock.
Don’t just turn off the power switch—remove the plug from the wall. This small step protects you from unexpected movement if someone accidentally presses the power button while you’re cleaning. It also ensures you can handle metal parts, like screws, safely.
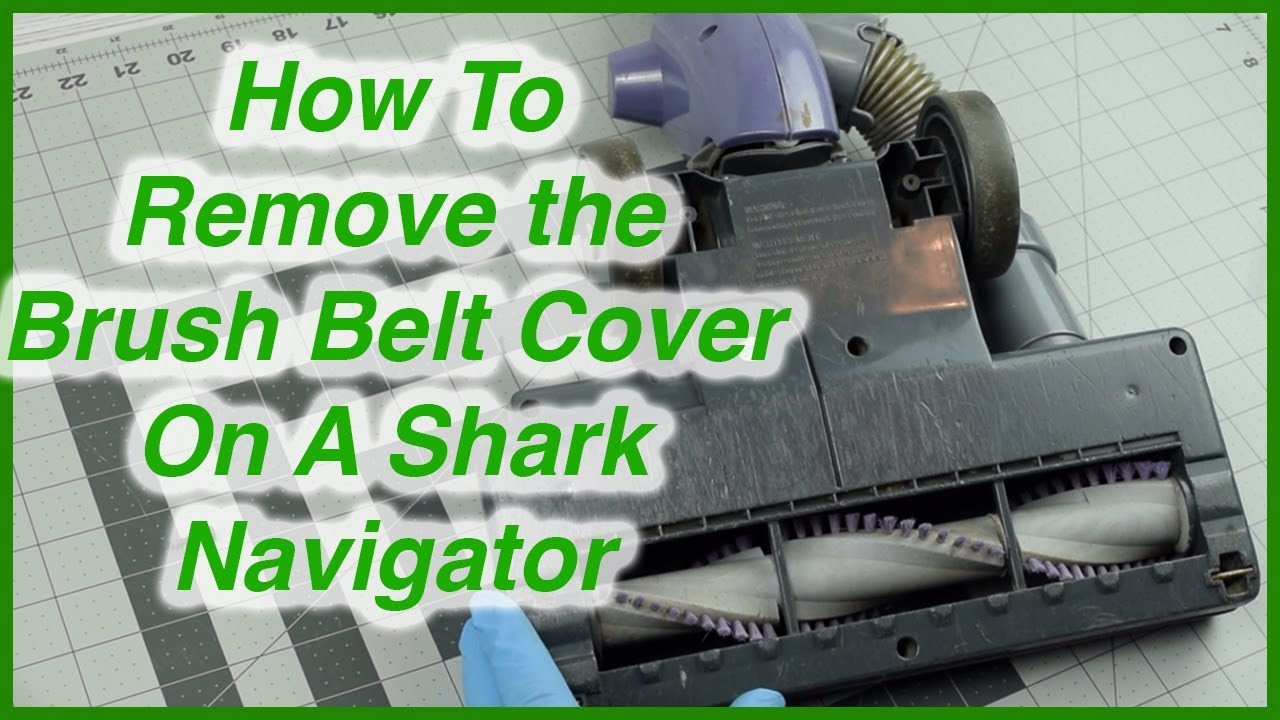
2. Access The Brush Roll
Flip the vacuum over so you can see the bottom. On most Shark Navigator models, you’ll see a cover plate held by screws or clips. Remove the screws using your small screwdriver and set them aside in a bowl or cup so you don’t lose them.
Take care not to overtighten or strip the screws when removing them, as you’ll need to reattach the cover later. If your vacuum uses clips, gently press or slide them instead of forcing them open, which can break the plastic.
Some models have a quick-access door, while others require more work. Check your manual if you’re unsure. Gently remove the cover to expose the brush roll.
If dirt or dust falls out while removing the cover, don’t worry—this is common. Lay down an old towel or newspaper to catch debris and make cleanup easier.
3. Remove The Brush Roll (if Applicable)
If your model has a removable brush roll, carefully lift it out. Take note of how it fits, as you’ll need to replace it exactly the same way. For fixed brush rolls, you’ll clean it in place.
A good tip is to take a quick photo with your phone before removing the brush roll. This way, you’ll remember the position and avoid confusion during reassembly.
Some brush rolls have end caps that must be unscrewed or gently pulled out. If you feel resistance, check for hidden clips or tabs before using force.
4. Remove Tangled Hair And Debris
Use your scissors to cut any hair or string wrapped around the brush. Cut along the grooves (if present) to avoid damaging the bristles. Pull away loosened debris with your fingers or tweezers.
Expert tip: If hair is tightly wound, use a seam ripper for more control. Take your time—rushing can damage the brush.
For thick or sticky build-up, work in small sections. Loosen a little at a time instead of trying to pull everything off at once, which could pull bristles out or crack the brush core.
If you have pets, you may find clumps of hair at the ends of the brush roll, near the bearings. These are easy to miss and can block the brush from spinning. Use tweezers or a small pick to dig out any trapped hair.
Some users find it helpful to rotate the brush roll as they work, so they can see all sides and catch hidden debris. If you notice small stones or hard objects, remove them before they scratch or damage the brush roll surface.
5. Clean The Bristles And Ends
Brush the bristles with your soft cleaning brush to remove dust and fine particles. For sticky residue, dampen a microfiber cloth with mild soap and water, then wipe gently. Avoid soaking the brush roll or getting water inside the vacuum.
If you encounter gum, glue, or sticky candy, apply a small amount of mild dish soap and let it sit for a few minutes before wiping. Never use bleach or strong chemicals, as these can damage plastic parts and bristles.
Don’t forget the ends of the brush roll—these areas collect hidden lint and can affect spinning. Rotate the brush roll as you clean and check for dark or greasy marks, which can mean old hair or dirt is stuck inside.
If your brush roll has removable end caps, gently pop them off and wipe underneath. This is a common spot for hair to wrap and slow down the brush. If the end caps are not removable, use a cotton swab or soft brush to reach inside.
6. Check For Blockages
Look inside the brush roll compartment for any stuck debris or buildup. Wipe it with your cloth and make sure airways are clear.
Use a flashlight to check deep corners or behind the brush roll. Even small pebbles or clumps of lint can block airflow and reduce suction. If you notice dust building up on the vacuum’s sensors or wiring, gently wipe with a dry cloth only.
If you find any burnt or melted plastic, this could be a sign of overheating from past blockages. In this case, inspect the vacuum closely and consider getting a professional check.
7. Dry And Reassemble
If you used a damp cloth, let all parts dry completely before putting them back. Moisture inside the vacuum can cause mildew or electrical issues.
Air drying for at least 30 minutes is usually enough, but if you used a lot of water, wait longer or use a fan to speed up drying. Never use a hair dryer or heat gun, as high heat can warp plastic parts.
Replace the brush roll (if removed) and screw the cover back on securely. Make sure all clips and screws are tight, but do not overtighten, as this can crack the housing.
8. Test Your Vacuum
Plug in your Shark Navigator and turn it on. Listen for smooth, quiet operation and check that the brush spins freely. If you hear odd noises or see the brush isn’t turning, unplug and check for missed debris or incorrect assembly.
It’s helpful to test on a small area of carpet or rug first. Look for improved cleaning and check for any new vibrations or resistance. If you notice a burning smell, stop immediately and check for missed blockages or damaged parts.
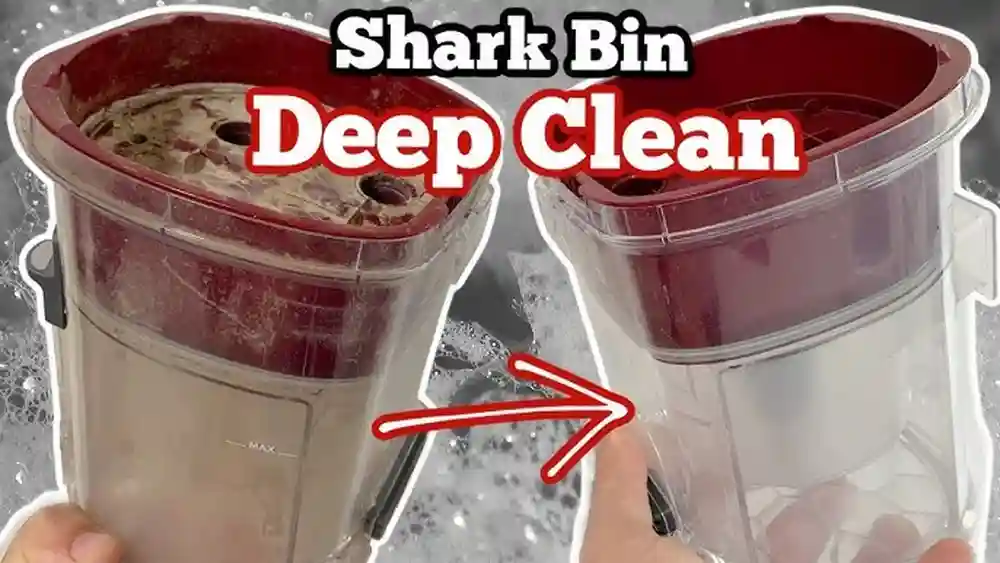
Credit: www.youtube.com
How Often Should You Clean The Brush Roll?
How often you clean depends on your floor type, pets, and how often you vacuum. As a rule:
- Every 2-4 weeks: Homes with pets or long hair
- Every month: Average households
- After heavy use: Post-renovation or seasonal cleaning
If you have thick carpets or rugs, hair and fibers build up faster. For homes with hardwood or tile, cleaning may be needed less often, but don’t skip it—dust and fine grit can still collect.
Neglecting the brush roll for months can lead to permanent damage or even void your vacuum’s warranty. Set a reminder on your phone or calendar for regular cleaning.
Non-obvious insight: If you notice your vacuum handle getting hot or the smell of burning rubber, check the brush roll immediately—these are signs it’s overdue for cleaning.
Common Problems And Troubleshooting
Even with regular cleaning, issues can arise. Here are common problems and solutions:
Brush Roll Not Spinning
- Check for blockages: Hair or debris can jam the ends.
- Inspect the belt: If the belt is loose or broken, the brush won’t turn.
- Motor protection mode: Some Shark Navigators stop the brush if there’s too much resistance.
If the brush roll starts and stops during use, this could mean the motor is protecting itself from overheating. Let the vacuum cool, then clean the brush roll and check the belt before trying again.
Strange Noises
- Rattling: Usually caused by loose screws or trapped debris.
- Squeaking: May indicate a dry or worn bearing at the brush roll end.
Try spinning the brush roll by hand after cleaning—if you hear grinding or squeaking, add a tiny drop of sewing machine oil to the bearings if your model allows (check your manual).
Reduced Suction
- Clogged airways: Check all air paths near the brush roll and clean as needed.
- Overfilled dust cup: Empty and clean for best results.
If suction drops suddenly, check the filters and hose for blockages. Sometimes, cleaning the brush roll alone is not enough.
If problems persist, consult the user manual or contact Shark customer service. Repeated issues after cleaning may mean it’s time for a replacement part or a more detailed inspection.
Comparing Different Shark Navigator Models
Some Shark Navigator models are easier to clean than others. Here’s a quick comparison of popular versions:
| Model | Brush Roll Type | Ease of Access | Self-Cleaning Feature |
|---|---|---|---|
| Navigtor Lift-Away | Removable | Easy | No |
| Navigtor Swivel Pro | Fixed | Moderate | No |
| Navigtor Zero-M | Self-Cleaning | Easy | Yes |
| Navigtor Professional | Removable | Moderate | No |
The Lift-Away and Zero-M models are generally the quickest for cleaning. The Swivel Pro may require more time due to extra screws or less accessible covers.
Beginner’s insight: Even if your model says “self-cleaning,” check the ends and compartment for hidden tangles—these areas are not always covered by self-cleaning features.
Self-cleaning models require less frequent manual cleaning but still benefit from monthly checks.
Tips For Preventing Brush Roll Clogs
Prevention is easier than repair. Here are some expert tips:
- Pick up large objects before vacuuming—coins, socks, or toys can wrap around the brush.
- Brush pets regularly to reduce shedding on carpets.
- Trim long threads or yarn from rugs.
- Vacuum slowly—moving the vacuum too fast can push hair into the brush roll instead of picking it up.
- Store your vacuum properly to avoid bristle bending or motor strain.
Another helpful tip: Shake out entryway rugs or mats before vacuuming to remove large debris that could tangle in the brush roll. Consider using a mat at doors to catch dirt before it reaches your floors.
If you have long hair, consider tying it back or brushing hair over a trash can before vacuuming. This reduces the amount of loose hair that could end up in the brush roll.
Regularly check and clean the wheels, as hair can wrap around them and transfer to the brush roll during use.
Cleaning Other Parts For Best Results
The brush roll is just one part of a clean vacuum. For maximum suction and air quality, also clean:
- Filters: Rinse and dry as recommended.
- Dust cup: Empty and wipe regularly.
- Hose: Check for blockages.
- Wheels and base plate: Remove dirt for smooth movement.
Neglecting these can make even the cleanest brush roll less effective.
For filters, most Shark Navigators have two or three: a foam filter, felt filter, and sometimes a HEPA filter. Rinse foam and felt filters every month and replace HEPA filters as the manual suggests. Dirty filters can block airflow and stress the motor.
To clean the hose, detach it and run a flexible brush or a long, soft rod through to remove lint or clogs. For stubborn blockages, try blowing air through the hose or tapping it gently on a hard surface.
Wipe the wheels and base plate after every few uses, especially if you vacuum near kitchens or bathrooms, where sticky spills can collect.
Deep Cleaning For Stubborn Messes
Sometimes, the brush roll collects sticky spills or gum. For these tough messes:
- Remove the brush roll completely.
- Soak only the bristle area in warm, soapy water (never submerge the whole part).
- Use a toothbrush to scrub away residue.
- Rinse well and let dry fully before reinstalling.
Important: Never put the brush roll in a dishwasher or use harsh chemicals. This can damage bristles or the brush core.
For dried paint or glue, gently scrape with a plastic tool and use mild soap. Avoid metal scrapers, which can scratch or gouge the brush roll.
After deep cleaning, spin the brush roll by hand to check for smooth movement and make sure no water remains in the center or under the end caps.
Real-life Example: Pet Hair Challenge
Sarah, a dog owner, noticed her Shark Navigator losing power. After opening the brush roll area, she found thick layers of dog hair wrapped around the brush and ends. Even after pulling out the main clumps, she missed hair stuck under the end caps, causing the brush to spin slowly. Using tweezers and a flashlight, she cleaned these hard-to-see spots. The vacuum returned to full power, and Sarah learned to check the ends each time.
Beginner’s insight: Many users clean only the visible bristles but forget the ends, where hair can slow the brush. Always check both.
Another common scenario: Lisa, who vacuums after her kids' snack time, noticed sticky cereal and candy sticking to the bristles. She used a damp microfiber cloth with mild soap to wipe away the residue. Since then, she checks for sticky spots every week and has fewer problems with odors and stains.
What Not To Do: Common Mistakes
Avoid these errors for safe, effective cleaning:
- Forcing the brush roll back in if it doesn’t fit—double-check alignment.
- Using sharp knives instead of scissors—this can cut bristles.
- Washing with hot water—can warp plastic parts.
- Skipping drying time—moist parts can short-circuit your vacuum.
Don’t use oil or lubricants unless your manual says it’s safe. Too much oil can attract dust and gum up the brush roll bearings.
Never use a hair dryer or heater to speed up drying; air drying is safest for all vacuum parts.
If you drop a screw or small part inside the vacuum, retrieve it before reassembling. Loose metal can damage the motor or electrical system.

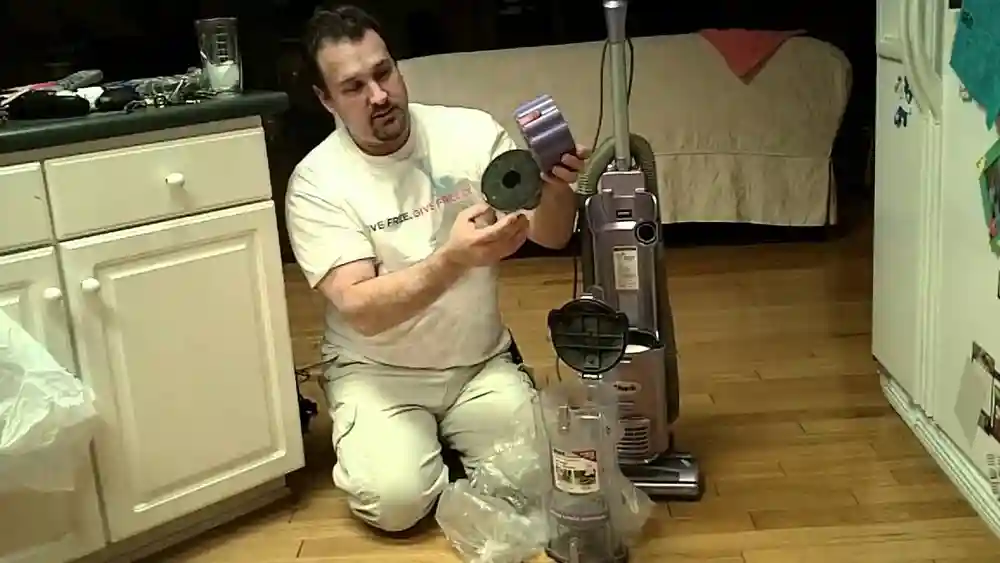
Credit: www.ifixit.com
How To Know When The Brush Roll Needs Replacement
Even with regular cleaning, brush rolls wear out. Watch for these signs:
- Bristles are worn down or uneven.
- The brush roll won’t spin even after cleaning.
- There’s a burning smell or visible cracks.
- The vacuum leaves dirt behind.
Most Shark Navigator brush rolls last 1-2 years with good care. Check your manual for the correct replacement part number.
If you vacuum very often or have pets, you may need to replace the brush roll more often. If you notice the brush roll making unusual noises or not picking up debris as well as it used to, inspect it closely for wear.
Replacement is simple: buy the correct part for your model, remove the old brush roll, and install the new one following the manual instructions.
Table: Signs You Need To Replace The Brush Roll
| Sign | What It Means | Action Needed |
|---|---|---|
| Bristles worn or missing | Less cleaning power | Replace brush roll |
| Roll doesn’t spin | Possible damage | Check belt/replace roll |
| Strange noises | Broken parts or blockages | Inspect/replace as needed |
| Persistent odor | Bacteria or mildew | Clean or replace |
If you replace the brush roll and still have issues, check the belt and bearings, as these may also need attention.
When To Seek Professional Help
Most brush roll cleaning is easy to do at home, but if you:
- Hear grinding or burning noises
- See sparks or smell burning plastic
- Can’t remove a stuck part without force
…stop and call Shark customer service or a qualified repair shop. Forcing or prying parts can void your warranty or cause more damage.
If your vacuum is still under warranty, professional help may be free or discounted. Be sure to keep your receipts and register your product for best results.
Extra Care For Self-cleaning Models
Some Shark Navigators have “Zero-M” or self-cleaning brush rolls. These are designed to reduce hair tangles but still need regular checks. Hair can build up at the ends or around the drive belt. Follow your manual for any special instructions and don’t assume the feature means “maintenance-free.
”
Non-obvious tip: Even self-cleaning brushes work best when the rest of the vacuum is clean. Don’t ignore filters or hoses.
If you notice the self-cleaning feature not working as expected, check for blockages or worn-out parts. Even advanced designs need some hands-on care.
Comparing Manual Vs. Self-cleaning Brush Rolls
If you’re considering an upgrade, here’s how manual and self-cleaning brush rolls compare:
| Feature | Manual Brush Roll | Self-Cleaning Brush Roll |
|---|---|---|
| Cleaning Frequency | Every 2-4 weeks | Every 1-2 months |
| Hair Removal | Manual cutting/pulling | Automatic to some extent |
| Maintenance Time | 10-20 minutes | 5-10 minutes |
| Cost | Lower | Higher |
Self-cleaning is convenient but not perfect—you’ll still need to check for blockages.
Manual brush rolls are less expensive and easier to replace, but require more regular maintenance. If your home has lots of long hair or pets, the self-cleaning models can reduce your workload but remember to check for hidden tangles or blockages that the system might miss.
Keeping Your Shark Navigator Running Like New
Cleaning the brush roll is not just about fixing problems—it’s about prevention. With regular care, your Shark Navigator can last for years and keep your home cleaner with less effort. Here’s a quick summary of the most important points:
- Unplug first for safety.
- Remove and clean all hair, dust, and debris from the brush roll and its compartment.
- Check the ends for hidden tangles.
- Dry thoroughly before reassembly.
- Test after cleaning to ensure smooth operation.
Don’t forget to set regular reminders and check the rest of your vacuum for clogs or wear.
Taking a few extra minutes each month for maintenance keeps your vacuum efficient and helps you avoid costly repairs. With these habits, even older Shark Navigator vacuums can work almost like new.
For more detailed information about vacuum maintenance and common issues, visit the official Wikipedia page on vacuum cleaners.
Credit: www.reddit.com
Frequently Asked Questions
How Do I Know If My Shark Navigator Brush Roll Is Clogged?
If your vacuum leaves dirt behind, the brush roll stops spinning, or you hear strange noises, the brush roll may be clogged. Check for hair or debris wrapped around the brush or stuck at the ends. Regular inspection prevents problems.
Can I Wash The Brush Roll With Water?
You can wipe the bristles with a damp cloth and mild soap, but never soak the entire brush roll or put it in water. Water inside the vacuum can cause damage. Always let parts dry completely before reassembling.
What If The Brush Roll Still Doesn’t Spin After Cleaning?
Check for blockages in the compartment, inspect the belt for wear, and make sure you reassembled everything correctly. If the brush roll remains stuck, contact Shark customer service for help.
How Often Should I Clean The Brush Roll If I Have Pets?
Homes with pets should clean the brush roll every 2-4 weeks. Pet hair wraps around the brush faster and can reduce suction or cause overheating if not removed regularly.
Is It Safe To Use Sharp Objects To Cut Hair From The Brush Roll?
Always use blunt-tipped scissors or a seam ripper for safety. Sharp knives or tools can damage the bristles or the brush roll core, and may cause injury.
Can I Use Compressed Air To Clean The Brush Roll Compartment?
Yes, compressed air can help blow out dust and small debris from hard-to-reach corners, but do this outside or over a trash can, as dust will fly out quickly.
Do I Need To Lubricate The Brush Roll Bearings?
Most Shark Navigator models do not require lubrication, but if your manual suggests it, use only a tiny drop of light oil. Too much oil attracts dust and may cause problems.
Keeping your Shark Navigator’s brush roll clean is one of the simplest ways to extend its life and keep your home dust-free. With these steps, you’ll see better vacuum performance and fewer repair bills—plus, cleaning will feel less like a chore and more like routine care for an important home appliance.