Keeping your Shark Navigator DLX in top shape is more than just emptying the dust cup. Regular, deep cleaning helps your vacuum last longer, maintain strong suction, and keep your air cleaner. Many users forget key steps or don’t realize how much dust and hair builds up inside. If you’ve noticed a loss of suction, odd smells, or simply want to prevent problems, cleaning your vacuum properly is a must.
This guide gives you a complete, easy-to-follow plan for cleaning the Shark Navigator DLX. You’ll discover not just the basics, but also less obvious spots where dirt hides. Whether you use your Shark for carpets, hardwood, or pets, these steps will help keep it working like new.
With clear instructions, tips, and answers to common questions, you’ll soon feel confident maintaining your vacuum.
Why Regular Cleaning Matters
A clean vacuum works better and lasts longer. The Shark Navigator DLX is a reliable machine, but dust, hair, and debris can clog filters, block airflow, and even damage the motor if ignored. You might notice:
- Reduced suction power – dirt blocks the air path
- Bad odors – old dust and pet hair build up
- Allergens – dirty filters spread dust back into your home
- Motor strain – leads to breakdowns and costly repairs
Cleaning isn’t just about looks. It’s about health, money, and performance. Shark recommends cleaning filters every 3 months and rinsing pre-motor filters monthly, but heavy users (especially pet owners) may need to clean more often.
What You Need Before You Start
Getting the right supplies makes cleaning faster and safer. Here’s what you’ll need:
- Clean, dry towels or microfiber cloths
- Mild dish soap
- Small brush or old toothbrush
- Scissors (for hair on the brush roll)
- Bowl or bucket with warm water
- Compressed air can (optional, for deep dust removal)
- Replacement filters (if yours are worn or damaged)
- Phillips screwdriver (for some deep cleaning steps)
- Rubber gloves (optional, for allergies)
Never use harsh chemicals, bleach, or rough scrubbers. These can damage parts or leave harmful residues.

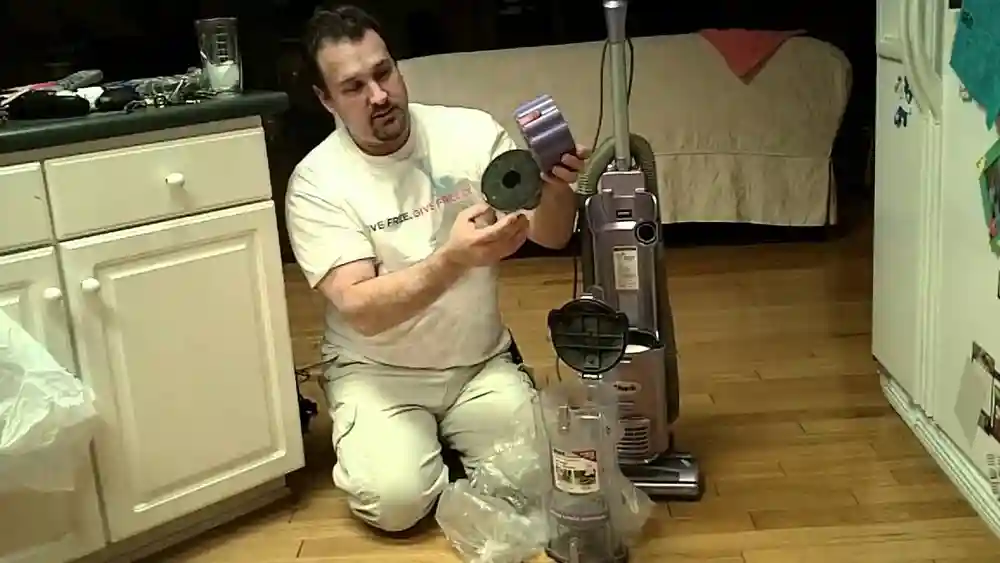
Credit: www.youtube.com
Safety First: Unplug And Prepare
Before you do anything, always unplug the vacuum from the wall. This prevents electric shocks and keeps you safe as you open and clean different sections. Make sure the vacuum is cool—never clean right after heavy use, since some parts can get warm.
It’s smart to clean your Shark Navigator DLX on an old towel or outside, especially if it’s been a while since your last cleaning. This way, dust and mess won’t get all over your floors.
Step-by-step: How To Clean The Shark Navigator Dlx
Let’s break down the process into manageable parts. Even if you’re a beginner, these clear steps will help you clean every important part of your vacuum.
1. Empty And Clean The Dust Cup
The dust cup is the first place dirt collects. Here’s how to clean it:
- Release the dust cup: Press the dust cup release button and pull the cup out.
- Empty debris: Hold the dust cup over a trash can and press the bottom lid release to dump out all dirt.
- Wash the cup: Rinse the dust cup with warm water. Use a bit of dish soap if it’s sticky or smelly.
- Scrub as needed: For stuck-on dirt, use a brush or sponge. Avoid scratching the clear plastic.
- Dry completely: Let the dust cup air dry. Never put it back wet, or you’ll risk mold and motor damage.
Non-obvious tip: Check the lid seal and the area where the cup meets the vacuum for hidden dust. Wipe with a damp cloth.
2. Clean The Filters
Your Shark Navigator DLX uses both pre-motor and post-motor filters. Cleaning these is crucial for strong airflow.
Pre-motor Filters (foam & Felt)
- Locate filters: Open the filter cover under the dust cup.
- Remove foam and felt filters: Lift them out gently.
- Rinse with water: Squeeze under cool running water. Do not use soap.
- Repeat until water runs clear.
- Air dry for 24 hours: Place on a towel—never use a dryer, heater, or direct sun.
Post-motor Hepa Filter
- Find the HEPA filter: It’s usually behind a grill at the front or side of the vacuum.
- Remove filter: Pull it out gently.
- Tap off dust: Lightly tap the filter on a trash can to loosen dust.
- Rinse under water (if washable): Only some HEPA filters can be rinsed. Check your manual.
- Let dry completely: Like other filters, air dry for at least 24 hours.
Helpful insight: Filters can look clean but still be clogged. If suction is weak after cleaning, it might be time to replace them. Shark recommends every 6–12 months, but homes with pets, heavy traffic, or allergies may need new filters sooner.
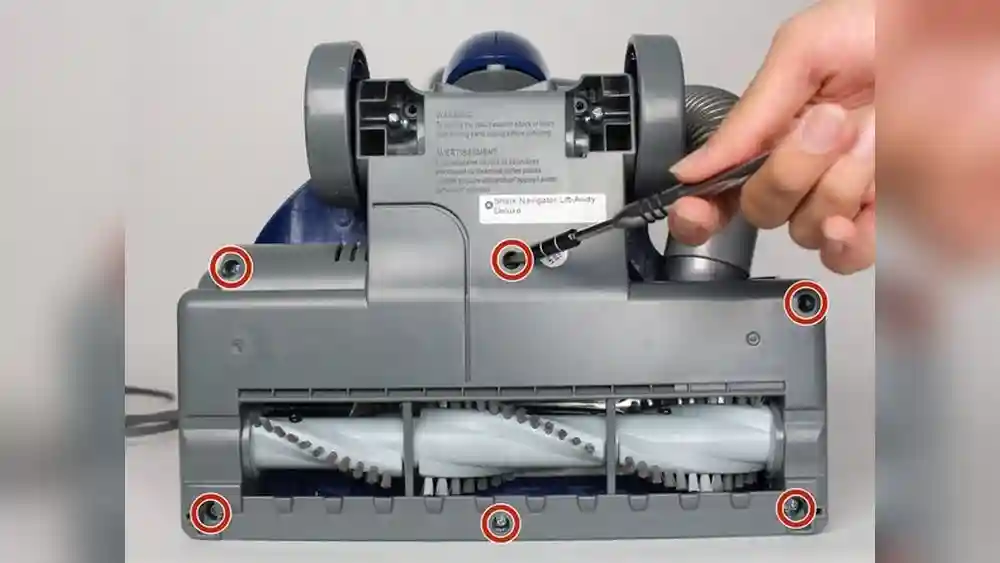
3. Clean The Brush Roll
The brush roll picks up hair, dust, and crumbs—but also tangles up with threads and pet fur.
- Access the brush roll: Flip the vacuum over. Some models have a cover with screws. If so, use a Phillips screwdriver to remove it.
- Remove debris: Carefully pull hair and threads off the brush. Use scissors for tight spots—slide the blade under tangles and cut gently.
- Check the end caps: Hair sometimes wraps around the ends. Remove carefully without forcing.
- Wipe the brush: Use a damp cloth to clean dust and dirt. Avoid soaking or getting water into the bearings.
- Spin test: Turn the brush roll by hand. It should spin freely.
Non-obvious tip: If the brush roll is hard to turn or squeaks, dust may be inside the bearings. Blow compressed air gently, or wipe with a dry brush.
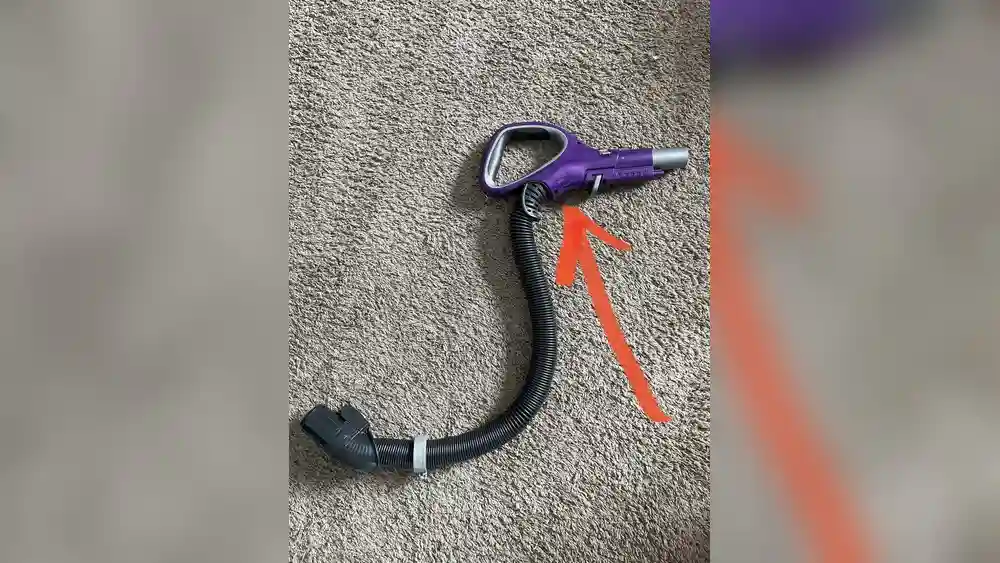
4. Clean The Hose
A blocked hose is a common cause of lost suction. Dust, socks, and even small toys can get stuck inside.
- Detach the hose: Press the release button and gently pull the hose off both ends.
- Inspect the hose: Look through it. Bend it slightly—if you see a blockage, use a broomstick or similar object to push it out.
- Wash the hose: Run warm, soapy water through it. Swish it around to loosen grime. Rinse well.
- Dry the hose: Hang the hose over a shower rod or outside. Make sure it’s completely dry before reattaching.
Important: Do not use sharp objects inside the hose, as they can make holes or cracks.
5. Clean The Wand And Attachments
The wand and tools collect fine dust, too.
- Remove attachments: Take off all tools (crevice tool, upholstery brush, etc. ).
- Wipe the wand: Use a damp cloth inside and out. For narrow tubes, wrap a cloth around a long stick.
- Clean attachments: Wash plastic tools with soapy water. Rinse and dry completely.
- Check for clogs: Push a flexible brush through each tool to remove stuck dirt.
Extra insight: Some dust gets trapped where the wand meets the body. Wipe connectors to keep a good seal.
6. Clean The Exterior
Don’t forget the vacuum’s outside surfaces. Dust, fingerprints, and sticky spots can build up.
- Wipe all plastic parts with a damp cloth
- Use a mild soap solution for stubborn spots
- Dry with a towel to avoid streaks
- Clean wheels and base plate to keep them rolling smoothly
7. Check And Clean The Air Pathways
Your Shark Navigator DLX has several air pathways inside. Even after cleaning the hose and dust cup, fine dirt can collect inside the vacuum body.
- Look for blockages: Shine a flashlight into all air inlets and outlets.
- Remove visible debris: Use a dry brush or compressed air. Do not pour water into the vacuum body.
- Wipe accessible areas: If you see dust near the motor vents, wipe gently with a dry cloth.
Pro tip: A slightly clogged air path can reduce suction even when everything looks clean. Taking time here prevents hidden problems.
8. Reassemble And Test
Once every part is 100% dry, put your Shark Navigator DLX back together:
- Reinstall filters (pre-motor, post-motor)
- Attach the dust cup
- Connect hose and wand
- Snap on attachments
Plug in and test on a small area. Listen for normal sounds and check suction with your hand. If anything seems off, review each step—sometimes a filter or hose is not seated correctly.
Deep Cleaning Comparison: What Makes A Difference
Here’s a quick look at what happens when you clean your vacuum completely versus only emptying the dust cup.
| Cleaning Level | Suction Power | Odor Control | Allergen Removal | Lifespan Impact |
|---|---|---|---|---|
| Dust Cup Only | 50–60% | Poor | Low | Minimal |
| Full Cleaning | 90–100% | Excellent | High | Greatly Extended |
As you can see, a full cleaning makes a dramatic difference. It’s worth the extra effort.
How Often Should You Clean Your Shark Navigator Dlx?
Frequency depends on usage, pets, and allergies. Here’s a simple schedule:
| Part | Light Use (1x/week) | Heavy Use (Daily/Pets) |
|---|---|---|
| Dust Cup | Every use | Every use |
| Pre-Motor Filters | Monthly | Every 2 weeks |
| HEPA Filter | Every 3 months | Monthly |
| Brush Roll | Monthly | Weekly |
| Hose & Attachments | Every 3 months | Monthly |
Pro tip: If you vacuum up fine dust (like drywall or fireplace ash), clean all filters immediately. These particles clog filters much faster than normal dirt.
When To Replace Parts
Cleaning helps, but some parts don’t last forever. Watch for these signs:
- Filters: Loss of suction or persistent odors after cleaning. Replace every 6–12 months.
- Brush Roll: Bent bristles, noisy operation, or poor carpet cleaning. Replace as needed.
- Hose: Cracks, holes, or loss of flexibility. Replace if air leaks.
- Belt: If the brush roll doesn’t spin, the belt may be broken.
You can find replacement parts on the Shark official website or at many online retailers.
Mistakes To Avoid
Even careful users make common errors that reduce their vacuum’s life. Here’s what to watch for:
- Reassembling with wet parts: This can cause mold, odors, and even motor damage.
- Forgetting the HEPA filter: Many people skip this, but it’s essential for air quality.
- Using harsh chemicals: These can damage filters and plastics.
- Forcing parts: If something doesn’t fit, re-check alignment—never force.
- Ignoring small blockages: Even a tiny stuck toy or chunk of dirt reduces performance.
Extra Tips For Pet Owners
If you have pets, your Shark Navigator DLX works extra hard. Try these tips:
- Brush pets regularly: Less hair ends up in your vacuum.
- Clean brush roll weekly: Pet hair tangles fast.
- Consider a pre-filter: Some users add a mesh screen over the dust cup intake to catch fur.
- Replace filters more often: Pet dander builds up quickly.
Cleaning For Allergy Sufferers
If someone in your home has allergies or asthma, your cleaning routine is even more important. Always use gloves, wear a mask, and clean in a well-ventilated area. Consider replacing the HEPA filter more often, and never skip post-motor filter cleaning.
For more information on HEPA filters and indoor air quality, see this Wikipedia page on HEPA.
Credit: www.bakersplus.com
Signs Your Shark Navigator Dlx Needs Cleaning
Watch for these clues:
- Weaker suction
- Louder motor sound
- Bad smell during use
- Visible dust coming from exhaust
- Brush roll not spinning
If you notice any of these, stop and clean your vacuum. Ignoring them can lead to bigger (and more expensive) problems.
Storage And Maintenance Tips
After cleaning, store your Shark Navigator DLX in a dry, cool place. Avoid damp basements or hot attics, as moisture and heat can damage filters and plastics. Keep extra filters on hand so you’re ready for quick replacements.
Wipe down the vacuum after each use to prevent dust from building up. Small habits make a big difference over time.
:max_bytes(150000):strip_icc()/Web_1500-shark-navigator-dlx-upright-vacuum-phoebe-cheong-photo-01-88815ca8c81040d0a4b7478facb37f94.jpg)
Credit: www.thespruce.com
Frequently Asked Questions
How Often Should I Clean The Filters In My Shark Navigator Dlx?
You should rinse the pre-motor filters (foam and felt) every month, or more often with heavy use or pets. The HEPA post-motor filter should be cleaned every 3 months for light use, or monthly for pet owners and allergy sufferers. Always let filters dry fully before reinstalling.
Can I Wash The Hepa Filter In My Shark Navigator Dlx?
Some HEPA filters are washable, while others must only be tapped clean. Check your user manual. If washable, rinse with water (no soap), and let it dry for 24 hours. Never use a wet HEPA filter, as this can cause mold and reduce filtration.
Why Does My Shark Navigator Dlx Smell Bad After Cleaning?
Bad smells often mean filters or hoses are still damp, or there is trapped debris you missed. Re-clean and dry all parts thoroughly. For stubborn odors, sprinkle a little baking soda in the dust cup or use a replacement filter.
What Should I Do If My Vacuum Loses Suction After Cleaning?
Check each part is dry and correctly installed. Look for blockages in the hose, wand, and air pathways. Make sure filters are not clogged. If the problem continues, you may need new filters or there could be a problem with the brush roll or belt.
Is It Safe To Use Soap Or Cleaning Sprays On My Shark Navigator Dlx?
Use mild dish soap on plastic parts like the dust cup, wand, and attachments. Never use strong chemicals, bleach, or cleaning sprays on filters or inside the vacuum body, as these can damage materials and create fumes.
---
Your Shark Navigator DLX is a smart investment. With the right cleaning routine, it will keep your home fresh and clean for years. Remember, the most common problems come from missed steps or wet parts. Take your time, follow these steps, and your vacuum will reward you with great performance and long life.