Keeping your Shark robot vacuum clean is essential if you want it to keep your home spotless. Over time, dust, hair, and debris can build up inside your robot, making it work less efficiently or even causing it to stop. Many people buy a robot vacuum for convenience but forget that it needs regular cleaning, too. If you maintain your Shark robot vacuum the right way, it lasts longer, cleans better, and avoids sudden breakdowns.
But cleaning a robot vacuum is not always as easy as it seems. Some people are afraid of damaging their device, while others simply don’t know where to start. In this guide, you’ll find step-by-step instructions for cleaning every important part of your Shark robot vacuum.
You’ll also discover expert tips that most users miss, and learn how to spot problems before they get worse. With the right routine, your robot will keep working like new for years.
Why Cleaning Your Shark Robot Vacuum Matters
A robot vacuum may seem smart, but it still relies on basic maintenance. Dust buildup can block sensors, causing the robot to get stuck or miss spots. Hair tangled in the brush roll makes it less effective, so it leaves dirt behind. A clogged filter reduces suction, and dirty wheels can make the robot move awkwardly or scratch your floors.
According to Shark's own research, regular cleaning can extend a robot vacuum’s life by up to 30%. Neglecting maintenance often leads to unexpected repairs, poor cleaning results, or even total failure. For people with pets or allergies, a dirty vacuum can also spread dust instead of removing it.
Cleaning your robot vacuum isn’t just about hygiene. It saves money on repairs, maintains your indoor air quality, and lets your robot do the job you bought it for. A few minutes of care every week makes a big difference.
Tools And Supplies You’ll Need
Before you start, gather the right supplies. Some are included with your Shark robot vacuum, while others are common household items. Having everything ready saves time and prevents accidental damage.
- Small brush or old toothbrush – For cleaning dust and hair from tight spots.
- Microfiber cloth – For wiping sensors and the robot’s body without scratching.
- Scissors – To cut hair from the brush roll and wheels.
- Compressed air – Helps clear dust from sensors and vents.
- Mild dish soap – For cleaning washable parts.
- Water – For rinsing filters and bins.
- Screwdriver – Sometimes needed to remove the brush roll (check your model).
Never use harsh chemicals, strong detergents, or abrasive pads. They can damage the plastic and electronic parts.
Safety Precautions Before Cleaning
Always turn off your Shark robot vacuum before cleaning. Remove it from the charging dock and, if possible, switch off the power button underneath. For models with a removable battery, take out the battery to avoid any risk of electric shock.
It’s also important to let the robot cool down if it just finished a cleaning cycle. Some parts can get warm, especially near the motor.
If you’re washing any parts, make sure they are completely dry before reassembling your vacuum. Moisture inside the robot can short-circuit the electronics or cause mold.
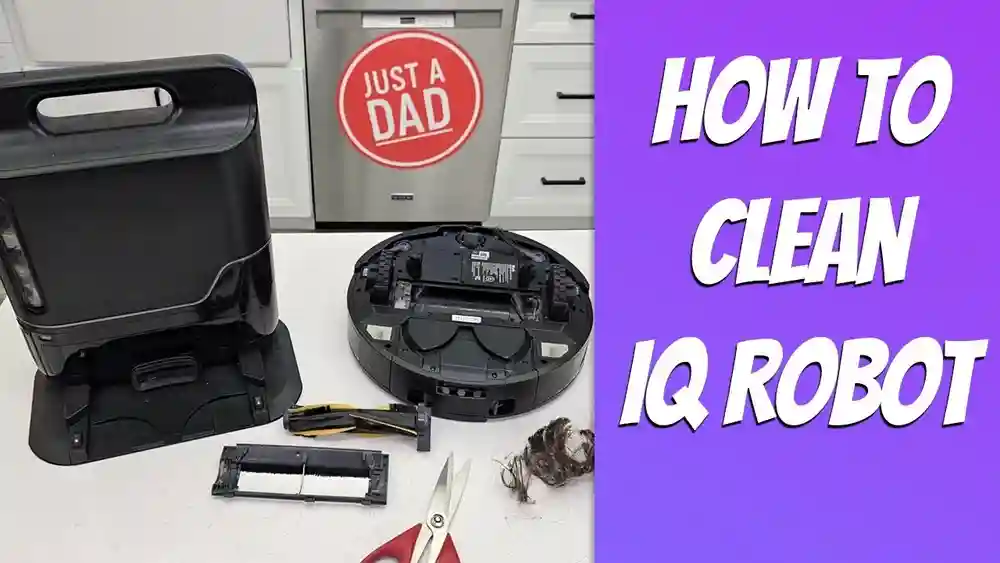
Step-by-step Guide: Cleaning Every Part Of Your Shark Robot Vacuum
Let’s break down how to clean each important part of your robot. While your specific model may have small differences, these steps work for most Shark robot vacuums, such as the Shark IQ, Shark AI, and Shark ION series.
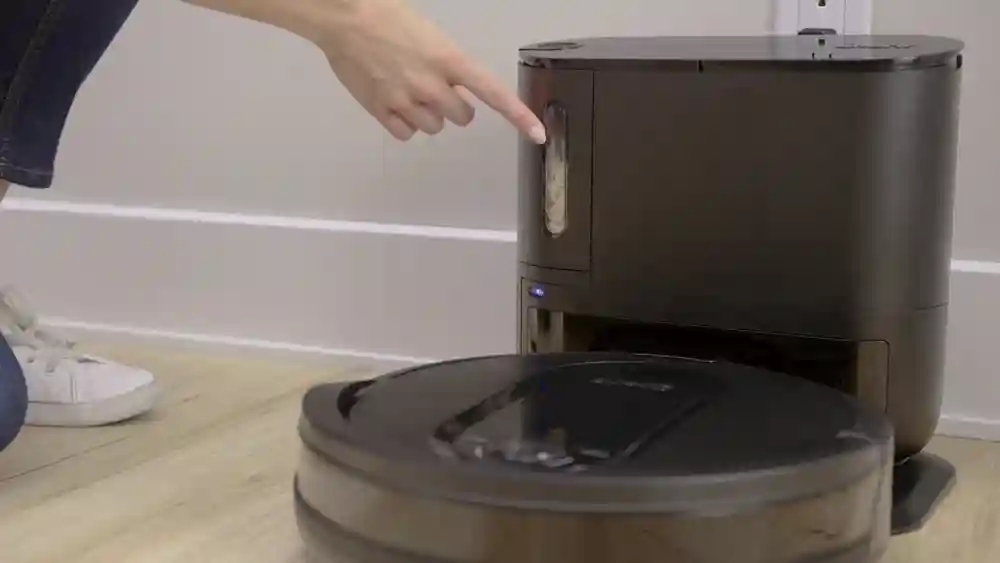
1. Empty And Clean The Dustbin
The dustbin is the container that holds all the dirt your vacuum collects. If it’s full, the robot cannot pick up more debris and may even alert you with a warning light.
How to do it:
- Press the dustbin release button to remove the bin from the robot.
- Open the lid and empty all debris into your trash can.
- Tap the bin gently to loosen stuck dust.
- Wash the bin with warm water and a few drops of mild dish soap. Use a brush to scrub corners if needed.
- Rinse thoroughly and let it air dry completely before reinserting.
Expert tip: Never put the dustbin back while it’s wet. Even small drops of water can damage the robot’s electronics.
2. Clean The Filter
The filter traps fine dust and allergens. Over time, it can get clogged, reducing suction and making the robot louder.
How to do it:
- Remove the filter from the dustbin (check your manual for location).
- Tap it gently over your trash to remove loose dust.
- If the filter is washable (HEPA filters usually are), rinse it under cold water. Avoid soap.
- Let the filter dry for at least 24 hours before reinstalling.
Non-obvious insight: Many users forget to clean the filter every week. A dirty filter is the number one cause of weak suction.
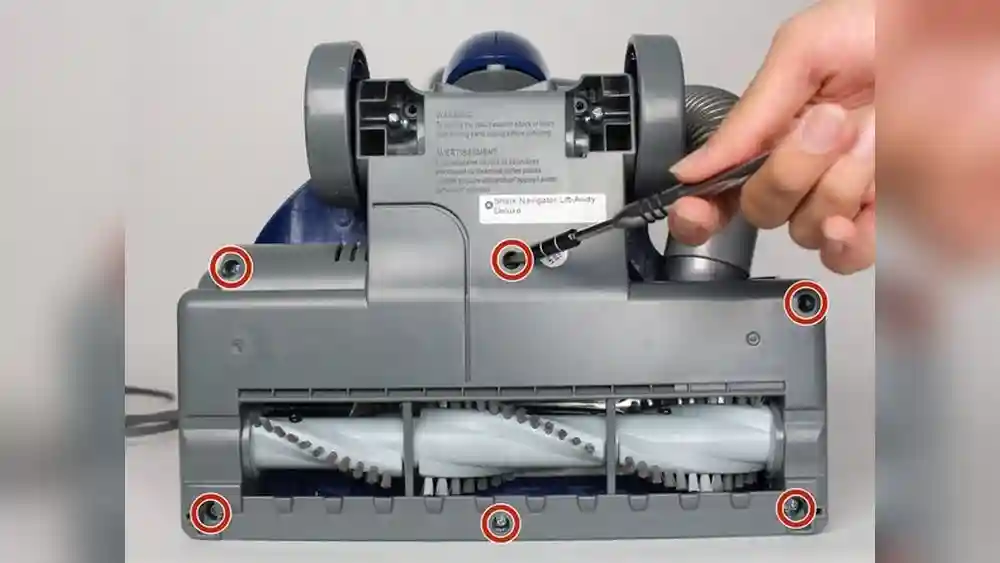
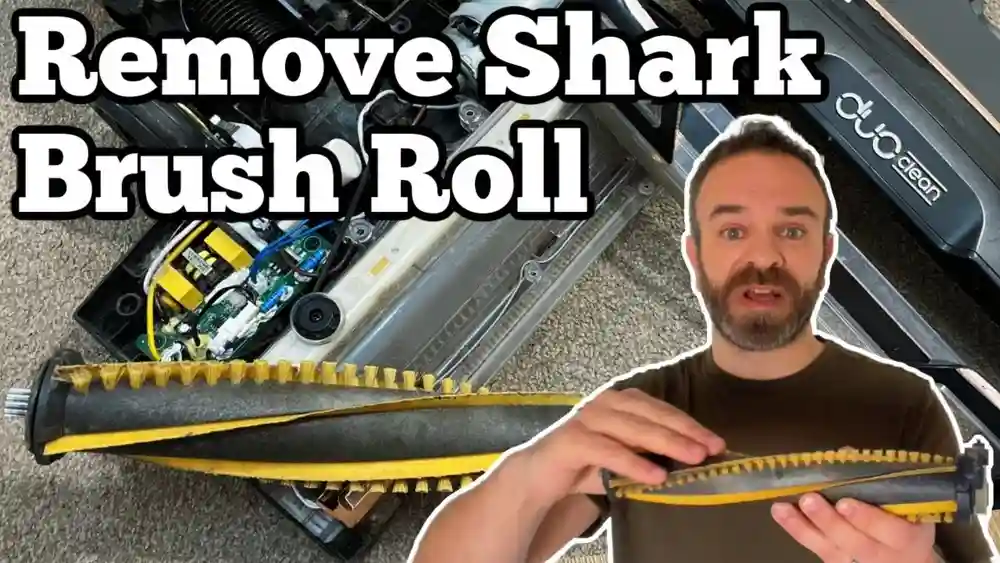
3. Untangle And Clean The Brush Roll
The brush roll (main brush) lifts dirt from the floor. Hair and string often wrap around it, making it less effective.
How to do it:
- Flip the robot over to access the brush roll.
- Release the cover (sometimes you need a screwdriver).
- Remove the brush roll and pull off any hair or debris by hand.
- Use scissors to cut hair wrapped tightly around the brush.
- Wipe the brush with a damp cloth if it’s sticky, but do not soak it.
- Clean the brush roll cavity, where dust can collect.
Pro tip: Check the brush roll ends. Some Shark models allow you to pop off the end caps—hair can hide inside, causing the brush to jam.
4. Clean The Side Brushes
Side brushes sweep dirt from edges into the path of the main brush. Hair can wrap around these thin arms and stop them from spinning.
How to do it:
- Gently pull off the side brushes (they usually pop off easily).
- Remove any tangled hair using your fingers or a comb.
- Wipe with a damp cloth.
- If the side brushes are bent, soak them in warm water for a few minutes, then reshape gently.
- Reinstall when fully dry.
Extra insight: If a side brush is damaged or missing bristles, replacements are cheap and easy to install.
5. Clean Sensors And Charging Contacts
Sensors help the robot navigate and avoid obstacles. Dirty sensors can cause erratic driving or missed spots. Charging contacts must be clean for the robot to recharge.
How to do it:
- Use a clean, dry microfiber cloth to wipe each sensor (usually found on the bottom and front edge).
- If dust is stuck, use compressed air or a cotton swab.
- Wipe the metal charging contacts on the robot and the dock.
Common mistake: Don’t use water or cleaning sprays on sensors. Only dry methods are safe.
6. Clean The Wheels
Front and side wheels pick up hair and dust, which can slow movement or scratch your floors.
How to do it:
- Flip the robot and check the wheels.
- Pull out the front caster wheel (most models let you remove it).
- Clean the wheel and axle. Remove tangled hair with tweezers.
- Spin the side wheels to check for smooth movement. Remove any debris stuck inside.
- Wipe all wheels with a dry or slightly damp cloth.
Pro tip: If the wheels squeak after cleaning, a tiny drop of mineral oil on the axle helps.
7. Clean The Robot Body And Top
Dust can stick to the robot’s top, especially near the buttons or camera (if your model has one).
How to do it:
- Wipe the outer shell with a microfiber cloth.
- For stubborn spots, use a cloth lightly dampened with water.
- Clean around the buttons and display.
Non-obvious detail: If your robot uses a camera for navigation, keep the camera lens spotless for best performance.
8. Deep Cleaning: Monthly Maintenance
Every month, do a deeper cleaning to prevent buildup and spot hidden issues.
- Remove and wash all washable parts (dustbin, filter, brush roll, side brushes).
- Inspect for cracks, worn bristles, or loose screws.
- Check for firmware updates—sometimes cleaning issues are software-related.
- Test the robot on a small area after reassembly to check for unusual noises or errors.
Expert tip: Mark your calendar for a monthly “robot day” to make deep cleaning a habit.
How Often Should You Clean Each Part?
Different parts need cleaning at different frequencies. Here’s a quick reference:
| Part | Cleaning Frequency | Notes |
|---|---|---|
| Dustbin | After every use | More often with pets or heavy dust |
| Filter | Weekly | Replace every 2-3 months |
| Brush roll | Weekly | More often for long-haired pets |
| Side brushes | Weekly | Replace if bent or worn |
| Sensors & contacts | Every 2 weeks | Critical for navigation |
| Wheels | Monthly | Check for hair and debris |
| Body & top | Monthly | More often if visibly dirty |
Signs Your Shark Robot Vacuum Needs Cleaning
Sometimes your vacuum tells you it’s time for maintenance. Look for these warning signs:
- Suction power drops and the robot leaves debris behind.
- The robot is louder than normal, or makes grinding noises.
- Brushes or wheels get stuck or stop spinning.
- Error lights or voice alerts say “check brush,” “clean filter,” or similar.
- Navigation problems, like missed spots, bumping into objects, or getting lost.
Cleaning usually solves these problems. If issues continue, check your user manual or contact Shark support.
When To Replace Parts Instead Of Cleaning
Some parts wear out over time and should be replaced, not just cleaned. Typical replacement intervals:
- Filter: Every 2-3 months, or sooner if suction drops.
- Brush roll: Every 6-12 months, depending on wear.
- Side brushes: Every 6-9 months, or if bristles are missing or bent.
- Battery: Every 2-3 years, when runtime drops sharply.
Genuine Shark replacement parts are best, but high-quality third-party versions are also available. Using worn parts can harm your robot or reduce cleaning quality.
Troubleshooting Common Cleaning Problems
Even with good habits, you might face issues. Here’s how to solve them:
The Brush Roll Won’t Spin
- Remove the brush roll and check for hair at the ends or in the cavity.
- Make sure the brush is installed correctly.
- Check for worn or broken gears (rare).
The Robot Leaves Dirt Behind
- Empty the dustbin and clean the filter.
- Check that the brush roll is spinning freely.
- Clean the sensors—dirty sensors can make the robot miss spots.
The Robot Gets Stuck Or Has Poor Navigation
- Clean all sensors and wheels.
- Check for obstructions (like cables or fringe rugs).
- Update your robot’s firmware if available.
Charging Issues
- Wipe the charging contacts on both the robot and the dock.
- Make sure the dock is plugged in and in a clear area.
- Try a different outlet if needed.
If problems continue, visit the official Shark support site or consult your user manual.
Advanced Tips For A Cleaner Shark Robot Vacuum
Most users stick to the basics, but these tips can take your robot’s performance further:
- Rotate filters: Buy a spare filter and rotate weekly. This ensures both filters dry fully and last longer.
- Use a cleaning mat: Place a silicone mat under the dock to catch debris and protect your floor.
- Vacuum the robot: Use a handheld vacuum to remove dust from vents and hard-to-reach areas.
- Check firmware updates: New software can fix cleaning and navigation bugs.
- Clean after big messes: If your robot vacuums up a large spill or lots of pet hair, clean it immediately—even if it’s not on your schedule.
Comparison: Shark Robot Vacuum Vs. Manual Vacuum Cleaning
How much work does cleaning a robot vacuum really save? Here’s a side-by-side look:
| Feature | Shark Robot Vacuum | Manual Vacuum |
|---|---|---|
| Cleaning Effort | Low (robot does the work, with weekly maintenance) | High (must clean entire home yourself) |
| Maintenance | Empty bin, clean brushes/filters weekly | Empty bag/bin, clean filter/brushes monthly |
| Coverage | Automatic, but may miss corners if not maintained | Complete, but requires user effort |
| Allergen Control | Good if filter is cleaned | Very good with HEPA manual vacuum |
| Long-term Cost | Buy replacement parts occasionally | Buy bags, filters, electricity; more wear on manual vacuums |
Credit: www.homedepot.com
What Most People Overlook When Cleaning
Many Shark robot vacuum owners forget these important details:
- The filter must dry completely before reinstalling. Damp filters ruin motors and grow mold.
- Hidden hair in the brush roll ends—it’s easy to miss, but causes jams.
- Dirty sensors can make a smart robot act “dumb.” Wipe them regularly.
- Worn side brushes reduce edge cleaning. Replace them if they look tired.
- Firmware updates can fix cleaning and navigation issues.
Don’t ignore these small tasks. They make a big difference in how well your robot works.
How To Store And Care For Your Shark Robot Vacuum
If you need to store your robot for a while, follow these steps:
- Clean all parts before storage.
- Remove the battery if storing for more than a month.
- Store in a dry, cool place—avoid garages or damp basements.
- Keep the charging dock unplugged to save power.
When you return the robot to use, check for dust, recharge fully, and do a quick test run.

Credit: www.youtube.com
Environmental Impact: Why Cleaning Matters
A well-maintained robot vacuum uses less energy and lasts longer, which is better for the environment. Throwing away a robot every couple of years because of poor maintenance adds to electronic waste. By cleaning and replacing small parts, you help reduce waste and save money.
According to a study by the European Environment Agency, the average robot vacuum lasts 2-4 years without maintenance, but up to 6-8 years with regular cleaning and part replacement (European Environment Agency).
Table: Shark Robot Vacuum Cleaning Checklist
Here’s a quick checklist you can print or save for reference.
| Task | How Often | Completed? |
|---|---|---|
| Empty dustbin | After every use | |
| Clean filter | Weekly | |
| Check brush roll | Weekly | |
| Clean side brushes | Weekly | |
| Wipe sensors/contacts | Every 2 weeks | |
| Clean wheels | Monthly | |
| Wipe robot body | Monthly | |
| Deep clean all parts | Monthly |

Credit: www.walmart.com
Frequently Asked Questions
How Often Should I Clean My Shark Robot Vacuum?
Most parts should be cleaned weekly, but the dustbin should be emptied after every use. For homes with pets or lots of dust, clean more often. Filters and brushes last longer if cleaned regularly.
Can I Wash The Filter With Soap?
No, only rinse washable filters with cold water. Soap can damage the filter’s fine mesh. Always let the filter dry completely before reinstalling.
What Do I Do If My Robot Vacuum Smells Bad?
Bad smells usually come from a dirty filter or dustbin. Wash both thoroughly and let them dry. For persistent odors, replace the filter and clean the brush roll with mild soap.
Is It Safe To Use Compressed Air On Sensors?
Yes, but use short bursts and keep the nozzle a few inches away. Never use water or cleaning sprays on sensors, as moisture can damage them.
How Do I Know If A Part Needs To Be Replaced?
Replace the filter every 2-3 months, the brush roll and side brushes every 6-12 months, or sooner if they show visible wear. If cleaning doesn’t restore performance, it’s time for a new part.
---
Caring for your Shark robot vacuum isn’t difficult, but it does require a little attention. With regular cleaning and smart maintenance, your robot will clean better, last longer, and need fewer repairs. A few minutes each week protects your investment and keeps your home fresh and healthy. Start your new cleaning routine today, and your Shark robot will thank you with years of reliable service.