If your Shark Navigator vacuum cleaner isn’t picking up dirt as well as before, or you’re noticing a burning smell, it might be time to change the belt. The belt is a small rubber part, but it is essential for driving the brush roll. Many owners delay this simple fix, thinking it’s complicated. In reality, with a bit of guidance, you can save money and extend the life of your vacuum. Let’s walk through everything you need to know about changing the belt on a Shark Navigator, with detailed instructions, tips, and answers to common questions.
Understanding The Shark Navigator Belt System
Before jumping into the replacement process, it’s important to know what the vacuum belt does and why it matters. The belt connects the motor shaft to the brush roll. When the motor spins, the belt turns the brush roll, which sweeps dirt and debris into the suction path. Without a properly working belt, your vacuum loses cleaning power—even if the motor sounds fine.
Some Shark Navigator models use a flat rubber belt, while others use a toothed (geared) belt. The replacement process is similar, but always check your model’s manual or the model number printed on the vacuum body. For example, a flat rubber belt is common on older or basic models, while newer models with “PowerFins” or advanced brush systems may use a toothed belt for better grip and longer life.
A well-maintained belt ensures the brush roll spins at the right speed. If the belt slips or is too loose, the brush roll may turn slowly or not at all, leaving dirt behind even if suction seems strong. In some cases, a worn belt causes the vacuum to scatter debris instead of picking it up.
Common Symptoms Of A Broken Or Worn Belt
- The brush roll does not spin when the vacuum is on.
- Burning rubber smell during use.
- Unusual noises from the floor head.
- Reduced pickup of hair and debris.
- The vacuum leaves dirt behind on carpet.
If you notice any of these signs, it’s time to inspect and possibly replace your belt.
Sometimes, the symptoms are subtle. For instance, you might feel the vacuum is “harder to push” or it doesn’t lift pet hair as well as it used to. Don’t ignore these clues—a slipping belt can lead to more serious problems, like overheating the motor or damaging the brush roll bearings, if not fixed promptly.
Tools And Materials Needed
Changing the belt is a hands-on task, but it doesn’t require advanced tools. Gather these items before starting:
- Replacement Shark Navigator belt (check your model number)
- Phillips screwdriver (medium size)
- Flathead screwdriver (for prying)
- Small brush or cloth (for cleaning dust)
- Scissors (for cutting tangled hair)
- Gloves (optional, for grip and cleanliness)
Having the right belt is critical. Using the wrong size can cause poor performance or damage the vacuum. Check your user manual, or look up the correct belt for your Shark Navigator model online.
If you’re unsure about the screwdriver size, choose a medium Phillips head—it fits most Shark Navigator screws. A flathead screwdriver is helpful for gently prying off the cover without cracking the plastic. Scissors make it safer and easier to remove hair or string wrapped around the brush roll.
Gloves keep your hands clean, especially if there’s a lot of built-up dust or pet hair.

Credit: www.youtube.com
Safety First: Prepare Your Workspace
Vacuum repairs are generally safe, but a few precautions keep everything trouble-free:
- Unplug the vacuum from the wall socket.
- Work on a flat, stable surface—like a table or clean floor.
- Keep screws and small parts in a dish to avoid losing them.
- If the vacuum was just used, let it cool for a few minutes. The motor and brush area can get hot.
It’s easy to forget to unplug the vacuum—some models have lights or electronic brush controls that could turn on accidentally. Never skip this step. Working on a stable surface prevents the vacuum from rolling, which can cause the body or delicate parts to get damaged.
If you have pets or children, keep them away from your workspace to avoid accidents. Having a small bowl or magnetic tray for screws makes reassembly much easier—missing screws are a common frustration.
Step-by-step Guide: How To Change The Belt On A Shark Navigator
Let’s break down the process so you can follow along confidently.
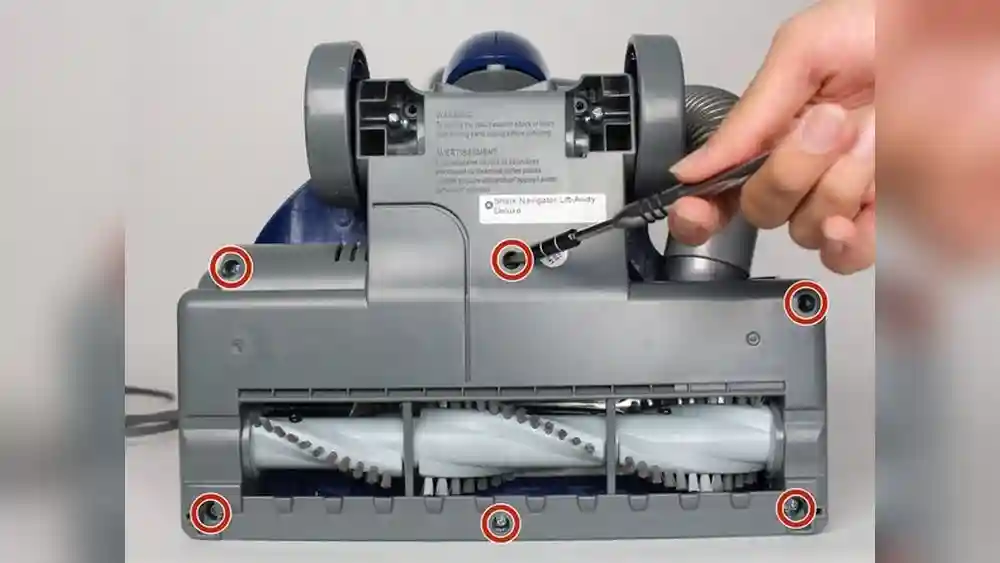
1. Remove The Floor Head Or Brush Roll Cover
Lay the vacuum down so you can see the bottom of the floor head. Most Shark Navigator models have a bottom plate held by screws.
- Use the Phillips screwdriver to remove all visible screws from the bottom plate.
- Put the screws in a dish or magnetic tray.
- Gently lift off the bottom plate. If it doesn’t come off, check for hidden screws near the wheels or brush roll ends.
Some models have clips or latches instead of screws. Release these carefully.
If you meet resistance, check for additional screws under the wheels—sometimes they hide in small recesses. Take your time and avoid prying too hard, which can break the plastic. If your model uses latches, gently press them with a flathead screwdriver or your finger.
Don’t rush—forcing the cover can lead to cracks that are expensive or impossible to fix.
2. Access And Remove The Brush Roll
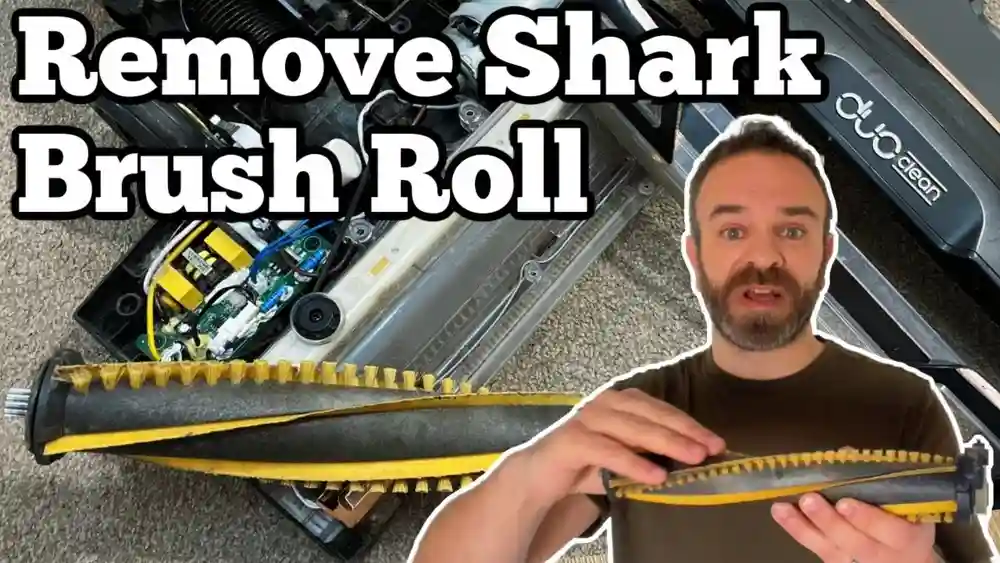
With the cover off, you’ll see the brush roll (a cylinder with bristles) and the belt wrapped around one end.
- Lift the brush roll out. Sometimes, you need to slide it sideways before pulling up.
- If hair or string is wrapped around the brush, cut it away with scissors.
- Check if the belt is broken, stretched, or has cracks.
Look at both ends of the brush roll—some models have small tabs or notches you need to align before the roll lifts out. Clean the ends, especially where the brush roll sits in its slot; dust here can cause noise and extra friction.
If you notice melted plastic or burn marks, inspect the area for signs of overheating.
3. Remove The Old Belt
- Slide the old belt off the motor shaft (the small metal rod) and the brush roll.
- If the belt is broken, just pull the pieces out.
- Clean any dust or debris from the belt area with your brush or cloth.
Some belts may be stuck due to melted rubber or debris. If this happens, gently scrape the residue off the shaft with a cloth or a plastic tool (never use a knife, which can scratch or damage the metal). Inspect the motor shaft for wear—rough spots can shred new belts quickly.
Wipe everything clean before installing the new belt.
4. Install The New Belt
- Slide the new belt over the motor shaft first.
- Loop the other end of the belt over the brush roll’s belt slot.
- The new belt will be tight. This is normal—stretch it gently, but don’t force it with sharp tools.
If the belt seems difficult to stretch, roll it gently with your fingers while applying steady pressure. Never use pliers or sharp objects, which can nick or cut the belt. A tight fit is good—it means the belt will turn the brush roll efficiently without slipping.
Double-check that the belt is not twisted; a twist will cause quick failure and poor cleaning.
5. Reinstall The Brush Roll
- Place the brush roll back into its slots, making sure the belt stays aligned in the groove.
- Spin the brush roll by hand. It should turn with some resistance but not be stuck.
- Double-check that the belt sits straight, not twisted.
If the brush roll does not go in smoothly, check the belt alignment. Sometimes, the belt may slip off the shaft or twist during installation—re-seat it if necessary. A smooth, even fit ensures the brush roll spins at full speed when powered on.
6. Reattach The Bottom Plate
- Line up the bottom plate and press it into place.
- Replace all screws, tightening them evenly.
- Stand the vacuum upright and check for any missing parts.
Avoid overtightening the screws, as this can strip the threads or crack the plastic. Tighten each screw a little at a time to distribute pressure evenly. If your vacuum has a foam or felt gasket under the plate, make sure it is seated properly to prevent air leaks.
7. Test The Vacuum
- Plug the vacuum back in.
- Turn it on briefly. The brush roll should spin, and the vacuum should sound normal.
- If you hear strange noises or the brush doesn’t spin, unplug and check the belt alignment again.
Insight: Many first-timers forget to check the belt alignment. A twisted belt can burn out quickly or cause the brush roll to jam.
If the vacuum makes a high-pitched squeal or the brush roll is slow to start, turn it off immediately—this usually means the belt is not seated correctly or debris is still jammed.
Table: Shark Navigator Models And Belt Types
Understanding your model helps you buy the right belt. Here’s a quick guide to popular Shark Navigator models and the type of belt they use.
| Model Number | Belt Type | Brush Roll Type |
|---|---|---|
| NV350 | Flat Rubber Belt | Standard Bristle |
| NV352 | Flat Rubber Belt | Standard Bristle |
| NV360 | Toothed Belt | PowerFins |
| NV501 | Flat Rubber Belt | HEPA Bristle |
| NV356E | Flat Rubber Belt | Standard Bristle |
Tip: Always double-check your model sticker—it’s usually found on the back or bottom of the vacuum.
If your model isn’t listed, search for “Shark Navigator [model number] belt” to find the exact part. Some stores and websites have photos of the belt so you can compare before buying.
Common Mistakes To Avoid
Replacing a belt is simple if you avoid these beginner errors:
- Forgetting to unplug the vacuum. This is a safety risk.
- Using the wrong belt type or size. Even a small difference can cause problems.
- Not cleaning the brush roll. Hair and debris can jam the new belt or wear it out faster.
- Overtightening screws. This can crack the plastic plate.
- Forcing the brush roll in place. If it doesn’t fit easily, the belt may be twisted.
- Ignoring the manual. Your specific model may have unique steps.
Non-obvious insight: If your vacuum has a reset button, press it after changing the belt. Some Shark Navigators won’t spin the brush roll unless the reset is pressed after maintenance.
Another mistake is using lubricants like oil or grease on the belt or brush roll. While it may seem like a good idea, oils attract dust and dirt, causing even faster wear or slippage. Only clean, dry parts should touch the belt area.

Credit: www.youtube.com
How Often Should You Change The Belt?
Most manufacturers recommend changing the vacuum belt every 6–12 months—even if it’s not broken. If you use the vacuum daily or have pets, consider checking it every 3–6 months. A worn belt stretches and slips, which reduces cleaning power.
Some users wait until the belt snaps, but this can risk damage to the brush roll or motor. Proactive changes keep your vacuum at peak performance and reduce the chance of mid-cleaning breakdowns.
Signs You Need To Replace Sooner
- The belt feels loose or slips off easily.
- You smell burning rubber.
- The vacuum makes thumping noises.
- The brush roll slows down or stops.
Proactive belt changes prevent bigger problems, like motor strain or damage to the brush roll.
If your home has lots of pet hair or you often vacuum rugs, check the belt more frequently. Heavy use wears out belts faster, even if they look fine on the outside.
Extra Tips For Shark Navigator Owners
To get the best from your Shark Navigator and make the belt last longer, try these tips:
- Regularly remove hair from the brush roll after every few uses.
- Vacuum large debris first with the brush roll off, then clean carpets with it on.
- Store the vacuum upright to avoid bending the belt.
- Check for clogs in the air path—blockages can strain the belt and motor.
- Keep spare belts handy so you don’t have downtime when one breaks.
Empty the dust bin often—an overfull bin reduces airflow and forces the brush roll to work harder, increasing belt wear. If your vacuum has height adjustments, use the correct setting for your floor type. Running the brush roll too low on thick carpet increases resistance, which strains the belt.
Table: Signs Of Belt Problems And Solutions
Quickly diagnose issues with this reference:
| Problem | Possible Cause | Solution |
|---|---|---|
| Brush roll not spinning | Belt broken or slipped off | Replace or realign belt |
| Burning smell | Belt jammed, hair buildup | Clean brush roll, replace belt |
| Unusual noise | Belt twisted or off track | Realign belt, check installation |
| Poor suction | Clogged air path, loose belt | Clear clog, replace belt if stretched |
| Brush roll stuck | Debris in bearings | Clean ends, lubricate if needed |
If you notice repeated belt failures, inspect all moving parts and clean thoroughly before installing a new belt.
What To Do If The Belt Breaks Often
If your Shark Navigator keeps breaking belts, there may be an underlying issue:
- Check for hidden debris in the brush roll or end caps. Even a small stone can jam the roll and snap the belt.
- Inspect the motor shaft for rough edges or damage. A bent shaft can shred belts quickly.
- Make sure you are using genuine Shark belts. Generic belts may not fit or last as long.
- Don’t vacuum large hard objects, like rocks or big plastic items. These can jam the brush roll.
Non-obvious insight: Very old vacuums sometimes have worn bearings in the brush roll, which increases friction and breaks belts faster. Replacing the brush roll or lubricating the bearings can solve this.
Some users find that after changing the belt, the new one breaks within a few days. This almost always means something is causing extra resistance—either a jam in the brush roll, worn bearings, or a misaligned motor shaft. Fix these before installing another belt.

Credit: www.ifixit.com
When To Call A Professional
Most belt changes are DIY-friendly. But call a repair service if:
- The brush roll is jammed and won’t come out.
- You notice melted plastic or burning even after a belt change.
- The vacuum motor makes grinding sounds.
- The vacuum is still under warranty—unauthorized repairs might void it.
For extra help, official Shark support offers guides and phone help. Their website also has downloadable manuals for each model.
If you feel unsure during the process or the vacuum doesn’t run right after your repair, it’s always better to get professional help than risk further damage.
Table: Diy Vs. Professional Belt Replacement
Here’s a quick comparison of doing it yourself versus hiring a pro:
| Aspect | DIY Replacement | Professional Service |
|---|---|---|
| Cost | $5–$15 (belt only) | $50–$80 (parts & labor) |
| Time | 15–30 minutes | 1–3 days (including drop-off) |
| Difficulty | Easy to moderate | Handled by expert |
| Warranty impact | Possible if self-repaired | Usually preserved |
| Extra inspection | Owner’s responsibility | Pro checks all parts |
DIY is usually the fastest and cheapest way, but a pro can spot other issues, like bad bearings or electrical problems, before they get worse.
Sourcing The Right Belt
Buying the correct replacement belt is essential. Here’s how to make sure you get the right part:
- Check your model number. It’s usually on a silver sticker on the vacuum base or behind the dust bin.
- Order genuine Shark belts from Shark’s official site, major retailers, or trusted online stores.
- Avoid off-brand belts unless they list your exact model compatibility.
- Buy a two-pack if available, so you always have a spare.
If you’re unsure, bring your old belt to the store or take a clear photo for comparison.
Some hardware stores will let you open the package to compare belts—just ask. Online stores often have customer reviews where you can see if others with your model had success with the belt.
Real-life Example
Maria, a pet owner from Florida, noticed her Shark Navigator stopped picking up dog hair. She heard a faint burning smell. Following the steps above, she removed the bottom plate and found the belt had snapped. After ordering a replacement belt (using her model number), she changed it herself in 20 minutes.
The vacuum worked like new—and she avoided a $70 repair bill. Maria now checks her belt every six months.
Takeaway: Many common vacuum issues come down to a simple belt change.
Another user, John from Ohio, struggled with repeated belt breaks. After he cleaned out a mass of pet hair from the brush roll ends and switched to a genuine Shark belt, the problem stopped. He learned that regular cleaning and using the correct part makes all the difference.
Where To Find More Help
If you get stuck, Shark’s official support page provides guides and parts lookup tools. You can also find video tutorials and user forums for extra tips. For more technical info, visit the Wikipedia vacuum cleaner page for background on how vacuums work.
Online forums like Reddit’s r/vacuumcleaners or YouTube have step-by-step videos, which can boost your confidence if you’re a visual learner.
Frequently Asked Questions
How Do I Know Which Belt Fits My Shark Navigator?
Check the model number on your vacuum’s body, usually near the base or under the dust bin. Search online or in your manual for compatible belt part numbers. Use only belts designed for your exact model.
Can I Use My Vacuum If The Belt Is Broken?
No. Without a working belt, the brush roll won’t spin, and the vacuum won’t clean carpets or pick up debris effectively. Continuing to use it can also damage the motor.
How Long Does A Shark Navigator Belt Last?
With normal use, belts last 6–12 months. If you vacuum often or have pets, check and replace the belt every 3–6 months. Signs of wear include stretching, cracks, or a burning smell.
Why Does My Belt Keep Breaking?
Common causes are a jammed brush roll (from hair or debris), using the wrong belt type, or a damaged motor shaft. Always clean the brush roll and use genuine Shark belts. If belts break often, have a technician inspect the vacuum.
Is Replacing The Belt Difficult For Beginners?
No. Most people can change the belt in 15–30 minutes with basic tools. Follow step-by-step instructions and take your time. If you get stuck, ask for help or watch a video tutorial for your model.
Changing the belt on your Shark Navigator is one of the best ways to keep your vacuum running strong. With the right tools and a careful approach, you’ll save money, avoid downtime, and enjoy cleaner floors for years to come.