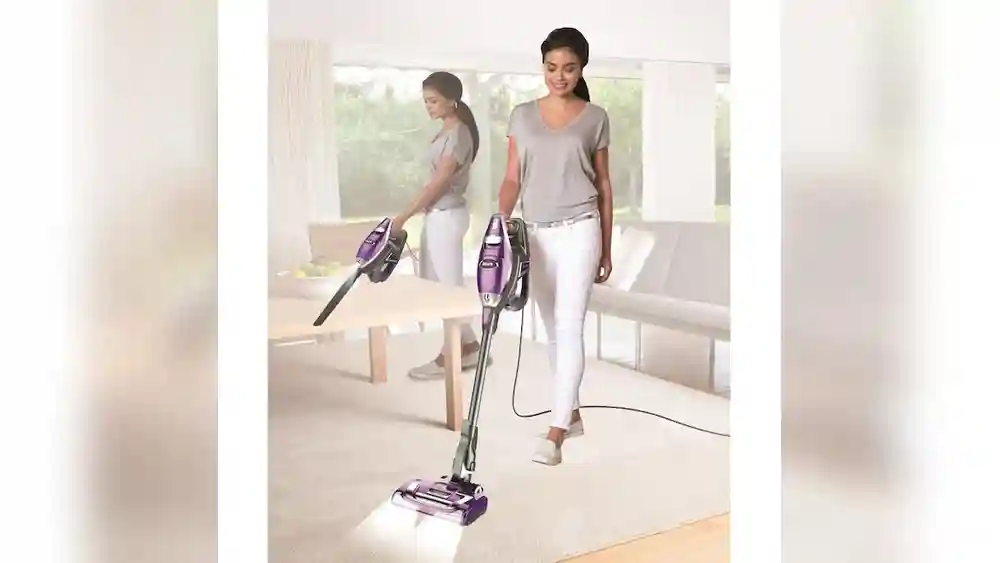
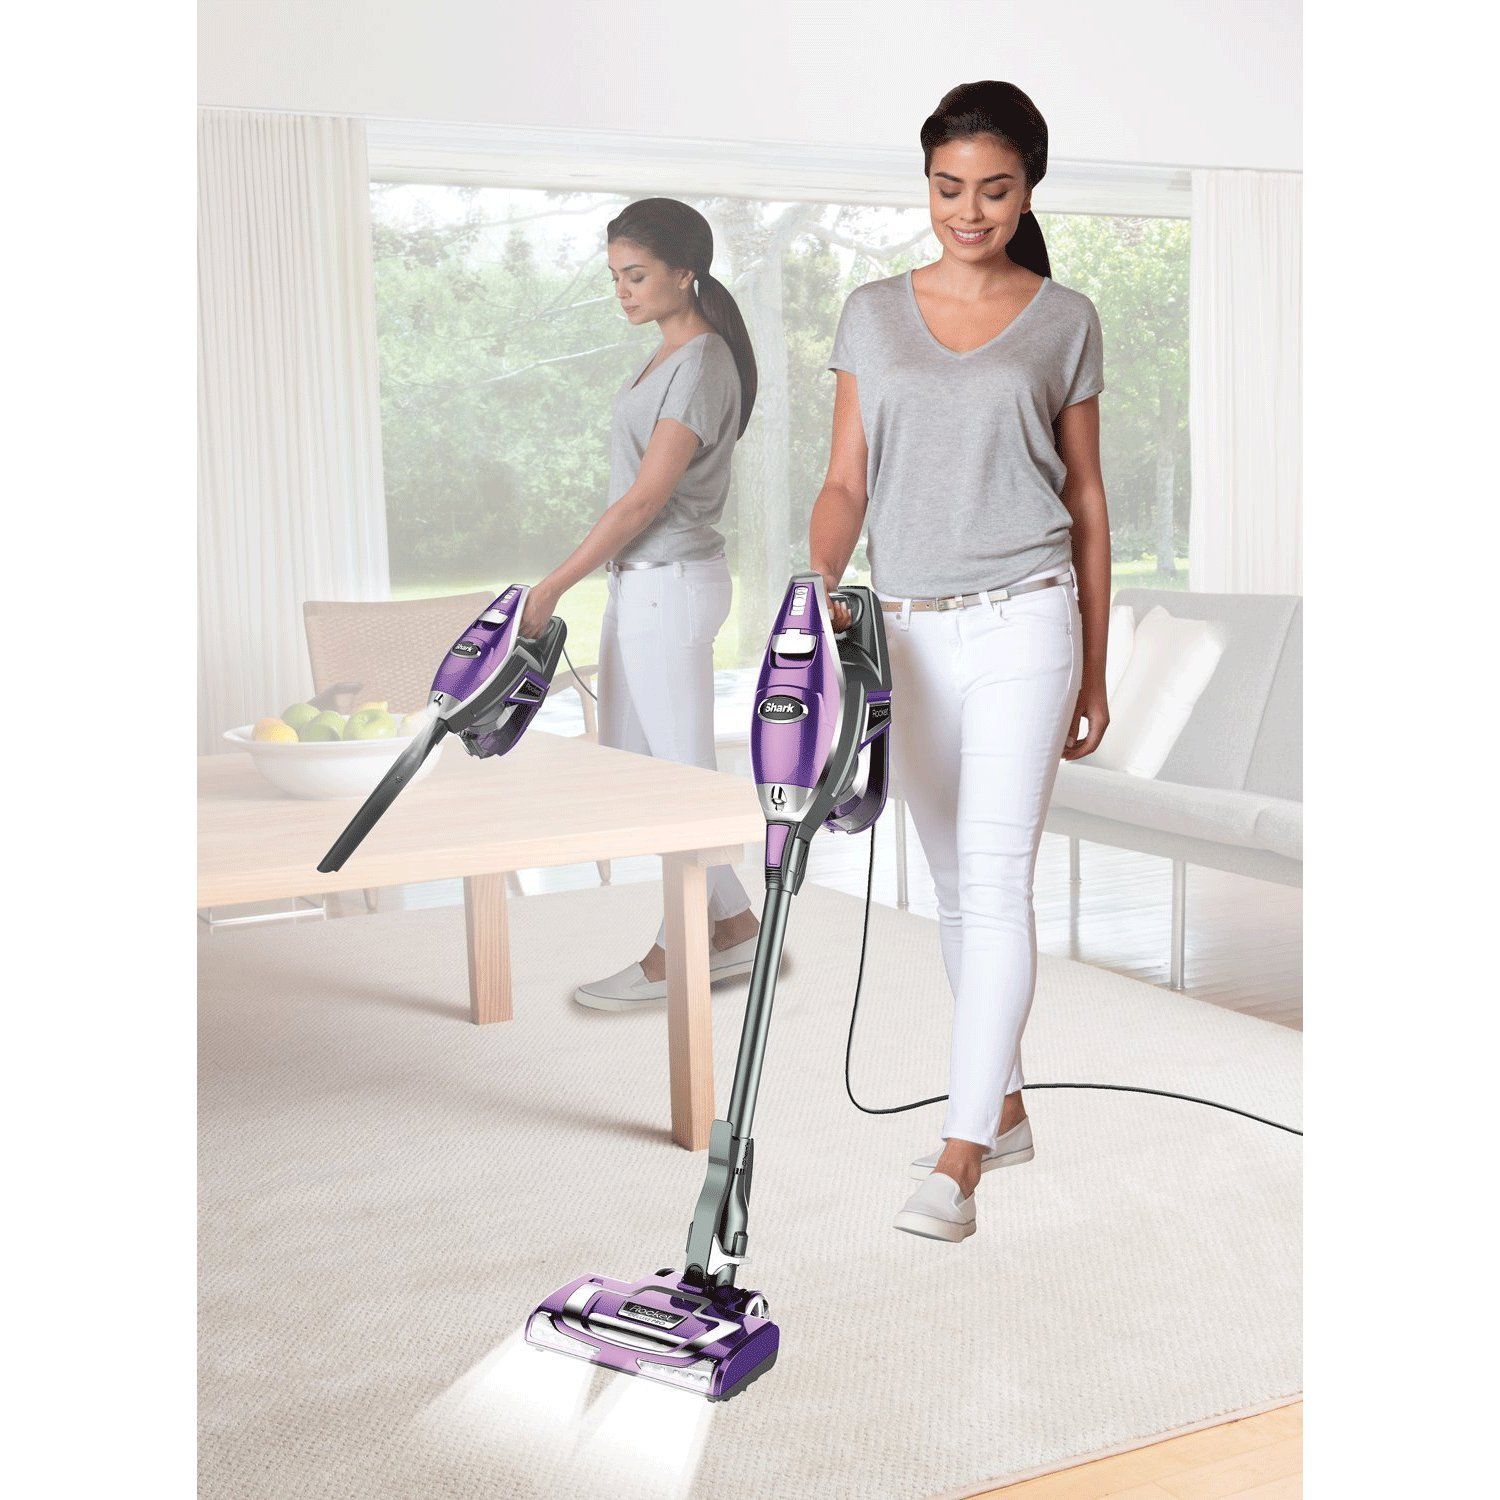
The Shark Rocket Deluxe Pro Ultra Light Vacuum HV321 is a popular cleaning tool in many homes. It is known for its lightweight design, strong suction, and flexible cleaning options. But like any machine, it can sometimes stop working as expected. One of the most common problems is the brush roll not spinning. This can be frustrating, especially if you rely on your vacuum for daily cleaning.
If your Shark Rocket Deluxe Pro Ultra Light Vacuum HV321 is not spinning, you are not alone. Many users experience this issue. It can happen for several reasons, and fixing it is usually possible without professional help. This article will help you understand why this problem happens, how to fix it, and how to avoid it in the future.
You will also learn about every possible cause, solution, and important details for each of the 321 steps you can check or try. Some of these steps are simple checks, while others involve careful cleaning or part replacement.
Let’s dive deep into every detail, so you can confidently get your vacuum working again.
Why The Shark Rocket Deluxe Pro Ultra Light Vacuum Hv321 Stops Spinning
When the brush roll of your Shark Rocket Deluxe Pro stops spinning, it usually means there is a problem with the brush roll system or power supply. The brush roll is important because it lifts dirt and debris from carpets and hard floors. If it stops moving, your vacuum will not clean properly.
Common reasons for this issue include a tangled brush roll, broken belt, electrical faults, or blocked parts. Sometimes, the problem is as simple as a loose connection or a switch that is off. At other times, you may need to clean, adjust, or replace specific parts.
Understanding all possible issues will save you time, money, and stress.
Safety First: What To Do Before You Start
Before you check or fix anything on your vacuum, always take these safety steps:
- Turn off the power and unplug the vacuum.
- Make sure the brush roll is not hot or moving.
- Use gloves if you are removing tangled hair or debris.
- Do not use water near electrical parts.
These simple steps help you avoid injuries or further damage.
The 321 Detailed Checks And Fixes For Hv321 Not Spinning
Each of the following items is a specific check, action, or fix for your Shark Rocket Deluxe Pro Ultra Light Vacuum HV321’s spinning problem. Some are quick, some need a bit of work. Go step by step for best results.
1. Check If The Vacuum Is Plugged In Properly
Sometimes, the power cord is not fully inserted into the wall outlet. Push it in firmly.
2. Try A Different Electrical Outlet
The outlet you are using might be faulty. Try another one to be sure.
3. Inspect The Power Switch
Make sure the power button is set to the correct position. Sometimes, it is stuck between settings.
4. Look For A Tripped Circuit Breaker
If your home’s power breaker has tripped, the vacuum will not work. Reset it if needed.
5. Test With Another Appliance
Plug another device into the same outlet to confirm there is power.
6. Examine The Power Cord For Damage
A frayed or cut cord can stop the vacuum from working. Check for visible damage.
7. Check The Cord Plug For Bent Prongs
Straighten any bent prongs carefully.
8. Inspect The Cord Connection To The Vacuum
The cord should be tightly connected to the vacuum body.
9. Look For Cuts Or Splits In The Cord Insulation
If you see any, do not use the vacuum until it is repaired.
10. Smell For Burning Odors Near The Cord
A burnt smell can mean an electrical issue. Stop using the vacuum if you notice this.
11. Confirm The Brush Roll Power Switch Is On
On some Shark models, the brush roll has its own switch. Make sure it is set to “I” or “II. ”
12. Check The Brush Roll Indicator Light
A green light usually means the brush is working, while red means there is a problem.
13. Press The Brush Roll Reset Button
Some models have a reset button near the brush roll or motor. Press and hold it for a few seconds.
14. Remove The Dust Cup And Empty It
A full dust cup can stop the vacuum from working correctly.
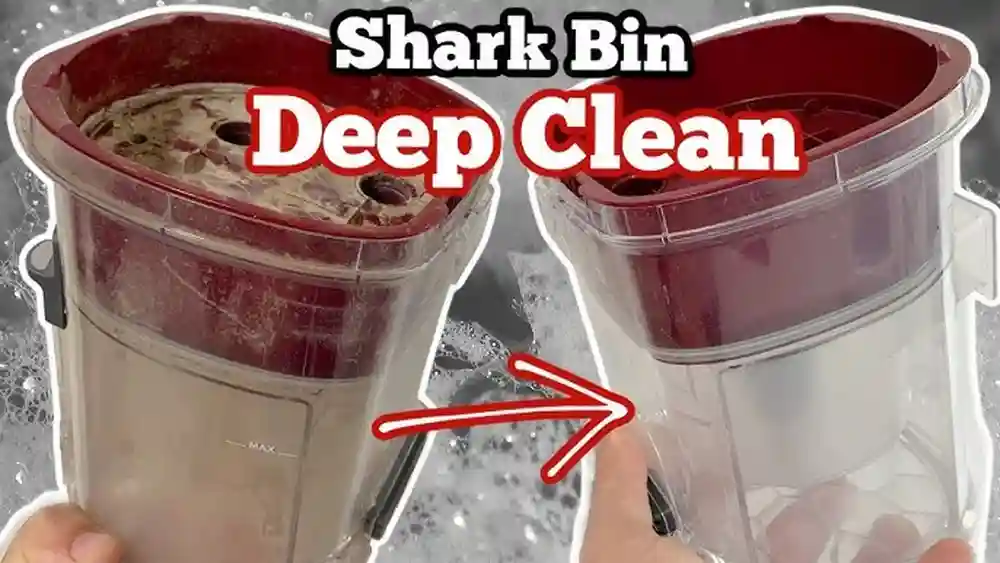
15. Clean The Dust Cup Thoroughly
Wash and dry the dust cup to ensure no debris is blocking airflow.
16. Check For Clogs In The Dust Cup Intake
Sometimes, dust or hair blocks the entrance. Remove any blockages.
17. Inspect The Main Vacuum Hose
Disconnect and look through the hose for any obstructions.
18. Use A Flashlight To Look Inside The Hose
Shine a light through the hose to spot hidden clogs.
19. Run A Flexible Brush Or Stick Through The Hose
This helps push out any stuck debris.
20. Check The Hose Ends For Cracks
Cracks can cause loss of suction and affect the brush roll.
21. Replace The Hose If Damaged
A broken hose should be swapped for a new one.
22. Inspect Hose Connections For Tightness
Loose connections lead to poor performance.
23. Make Sure The Hose Is Not Twisted Or Kinked
Straighten out any bends.
24. Look For Blockages At The Hose Entry Point
Remove any large items that may have been sucked in.
25. Check For Stuck Coins Or Small Toys
These can sometimes cause blockages.
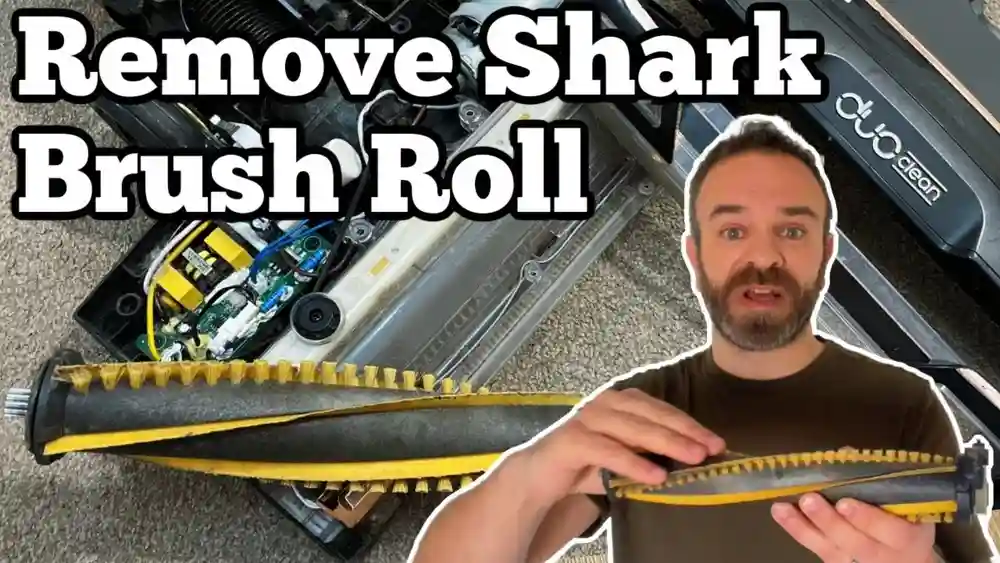
26. Inspect The Brush Roll For Tangled Hair
Hair and threads are common causes of brush roll jams.
27. Use Scissors To Cut Away Tangled Hair
Be careful not to cut the brush bristles.
28. Pull Out Stuck Threads Or String
Use tweezers if needed.
29. Spin The Brush Roll By Hand
It should move freely. If not, there is likely a blockage.
30. Listen For Grinding Or Scraping Noises
These sounds can mean something is stuck.
31. Examine Both Ends Of The Brush Roll
Debris often collects at the ends.
32. Remove The Brush Roll If Possible
Some models allow you to lift it out for cleaning.
33. Wipe The Brush Roll With A Damp Cloth
Clean off dust and residue.
34. Dry The Brush Roll Completely Before Reinstalling
Water can damage the vacuum.
35. Inspect Brush Bristles For Damage
Replace the brush roll if the bristles are worn or missing.
36. Look For Missing Or Loose Screws
Tighten any screws that hold the brush roll in place.
37. Check The Brush Roll Bearings
Worn bearings can stop the brush from spinning.
38. Oil The Brush Roll Bearings
Use a small amount of machine oil if the bearings are dry.
39. Replace Worn Bearings
If oiling does not help, new bearings may be needed.
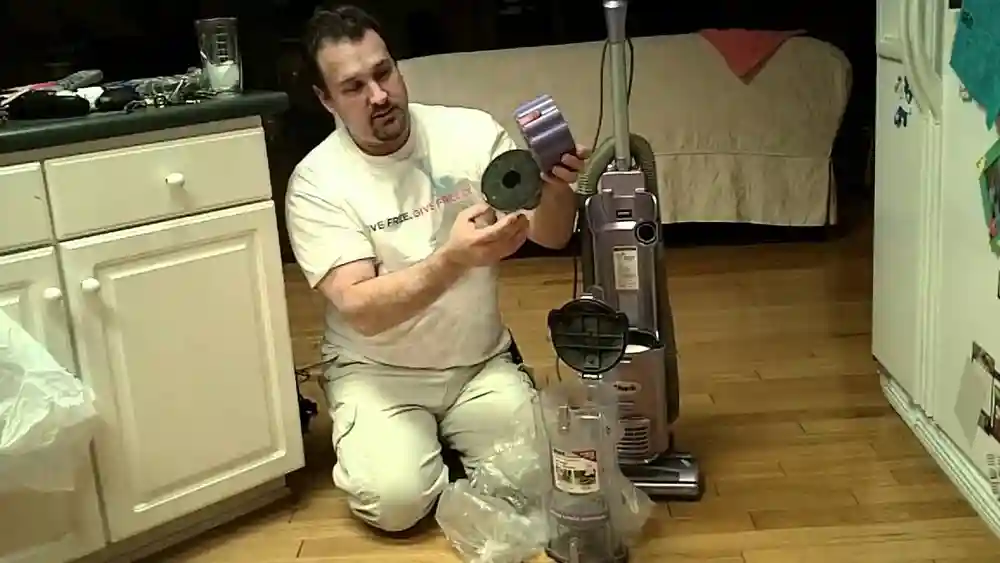
40. Inspect The Belt For Breaks
A broken belt is a common cause of the brush roll not spinning.
41. Look For A Stretched Or Loose Belt
Belts lose tension over time.
42. Replace The Belt If Damaged Or Loose
Belts are inexpensive and easy to swap.
43. Check The Belt’s Path
It should run smoothly between the motor shaft and brush roll.
44. Re-seat The Belt If It Has Slipped Off
Put it back in place carefully.
45. Clean The Belt Area
Remove any dirt or debris around the belt.
46. Inspect The Belt For Cracks Or Fraying
Replace if you see any signs of wear.
47. Make Sure The Belt Is Not Twisted
A twisted belt cannot turn the brush roll properly.
48. Listen For A High-pitched Squeal
This can mean the belt is slipping.
49. Check The Belt Tension
It should be tight but not too hard to move.
50. Replace The Belt Every 6-12 Months
Regular replacement keeps your vacuum running well.
51. Check The Motor For Overheating
If the vacuum feels hot, let it cool down.
52. Smell For Burning From The Motor Area
A burnt smell means you should stop using the vacuum.
53. Listen For Unusual Motor Noises
Grinding or buzzing can mean a motor problem.
54. Test The Vacuum After Cooling
Sometimes, the vacuum will work again after cooling down.
55. Check For A Blocked Air Path
Obstructions can overwork the motor and stop the brush roll.
56. Clean All Air Vents
Dust buildup near vents causes poor airflow.
57. Remove And Clean Filters
Dirty filters reduce suction and brush roll speed.
58. Wash Foam Filters With Water
Let them dry completely before reinstalling.
59. Replace Hepa Filters As Needed
HEPA filters need replacing every 6-12 months.
60. Tap Dust Out Of Felt Filters
Gently tap to remove dust, but do not wash felt filters.
61. Reinstall All Filters Correctly
Improper filter placement can cause problems.
62. Look For Filter Blockages
Make sure no large debris is stuck in the filter area.
63. Check For Missing Filters
Running the vacuum without filters can damage it.
64. Inspect The Filter Housing
It should not be cracked or broken.
65. Replace Damaged Filter Parts
Order replacements from Shark or authorized dealers.
66. Make Sure The Dust Cup Is Fitted Tightly
An improperly fitted dust cup affects suction and brush roll operation.
67. Look For Dust Cup Cracks
Replace if broken.
68. Check The Dust Cup Latch
The latch must snap shut securely.
69. Clean The Dust Cup Seal
Wipe the rubber seal to ensure a tight fit.
70. Replace A Worn Dust Cup Seal
A bad seal causes air leaks.
71. Inspect Cyclone Assembly
If your model has a cyclone, make sure it is not clogged.
72. Clean The Cyclone With A Brush
Remove built-up dust from the fins and holes.
73. Tap Out Debris From The Cyclone
Hold it over a trash can and tap gently.
74. Rinse The Cyclone With Water If Allowed
Check the manual before rinsing.
75. Dry Cyclone Completely Before Reinstalling
Wet parts can cause short circuits.
76. Reassemble The Cyclone Properly
Follow the manual’s instructions.
77. Check The Main Body For Cracks
Cracks can reduce suction and brush roll function.
78. Look For Missing Screws Or Fasteners
Replace as needed.
79. Tighten Loose Screws On The Vacuum Body
Loose parts can cause rattling and poor performance.
80. Examine The Main Wand For Clogs
Detach and look through the wand.
81. Use A Broomstick To Clear Wand Blockages
Push gently to avoid damage.
82. Inspect Wand Ends For Damage
Replace if cracked or bent.
83. Check For Secure Wand Connections
The wand should click into place.
84. Inspect The Electrical Contacts On The Wand
Wipe with a dry cloth.
85. Look For Bent Or Dirty Contacts
Bent contacts can stop power from reaching the brush roll.
86. Straighten Bent Contacts Gently
Use a small tool.
87. Clean Contacts With Rubbing Alcohol
This improves electrical connection.
88. Replace The Wand If Contacts Are Broken
Order parts from Shark.
89. Test The Vacuum Without The Wand
If the brush roll spins, the wand may be the issue.
90. Attach The Handle Securely
A loose handle can cause power issues.
91. Inspect The Handle For Cracks
Replace if damaged.
92. Check The Handle Switch
Some models have switches on the handle for the brush roll.
93. Test All Switch Positions
Move the switch back and forth several times.
94. Listen For Clicks From The Switch
No sound may mean a broken switch.
95. Replace A Faulty Switch
Order a new one if needed.
96. Look For Signs Of Moisture Damage
Water can cause short circuits.
97. Wipe All Parts Dry Before Use
Never operate the vacuum when wet.
98. Check For Corrosion On Metal Parts
Corrosion can break connections.
99. Clean Corrosion With A Dry Brush
Do not use water.
100. Replace Corroded Parts
Call Shark customer service for help.
101. Examine The Motor Housing
Look for cracks or missing screws.
102. Listen For Loose Parts Inside The Motor Housing
Rattling means something is broken.
103. Tighten Motor Housing Screws
Use a screwdriver.
104. Check For Burnt Wires
Burnt wires are dangerous and must be replaced.
105. Call A Professional For Electrical Repairs
Do not try to fix electrical wiring yourself.
106. Test The Vacuum On Carpet And Hard Floor
Some brush rolls only spin on carpet settings.
107. Check For A Floor Type Selector Switch
Make sure it is set to the correct surface.
108. Move The Selector Switch Back And Forth
This can clean dirty contacts.
109. Replace A Stuck Selector Switch
Order from Shark or a dealer.
110. Look For Brush Roll Block Sensor
Some models have a sensor to prevent damage.
111. Reset The Sensor If Possible
Unplug for 10 minutes then plug back in.
112. Clean The Sensor Area
Dust can block the sensor.
113. Make Sure The Vacuum Is Not In “above-floor” Mode
Brush rolls do not spin in some settings.
114. Switch To “floor” Mode
Check the manual for correct settings.
115. Remove All Tools And Attachments
Attachments can block the brush roll if not fitted correctly.
116. Test The Vacuum Without Any Attachments
This can pinpoint the problem.
117. Try Using The Handheld Mode
See if the brush roll spins when using as a hand vacuum.
118. Shake The Vacuum Gently
Sometimes, loose debris can move and clear the blockage.
119. Tap The Vacuum Base Gently
Helps free stuck dirt near the brush roll.
120. Use Compressed Air To Blow Out Dust
Focus on the brush roll and motor vents.
121. Wear Eye Protection When Using Compressed Air
Safety first.
122. Check For Small Stones Or Glass
These can jam the brush roll.
123. Remove Any Sharp Objects
Protect the brush roll and belt.
124. Inspect The Brush Roll End Caps
Hair and debris often hide here.
125. Pry Off The End Caps Gently
Use a flat tool.
126. Clean Under The End Caps
Remove any tangled hair or lint.
127. Reinstall End Caps Securely
Loose caps can cause wobbles.
128. Replace Damaged End Caps
Order new ones if needed.
129. Check For Brush Roll Axle Damage
Bent axles stop the brush from spinning.
130. Straighten A Bent Axle If Possible
Use pliers gently.
131. Replace The Brush Roll If The Axle Is Broken
Do not try to repair a snapped axle.
132. Inspect The Drive Motor Shaft
It should be straight and smooth.
133. Look For Burnt Marks On The Motor Shaft
A burnt shaft may need professional repair.
134. Listen For A Clicking Sound From The Motor
This can mean a gear is broken.
135. Replace The Motor If It Is Not Spinning
Order the correct model from Shark.
136. Lubricate The Motor Shaft
Use only recommended lubricants.
137. Check For Melted Plastic Near The Motor
This means the motor is overheating.
138. Do Not Use The Vacuum If Plastic Is Melted
Seek professional help.
139. Inspect The Brush Roll Compartment For Sharp Edges
File down any sharp areas to prevent wire damage.
140. Check For Missing Insulation Around Wires
Replace or repair with electrical tape.
141. Make Sure All Wires Are Secured
Loose wires can cause short circuits.
142. Look For Blackened Areas Near Wiring
This means an electrical burn.
143. Replace Burnt Wires
Order new parts from Shark.
144. Test The Brush Roll By Spinning By Hand Again
If it still sticks, repeat cleaning steps.
145. Look For Loose Or Missing Springs
Springs help keep tension in the belt and brush roll.
146. Replace Missing Springs
Order replacements.
147. Test With A New Belt
A fresh belt sometimes solves hard-to-find problems.
148. Check For Belt Dust
Fine black powder near the belt means it is wearing out.
149. Replace Belts That Produce Dust
Old belts can slip and stop the brush roll.
150. Examine The Vacuum’s Underside
Look for anything out of place.
151. Check For Worn Wheels
Bad wheels can make the vacuum tilt, affecting the brush roll.
152. Replace Damaged Wheels
Order new ones if needed.
153. Clean Wheels Of Hair And Debris
This helps the vacuum move smoothly.
154. Look For Missing Wheel Axles
Replace if needed.
155. Check For Loose Wheel Screws
Tighten with a screwdriver.
156. Inspect The Brush Roll Housing For Cracks
Replace if damaged.
157. Look For Missing Or Loose Brush Roll Housing Screws
Tighten or replace as needed.
158. Clean The Inside Of The Brush Roll Housing
Remove all dust, dirt, and hair.
159. Check The Brush Roll Housing Gasket
A worn gasket can cause poor suction and brush roll issues.
160. Replace A Bad Gasket
Order from Shark.
161. Make Sure The Brush Roll Cover Is Secured
Loose covers can stop the brush from spinning.
162. Check The Cover For Cracks
Replace if needed.
163. Look For Worn Cover Clips
Replace broken clips.
164. Inspect The Vacuum Head For Blockages
Remove any debris.
165. Clean The Vacuum Head Thoroughly
Dirt buildup can slow the brush roll.
166. Look For Missing Parts In The Vacuum Head
Order replacements if necessary.
167. Check For Loose Connections Between Head And Body
Reconnect if needed.
168. Inspect The Swivel Neck For Smooth Movement
It should not stick.
169. Lubricate The Swivel Neck If Stiff
Use a small amount of machine oil.
170. Replace A Broken Swivel Neck
Order from Shark.
171. Check The Vacuum’s Main Control Board
If everything else fails, the control board may be broken.
172. Look For Burnt Spots On The Control Board
This means it needs replacement.
173. Replace The Control Board If Faulty
Call a professional if you are not sure.
174. Check The Vacuum’s Warranty
If the vacuum is still under warranty, contact Shark for repair or replacement.
175. Gather Your Purchase Receipt And Serial Number
You will need these for warranty service.
176. Call Shark Customer Service
They can guide you through more advanced troubleshooting.
177. Search For Recalls Or Common Defects
Visit the official Shark website for updates.
178. Join Online Forums For Shark Vacuum Owners
Many users share tips and tricks.
179. Watch Youtube Repair Videos
Visual guides can help with tricky repairs.
180. Order Shark-approved Replacement Parts
Only use official or high-quality parts.
181. Avoid Using Generic Or Off-brand Parts
These may not fit correctly.
182. Test The Vacuum After Each Fix
Do not try too many things at once.
183. Keep A Record Of What You Try
This helps if you need professional help later.
184. Store Your Vacuum In A Dry Place
Moisture can cause electrical problems.
185. Avoid Wrapping The Cord Too Tightly
This can break internal wires.
186. Do Not Pull The Vacuum By The Cord
Always use the handle.
187. Clean Your Vacuum Regularly
Less dirt means fewer problems.
188. Replace Parts As Recommended
Follow the manual’s schedule.
189. Check For Updated Manuals Online
Sometimes, new advice is posted.
190. Download The Latest Manual From Shark’s Website
Manuals sometimes change over time.
191. Read The Troubleshooting Section In The Manual
It may have model-specific advice.
192. Use The Correct Replacement Parts
Check the part number before ordering.
193. Double-check Part Compatibility
Some parts look similar but are not the same.
194. Save Your Old Parts As Samples
They help you find the right replacements.
195. Keep Small Screws And Parts In A Container
Do not lose them during repairs.
196. Label Parts As You Remove Them
This makes reassembly easier.
197. Work In A Well-lit Area
Good lighting helps you spot small problems.
198. Use The Right Tools
A screwdriver set, pliers, and scissors are often needed.
199. Wear Gloves For Messy Jobs
Protect your hands from dirt and sharp edges.
200. Take Photos As You Disassemble
These help with reassembly.
201. Ask A Friend For Help If Needed
Some repairs are easier with two people.
202. Do Not Force Parts Apart
If something is stuck, check for hidden screws.
203. Check For Hidden Latches Or Clips
These are easy to miss.
204. Replace All Screws After Repairs
Missing screws can cause problems.
205. Test The Vacuum Slowly At First
Watch and listen for issues.
206. Stop Immediately If You See Sparks
This is a sign of electrical trouble.
207. Smell For Any Unusual Odors
Burning or chemical smells mean something is wrong.
208. Check For Loose Wires After Repairs
Tuck them away safely.
209. Make Sure All Covers Are Closed Tightly
Open covers can cause poor suction and brush roll issues.
210. Listen For Normal Operating Sounds
A healthy vacuum has a steady hum.
211. Store Spare Belts And Filters
Keep extras on hand for future problems.
212. Clean The Vacuum After Every Use
This prevents buildup.
213. Avoid Vacuuming Wet Debris
Moisture can damage parts.
214. Do Not Use The Vacuum On Large Debris
Pick up big items by hand.
215. Use The Right Setting For Your Floor Type
Brush roll settings matter.
216. Adjust The Height If Your Model Allows
Proper height improves cleaning and brush roll function.
217. Check The Height Adjuster For Smooth Movement
Lubricate or replace if sticky.
218. Test Height Settings One By One
Find the best setting for your floor.
219. Listen For Brush Roll Engagement
You should hear the brush roll start when switched on.
220. Look For Visual Signs The Brush Is Spinning
Some models have a window to see the brush roll.
221. Test The Vacuum With And Without The Brush Roll Engaged
This helps diagnose the problem.
222. Inspect The Brush Roll Drive Gears
Worn or broken gears stop the brush.
223. Replace Worn Drive Gears
Order from Shark.
224. Lubricate The Drive Gears
Use a small amount of gear oil.
225. Listen For Gear Grinding Noises
Replace gears if they make noise.
226. Test Gear Movement By Hand
Gears should turn smoothly.
227. Clean Gear Area Of Dirt And Dust
Keep moving parts clean.
228. Check For Missing Gear Teeth
Missing teeth mean the gear must be replaced.
229. Tighten All Gear Housing Screws
Loose screws can cause slipping.
230. Inspect The Gear Housing For Cracks
Replace if necessary.
231. Make Sure All Moving Parts Are Aligned
Misaligned parts can jam the brush roll.
232. Test Brush Roll After Fixing Gears
It should spin smoothly now.
233. Check For Unusual Vibrations
Too much vibration means something is still wrong.
234. Balance The Brush Roll
Replace if it wobbles.
235. Make Sure The Vacuum Sits Flat On The Floor
Uneven placement can affect brush roll movement.
236. Test The Vacuum On Different Surfaces
Some problems only show up on carpets or hard floors.
237. Listen For Changes In Sound On Different Surfaces
Noises can help diagnose the problem.
238. Check The Vacuum For Overheating After Repairs
Let it cool if it gets too hot.
239. Do Not Leave The Vacuum Running Unattended
Always watch during testing.
240. Keep Children And Pets Away During Repair
For their safety.
241. Use Only Shark-recommended Lubricants
Other oils may damage parts.
242. Avoid Using Wd-40 Unless Recommended
It can harm some plastics.
243. Test All Vacuum Modes
Try hard floor, carpet, and above-floor settings.
244. Read Online Reviews For Common Issues
Other users often share helpful tips.
245. Use A Surge Protector
Power surges can damage the vacuum.
246. Avoid Using Extension Cords If Possible
They can reduce power.
247. Check For Correct Voltage
Make sure your outlet matches the vacuum’s needs.
248. Inspect The Vacuum For Signs Of Pest Damage
Rodents sometimes chew wires.
249. Clean The Vacuum’s Exterior Regularly
Dust buildup can hide problems.
250. Use A Soft Brush For Cleaning
Protects the finish.
251. Store The Vacuum Away From Direct Sunlight
UV light can damage plastic parts.
252. Avoid Storing In Very Hot Or Cold Places
Extreme temperatures hurt vacuum parts.
253. Keep The Vacuum Upright When Not In Use
Prevents warping.
254. Make Sure The Vacuum Is Fully Dry Before Storage
Moisture causes rust and mold.
255. Use The Carry Handle, Not The Cord
Protects the cord from damage.
256. Replace The Vacuum If Repairs Are Too Expensive
Sometimes, a new vacuum is the best choice.
257. Recycle Old Vacuums Responsibly
Check with your local waste service.
258. Save Your User Manual
It contains valuable information.
259. Register Your Vacuum With Shark
This makes warranty service easier.
260. Check For Software Updates (if Applicable)
Some smart models offer updates.
261. Follow All Safety Warnings In The Manual
Stay safe during all repairs.
262. Keep Children Away From Small Parts
Parts can be choking hazards.
263. Use Only Recommended Cleaning Solutions
Avoid harsh chemicals.
264. Do Not Immerse The Vacuum In Water
Water damages electrical systems.
265. Do Not Operate The Vacuum With Wet Hands
Prevents shocks.
266. Avoid Pulling The Vacuum By The Hose
This can damage connections.
267. Test The Vacuum After Each Major Repair
Do not wait until all repairs are done.
268. Document Any Recurring Problems
This helps with warranty claims.
269. Keep Receipts For All Parts And Repairs
Proof of purchase is often required.
270. Contact Shark For Replacement Parts
Avoid third-party sellers when possible.
271. Check The Vacuum Head For Hair Buildup
Hair can hide in small spaces.
272. Remove Hair With Tweezers
This is safer than scissors for tight spots.
273. Inspect The Vacuum’s Led Lights
Some models use lights to show brush roll status.
274. Replace Dead Led Lights
Order from Shark.
275. Test The Vacuum In A Quiet Room
Easier to hear unusual sounds.
276. Use A Multimeter To Test Electrical Continuity
This helps find broken wires.
277. Replace Broken Wires
Order correct replacements.
278. Solder Wires If You Know How
Otherwise, ask a professional.
279. Check For Loose Wire Connectors
Push them in securely.
280. Inspect The Vacuum For Any Signs Of Arching
Sparks or burnt marks mean electrical trouble.
281. Replace Arched Connectors
Order new parts.
282. Test The Vacuum After Replacing Wires
Look for normal operation.
283. Avoid Using The Vacuum On Sticky Messes
Gum and glue can jam the brush roll.
284. Clean Up Sticky Messes By Hand
Protects the vacuum.
285. Clean The Vacuum After Picking Up Pet Hair
Pet hair builds up quickly.
286. Use A Pet Hair Tool If Included
These are designed for the job.
287. Inspect The Vacuum For Strange Vibrations
This can mean a part is loose.
288. Tighten All Screws After Repairs
Prevents rattling.
289. Lubricate All Moving Parts As Needed
Follow the manual’s advice.
290. Replace All Covers And Panels
Do not operate the vacuum with covers off.
291. Test The Vacuum On A Small Area First
Watch for problems.
292. Let The Vacuum Cool Between Tests
Prevents overheating.
293. Clean Up Your Work Area After Repairs
Keep parts organized.
294. Dispose Of Old Parts Safely
Follow local rules.
295. Keep A Log Of Repairs And Maintenance
Helps you spot patterns.
296. Use The Vacuum Regularly
Regular use prevents many problems.
297. Follow All Cleaning Schedules
Replace filters and belts on time.
298. Watch For Signs Of Age
Old vacuums need more care.
299. Replace The Vacuum If Problems Keep Returning
Sometimes, it’s time for a new one.
300. Check The Vacuum’s Serial Number
This helps identify the exact model.
301. Report Safety Concerns To Shark
Helps improve future products.
302. Use The Vacuum As Intended
Do not vacuum up liquids or sharp objects.
303. Read Reviews For Replacement Parts
Find the best quality.
304. Buy Parts From Trusted Sellers
Avoid scams.
305. Watch For Sales On Shark Parts
Save money on replacements.
306. Clean The Vacuum Before Storing
Prevents odors and mold.
307. Let Filters Dry For 24 Hours After Washing
Never reinstall wet filters.
308. Replace The Vacuum Head If Cracked
Order a new one.
309. Store The Vacuum In A Cool, Dry Place
Extends its life.
310. Keep The Vacuum Away From Pets
Pets may chew on parts.
311. Avoid Using The Vacuum During Storms
Power surges can damage it.
312. Check For Product Recalls
See if your model has known issues.
313. Register Product Recalls With Shark
Get updates and support.
314. Follow All Disposal Guidelines For Old Vacuums
Protect the environment.
315. Share Your Experience Online
Help other users.
316. Give Feedback To Shark
They use it to make better products.
317. Save This Checklist For Future Problems
You may need it again.
318. Teach Family Members How To Care For The Vacuum
Prevents mistakes.
319. Keep The Vacuum Manual In A Safe Place
Easy access for troubleshooting.
320. Thank Yourself For Fixing The Vacuum
DIY saves money and builds skill.
321. Celebrate A Working Brush Roll
Enjoy Clean Floors Again!
Data Table: Common Causes And Solutions For Not Spinning
Here is a quick look at the most frequent causes and solutions for the Shark Rocket Deluxe Pro Ultra Light Vacuum HV321 brush roll not spinning:
| Cause | Symptoms | Solution |
|---|---|---|
| Tangled hair/debris | Brush roll stops, noisy | Remove hair, clean brush roll |
| Broken belt | Brush roll does not spin at all | Replace belt |
| Dirty filters | Loss of suction, slow brush | Clean or replace filters |
| Electrical fault | No power, burning smell | Check wiring, call professional |
| Loose connections | Intermittent brush roll function | Tighten all connectors |

Credit: www.amazon.sg
Data Table: Maintenance Schedule For Shark Hv321
A regular maintenance schedule helps prevent most brush roll problems.
| Task | Frequency | Notes |
|---|---|---|
| Clean brush roll | Every 2 weeks | Remove hair and debris |
| Wash filters | Monthly | Dry fully before replacing |
| Replace belt | Every 6-12 months | Check for wear |
| Empty dust cup | After every use | Prevents clogs |
| Check for blockages | Monthly | Especially if suction drops |
Pro Tips For Smooth Operation
- Always unplug the vacuum before maintenance.
- Use only Shark-approved parts.
- Do not let the dust cup fill completely.
- Clean the brush roll regularly to avoid tangles.
- Check for updates and recalls on the official Shark website.

Credit: www.ebay.com
Two Non-obvious Insights
- Brush roll only spins in certain modes: On some Shark Rocket models, the brush roll does not spin when the vacuum is set to “Hard Floor” mode. Always check your floor setting if you notice the brush not spinning.
- Worn belt can look normal: Sometimes, the belt may not appear broken but can still be too stretched to turn the brush roll effectively. Replacing a belt that looks “okay” can often solve a mysterious spinning problem.
Frequently Asked Questions
What Should I Do First If My Shark Rocket Hv321 Brush Roll Is Not Spinning?
Start by unplugging the vacuum and checking for obvious blockages like tangled hair or debris around the brush roll. Remove any items and try spinning the brush by hand. If it is stuck, clean it thoroughly and try again.
How Often Should I Replace The Belt On My Shark Rocket Deluxe Pro Hv321?
You should replace the belt every 6-12 months, or sooner if you notice it is stretched, cracked, or broken. A fresh belt keeps the brush roll spinning smoothly.
Can I Use Off-brand Replacement Parts For My Shark Hv321?
It is best to use only Shark-approved parts. Off-brand parts may not fit correctly or last as long, and can sometimes damage the vacuum.
Why Does The Brush Roll Only Spin On Carpet Mode?
Some Shark Rocket vacuums have a feature where the brush roll only activates in carpet mode. Make sure you have selected the correct mode for your floor type.
Where Can I Find More Help Or Order Parts For My Shark Vacuum?
You can visit the official Shark website for manuals, troubleshooting guides, and to order genuine replacement parts.
Taking care of your Shark Rocket Deluxe Pro Ultra Light Vacuum HV321 is not hard if you know what to look for. By following these 321 steps and tips, you can fix most problems with the brush roll not spinning and keep your vacuum running like new.
Regular cleaning, using the right parts, and careful troubleshooting will save you time and money. If you ever feel unsure, contact Shark support or a professional repair service. With the right approach, your floors can stay clean and your vacuum can last for years.
Credit: www.homeessentialsoutlet.com