Changing the battery in a Shark cordless vacuum may seem difficult, but it’s actually a simple process if you follow the right steps. Many people buy cordless vacuums for their convenience and freedom of movement. However, with regular use, the battery will eventually lose its power and need replacing. In this guide, you’ll learn everything you need to know about how to change the battery in a Shark cordless vacuum. You’ll find clear, step-by-step instructions, safety advice, product comparisons, and tips to make the process easy, even if you’re a beginner.
Cordless vacuums have become popular for cleaning homes, cars, and even small offices. Shark is one of the most trusted brands in this market. Their vacuums are known for their lightweight design and efficient suction. But like all battery-powered devices, the performance drops over time as the battery ages.
Replacing the battery can breathe new life into your vacuum and save you the cost of buying a whole new machine.
Many users are surprised to learn that changing the battery is a task they can do at home, without special training. This article will walk you through every detail, from understanding your vacuum’s battery type, to tools you’ll need, and how to safely remove and install a new battery.
You’ll also see common mistakes to avoid, practical tips for battery care, and answers to the most asked questions. If you want to keep your Shark cordless vacuum working like new, this guide is for you.
Understanding Shark Cordless Vacuum Batteries
Before you start, it’s important to understand the basics of Shark cordless batteries. Shark uses different battery types in its cordless vacuum models, but most have similar replacement procedures.
Types Of Batteries Used
Most Shark cordless vacuums use either lithium-ion (Li-ion) or nickel-metal hydride (NiMH) batteries. Lithium-ion batteries are more common in newer models because they hold a charge longer and last through more cycles. They also deliver stable power, so suction stays strong until the battery is nearly empty. Some advanced Shark models even use specialized high-capacity Li-ion packs for extended run time.
Older models or budget lines may use NiMH batteries, which are cheaper but have less capacity and a shorter lifespan. NiMH batteries can lose charge if left unused for long periods and may develop a "memory effect" that reduces run time if not fully discharged during use.
It’s worth noting that battery shape and connector design can also differ, even if the chemistry is the same. Always look at both the voltage and the physical size of the battery when choosing a replacement.
Why Battery Type Matters
Knowing your battery type is important for three reasons:
- Compatibility: Not all batteries fit all Shark models. Even slight differences in connector position or voltage can prevent the vacuum from working or even damage it.
- Performance: Li-ion batteries provide longer run time and more consistent power. For example, a Li-ion battery may give you 30-40 minutes of strong suction, while a NiMH battery may only last 15-20 minutes and lose power as it drains.
- Maintenance: Different batteries have different care needs and replacement cycles. Li-ion batteries require less maintenance, while NiMH batteries need to be used and charged regularly to prevent loss of capacity.
Some users ignore the battery type and buy the cheapest option, but this can lead to poor vacuum performance or even void your warranty.
How Long Do Shark Batteries Last?
A typical Shark cordless vacuum battery lasts about 2-3 years with normal use, or around 300-500 charge cycles. High-use households (like families with pets or large homes) may see batteries wearing out sooner, especially if the vacuum is used daily or for heavy-duty cleaning.
If you notice that your vacuum doesn’t hold a charge, the suction drops quickly, or the vacuum turns off after a short time, it’s time to replace the battery. Sometimes, batteries can fail suddenly after months of gradual decline, so it’s smart to keep an eye on run times.
Signs Your Battery Needs Replacement
- The vacuum runs for a few minutes, then stops.
- The charging light blinks rapidly or does not turn on.
- The battery gets very hot during charging or use.
- The vacuum does not start at all, even after charging.
Some models may also display error codes or beep when the battery is not working properly. If possible, test your vacuum with another battery (from a friend with the same model or a spare) to confirm if the battery is the problem.
Changing the battery can restore the vacuum’s original cleaning power. Always check your user manual to confirm the battery type and model number before buying a replacement.
Tools And Materials You’ll Need
Changing the battery in a Shark cordless vacuum is straightforward, but having the right tools makes the job easier and safer. Here’s what you need:
- Replacement battery: Make sure it matches your vacuum model.
- Screwdriver: Most models need a Phillips-head screwdriver.
- Soft cloth: For cleaning contacts and dust.
- Protective gloves: Optional, but good for safety.
- Small bowl or tray: To keep screws safe during the process.
Some newer Shark models have removable batteries that simply slide out, while others have batteries inside the handle or base, which require you to open the casing.
For models with internal batteries, a magnetic screwdriver can be helpful to avoid dropping small screws. If your vacuum has unique security screws (sometimes called "star" or Torx screws), check your manual or online guides to confirm the tool needed.
Finding The Correct Replacement Battery
Always buy a battery designed for your exact Shark model. Using the wrong battery can damage your vacuum or even cause safety issues. You can find the model number on a sticker near the battery compartment or on the bottom of the vacuum.
To avoid buying the wrong battery:
- Check your manual or the Shark website.
- Look for your model number and battery part number.
- Buy from reputable retailers or Shark’s official store.
If in doubt, contact Shark customer support before buying. Some sellers offer “universal” batteries, but these often do not fit correctly or lack important safety features like overcharge protection.
A good tip: Save your old battery packaging or take a clear photo of it before recycling. This gives you a reference for the next time you need a replacement.
Safety Precautions Before Starting
Working with batteries requires some basic safety steps. Follow these precautions:
- Unplug the vacuum and remove it from the charging base.
- Allow the vacuum to cool if it was recently used.
- Work in a dry area to prevent electric shock.
- Do not touch battery terminals with metal objects.
- If the battery is swollen, leaking, or smells strange, handle with extra care and dispose of it safely.
Never try to open or repair a damaged battery. Use only proper replacement parts.
Extra tip: Keep a small fire extinguisher nearby if you are handling old or damaged batteries, especially Li-ion types, as they can catch fire if punctured or short-circuited. This is rare but good to know.
Step-by-step Guide: Changing The Battery In Shark Cordless Vacuums
The exact steps may vary depending on your Shark model, but the general process is similar. Below are detailed instructions for the most common Shark cordless vacuums.
1. Turn Off And Unplug The Vacuum
Make sure your vacuum is completely powered off. Remove it from the charging base or unplug the charger to avoid any electrical issues.
Even if the vacuum is off, static electricity or a faulty battery can cause a small shock, so always handle with care.
2. Locate The Battery Compartment
Most Shark cordless vacuums have the battery compartment:
- On the back or bottom of the vacuum stick/handle
- Under a small door or panel, secured with screws
Find the compartment by looking for a small latch or screw panel.
If you can't find the compartment, consult your manual or look up your model online for a diagram. Some models hide the battery under a decorative panel that snaps off gently with a plastic tool.
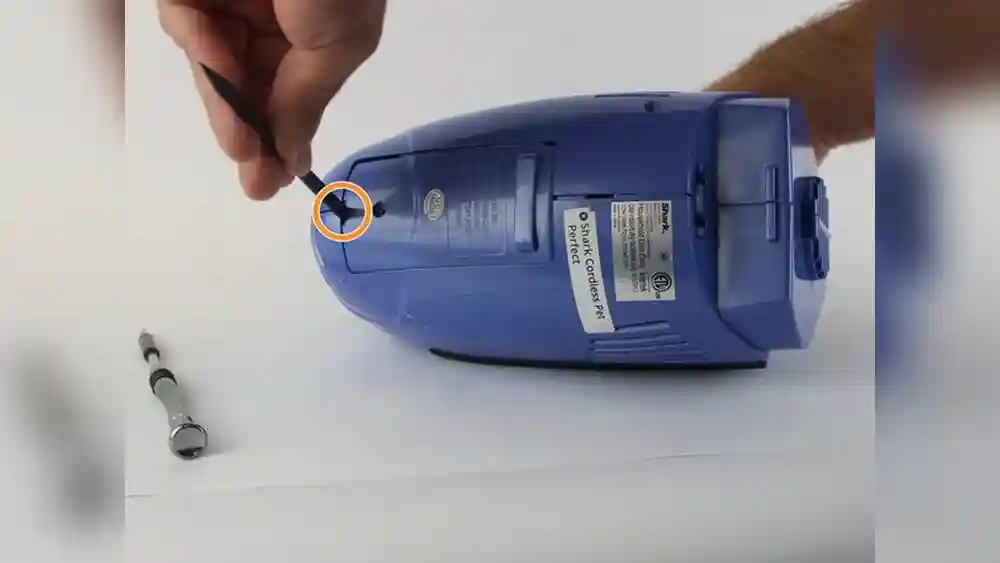
3. Remove The Battery Cover
Use a Phillips-head screwdriver to carefully remove the screws holding the battery cover. Place the screws in your tray or bowl so you don’t lose them.
Gently lift the cover to expose the battery. Some models have a sliding latch instead of screws.
If the cover sticks, gently pry it up with a plastic tool—never use metal tools, as they can damage the cover or scratch the vacuum.
4. Disconnect The Old Battery
Carefully unplug the battery connector. There may be a small plastic clip holding the battery in place. Press or slide the clip to release the battery.
If the battery is stuck, do not force it. Wiggle gently and check for hidden clips or screws.
Do not pull on the wires, as this can damage the connector. If you see corrosion (green or white powder) on the contacts, clean it gently with a dry cloth before installing the new battery.
5. Clean The Battery Contacts (optional)
Use a soft cloth to wipe away any dust or debris from the battery contacts inside the compartment. Clean contacts ensure a good connection for your new battery.
If you notice stubborn dirt, a cotton swab with a tiny bit of rubbing alcohol can be used, but make sure everything is dry before installing the new battery.
6. Insert The New Battery
Align the new battery’s connector with the socket inside the compartment. Make sure it fits snugly and clicks into place.
Double-check that the battery is seated properly before closing the cover.
Some batteries have a small arrow or indicator showing which way they should be inserted. Never force the battery in backward—if it doesn't fit, check the alignment.
7. Replace The Battery Cover
Put the cover back on and secure it with the screws. Do not overtighten, as this can strip the plastic.
If your vacuum has a snap-on cover, make sure all tabs click into place so dust and debris can't get inside.
8. Test The Vacuum
Turn on the vacuum to make sure it powers up correctly. If it does not start, check the battery connection again. Charge the battery fully before first use for best performance.
It’s normal for a new battery to require charging before delivering full power. Let the vacuum charge for at least 3-4 hours before the first cleaning session.
Model-specific Instructions
Shark makes several cordless models, and there are small differences in the battery replacement process. Here’s a quick comparison of popular models and how their batteries are accessed:
| Model | Battery Type | Access Method | Special Notes |
|---|---|---|---|
| Shark ION F80 | Removable Li-ion | Slide-out (no tools) | Battery slides out from the handle |
| Shark Rocket Pet Pro | Removable Li-ion | Slide-out (no tools) | Release latch to remove battery |
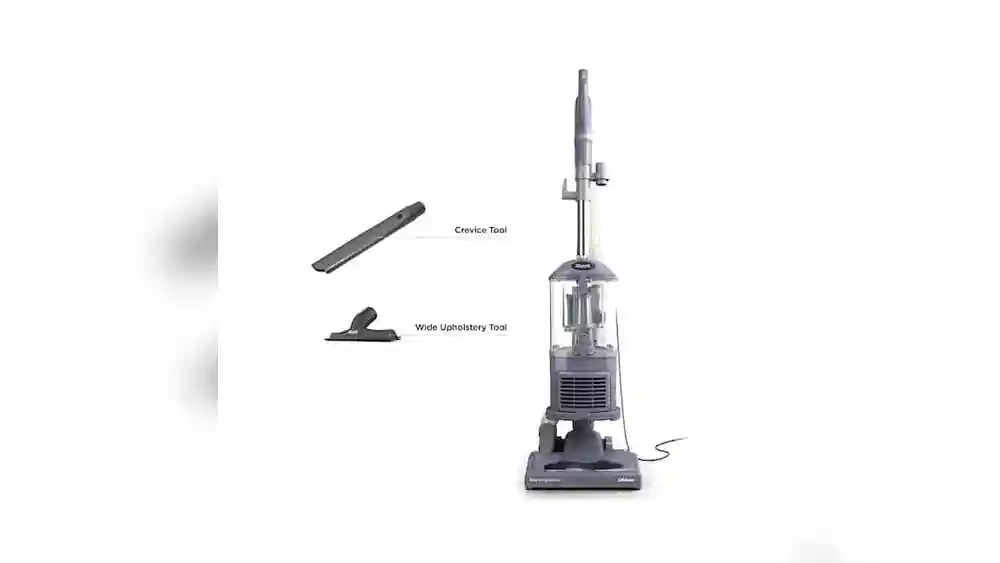
| Shark Navigator Freestyle | Internal NiMH | Phillips screwdriver needed | Access panel on vacuum base |
| Shark ION X40 | Removable Li-ion | Slide-out (no tools) | Push button to release battery |
| Shark ION P50 | Removable Li-ion | Slide-out (no tools) | Battery located in the wand |
If you own a model not listed here, check your user manual for exact battery access instructions.
For less common models (such as older Shark stick vacuums), you may find guides on forums or YouTube showing how to open the casing. Always be careful when following third-party guides—if you feel uncertain, contact Shark support.
Video Guide And Visual Aids
Some people find it easier to follow a video or images. Shark’s official website and YouTube channel offer step-by-step battery change videos for popular models. Watching a video can help you understand the process visually and avoid common mistakes.
Look for videos that match your exact model—small differences in design can change the battery location or the way covers are removed. Some videos also include useful tips, like how to test your charger or what to do if the battery doesn’t click into place right away.
If you prefer images, many manuals have diagrams showing each step. Take screenshots or print them out to keep by your workspace.

Credit: www.youtube.com
Common Problems And Troubleshooting
Sometimes, after replacing the battery, you may face issues. Here are some common problems and how to fix them:
Vacuum Won’t Turn On After Battery Replacement
- Check the battery connection: Make sure the battery is fully inserted and clicked into place.
- Charge the battery: New batteries are often shipped with little or no charge. Charge fully before first use.
- Wrong battery: Double-check that you bought the correct battery for your model.
- Dirty contacts: Clean the connectors with a dry cloth.
If you hear a clicking sound or see flashing lights, consult your manual—some models have safety locks or require a reset after battery change.
Short Run Time After Replacement
- Battery not fully charged: Charge the battery completely.
- Old charger: Sometimes, the charger is faulty, not the battery.
- Clogged filters: Dirty filters make the vacuum work harder and drain the battery faster. Clean filters and brush rolls regularly.
If the run time is much less than promised, check if you’re using “Max” or “Boost” mode, which drains the battery quickly. For regular cleaning, use the standard mode.
Battery Gets Hot Or Swells
- Stop using immediately: This is a safety hazard. Contact Shark support or dispose of the battery safely.
- Never use a damaged battery: It can cause fires or injury.
A swollen battery may bulge the vacuum’s casing or make it hard to close the battery door. This is a clear sign to stop using it.
If you smell anything unusual (like a sweet or chemical odor), unplug the charger and place the vacuum in a safe, well-ventilated area.
How To Care For Your New Shark Battery
A new battery is an investment, and proper care will make it last longer. Here are the best practices for battery care:
Charging Tips
- Charge only when needed: Don’t leave the battery plugged in all the time. Overcharging can shorten its life, especially for NiMH batteries.
- Use the original charger: Third-party chargers may damage the battery.
- Avoid extreme temperatures: Charge and store batteries in a cool, dry place.
- Don’t let the battery fully drain: Recharge when you notice power dropping.
If you have a spare battery, rotate their use, so neither sits unused for long periods.
Storage Tips
- Store in a cool, dry place: Heat shortens battery life.
- If storing for a long time: Charge the battery to about 50% before storage.
- Avoid moisture: Water can damage battery cells.
If you travel or move, remove the battery from the vacuum to prevent accidental activation and leaks.
Cleaning Tips
- Keep contacts clean: Wipe with a dry cloth every few months.
- Check for corrosion: If you see white or green powder, clean gently or replace the battery.
Dirty contacts can cause the vacuum to cut out during use or fail to charge.
Usage Tips
- Do not use the vacuum for very heavy debris: This drains the battery faster.
- Clean filters and brush rolls regularly: This keeps the vacuum efficient and reduces battery strain.
If you vacuum up large amounts of hair, pet fur, or fine dust, clean the filters more often than recommended.
Comparing Shark Battery Models
Choosing the right replacement battery can be confusing. Here’s a simple comparison of the most common Shark batteries:
| Battery Type | Average Run Time | Recharge Time | Estimated Lifespan | Typical Models |
|---|---|---|---|---|
| Li-ion 25.2V | 30-40 minutes | 2-3 hours | 2-3 years | F80, X40, P50 |
| NiMH 14.4V | 15-20 minutes | 3-4 hours | 1.5-2 years | Navigator Freestyle |
| Li-ion 21.6V | 20-30 minutes | 2-3 hours | 2-3 years | Rocket Pet Pro |
Non-obvious Insights About Batteries
- Lithium-ion batteries can be damaged if left uncharged for long periods. Try to use and charge your vacuum at least once a month, even if you don’t clean often.
- Replacement batteries often have a “break-in period.” The first 2-3 charges may not give full run time. After a few cycles, the battery reaches its full capacity.
Another tip: Some Li-ion batteries have built-in “memory chips” that communicate with the vacuum. Using a non-matching battery may cause error messages or prevent the vacuum from starting.
Environmental Concerns And Battery Disposal
Used batteries should never be thrown in the regular trash. They contain metals and chemicals that can pollute water and soil.
How To Dispose Of Old Batteries
- Take to a recycling center: Many electronic stores and recycling centers accept old batteries.
- Check your city’s waste website: Some areas have special collection programs.
- Do not burn or crush batteries: This can release toxic chemicals.
If you’re not sure where to recycle, some home improvement stores have battery drop-off bins. Always tape over the battery terminals before recycling to prevent accidental short circuits.
Why Proper Disposal Matters
Improper battery disposal can harm the environment and may even be illegal in some places. Always follow local guidelines for electronic waste. For more information, visit the official EPA battery recycling page.
Mistakes To Avoid When Changing Shark Vacuum Batteries
Many first-time users make simple mistakes that can damage their vacuum or reduce battery life. Here are the most common ones:
- Using the wrong battery type: Always match the battery model to your vacuum.
- Forcing the battery into place: If it doesn’t fit, check for alignment or hidden clips.
- Skipping safety steps: Not unplugging the vacuum or handling damaged batteries can be dangerous.
- Losing screws or parts: Keep all parts in a tray and work in a tidy space.
- Not charging the battery fully before first use: This can make the new battery seem weak.
Another common mistake is forgetting to reset the vacuum if your model requires it—some advanced Shark models need a power cycle (removing and reinserting the battery, then holding the power button) to recognize the new battery.
Avoid these errors for a smooth replacement process.
When To Replace The Whole Vacuum Instead Of Just The Battery
Sometimes, it’s better to buy a new vacuum instead of replacing the battery. Consider a new vacuum if:
- Your model is more than 5-6 years old and has other problems (broken brush roll, cracked casing, etc. ).
- Replacement batteries are very expensive or hard to find.
- The vacuum still has poor suction or performance after a new battery.
Compare the cost of a new battery to a new vacuum. In some cases, a new model may be a better investment.
If your vacuum is out of warranty and parts are no longer available, a new device will also offer updated features like longer run time, better filtration, and quieter motors.

Credit: www.ifixit.com
Real User Experiences: Changing A Shark Cordless Battery
Many Shark users have changed their batteries at home with great results. Here are some examples:
- “My Shark ION wouldn’t hold a charge. I bought a replacement battery for $40, followed a YouTube video, and my vacuum works like new!”
- “I was nervous at first, but it took me less than 10 minutes to change the battery on my Rocket Pet Pro. The hardest part was finding a small enough screwdriver.”
- “After swapping the battery, I got back the full 40-minute run time. It saved me from buying a new vacuum.”
Some users report that buying a second battery makes life easier—while one is charging, the other is ready to use. For busy households, this can double your cleaning time.
Most users find the process easy, especially if they watch a video or read their manual first.
How To Extend The Life Of Your Shark Cordless Battery
Proper care can add months or even years to your battery’s life. Here are some advanced tips:
Avoid Complete Discharge
Letting the battery run down to zero can damage lithium-ion cells. Try to recharge when you notice a drop in power, not after the vacuum stops completely.
Use Eco Or Low Power Mode
Most Shark cordless vacuums have multiple power settings. Using a lower setting for regular cleaning uses less battery and extends run time.
Don’t Store In Hot Places
Heat is the enemy of batteries. Avoid leaving your vacuum in the car or next to a heater.
Alternate Between Two Batteries
Some users buy a second battery. Rotating between two batteries means each one gets fewer charge cycles per month, helping both last longer.
Keep The Charger Clean
Dusty or dirty chargers can cause poor connections. Wipe the charging contacts every few months.
Allow Battery To Cool Before Charging
If you’ve just finished vacuuming, let the battery cool for 15-20 minutes before plugging it in. Charging a hot battery reduces its lifespan.
Update Your Vacuum’s Firmware (if Available)
Some high-end Shark models allow firmware updates via a mobile app or USB connection. Updates can improve battery management or fix charging bugs—check your manual for instructions.
How To Identify A Failing Shark Battery
Not sure if your battery is the problem? Here are clear signs of a failing battery:
- Vacuum dies quickly after starting.
- Charging light blinks abnormally or not at all.
- Battery feels hot or swollen.
- Charger works with other batteries but not yours.
If you see these signs, a new battery will likely solve the issue.
As an extra check, try your battery in another compatible vacuum, if possible. If it fails in both, the battery is at fault.
Choosing Between Oem And Third-party Batteries
When buying a replacement, you’ll see both OEM (original equipment manufacturer) and third-party batteries. Which should you choose?
Oem Batteries
- Guaranteed to fit and work with your vacuum.
- Usually more expensive.
- Backed by Shark’s warranty.
Third-party Batteries
- Usually cheaper.
- May offer more capacity or features.
- Quality can vary—read reviews before buying.
For older models, third-party batteries may be your only option. Always check for safety certifications like CE or UL on the battery label.
If you want maximum safety and compatibility, choose OEM. If you’re on a budget, third-party brands can work, but check the seller’s reputation.
How To Find Your Shark Model And Battery Number
If you’re not sure which battery to buy, you need your vacuum’s model and battery part number.
- Check the label: Usually on the bottom or back of the vacuum.
- Look in the manual: Battery specs are listed in the replacement parts section.
- Contact Shark support: They can help you identify the correct battery.
Having the right numbers ensures you get a battery that fits and works.
Take a clear photo of the label and keep it in your phone for easy reference.
Practical Tips For A Smooth Battery Change
- Work on a clean, flat surface: This prevents screws from getting lost.
- Take photos during disassembly: Helps you remember how to put it back together.
- Keep small children and pets away: For safety.
- Don’t rush: Take your time to avoid mistakes.
If you’re worried about losing screws, use a magnetized parts tray or stick them to a piece of tape on your work table.
These small steps can make the process stress-free.

Credit: www.walmart.com
Comparing Battery Replacement Cost To Professional Repair
Some people think about sending their vacuum for repair instead of doing it themselves. Here’s a quick cost comparison:
| Option | Average Cost | Time Required | Pros | Cons |
|---|---|---|---|---|
| DIY Battery Replacement | $30-$60 | 10-20 minutes | Cheapest, fast, learn new skill | Some models are tricky for beginners |
| Professional Repair Service | $60-$120 | 3-7 days (shipping/waiting) | No effort required, guaranteed result | Expensive, slower, shipping risk |
| Buy New Vacuum | $150-$400 | 1-3 days (shopping) | Latest features, new warranty | Most expensive |
For most users, DIY replacement is the best value. Professional repair may be worth it for very complex models.
If you have a premium Shark vacuum, check if battery replacement is covered by warranty—sometimes, the repair cost is covered for the first year.
Frequently Asked Questions
Can I Use My Shark Cordless Vacuum While It’s Charging?
No, most Shark cordless vacuums are designed to operate only from battery power. Using the vacuum while charging is not possible and can damage the battery or the vacuum’s electronics.
How Do I Know If My New Battery Is Genuine?
Buy only from trusted sellers. Check for official Shark branding, proper packaging, and matching part numbers. Genuine batteries come with a warranty and feel solid. If the price seems too low, it may be a fake.
What Should I Do If My New Battery Won’t Charge?
First, check that the battery is correctly installed and the charger is plugged in. Try charging another battery in the same charger to rule out charger issues. If the battery still won’t charge, contact the seller or Shark support for a replacement.
How Long Does It Take To Replace A Shark Cordless Vacuum Battery?
For most models, the process takes about 10-20 minutes, even for beginners. Removable battery models are the quickest—often under 5 minutes.
Is It Safe To Use Third-party Batteries In My Shark Vacuum?
Many users do, but quality can vary. Always read reviews and buy from reputable sellers. If you want guaranteed safety and performance, use an official Shark battery.
Changing the battery in your Shark cordless vacuum is a simple way to restore cleaning power without buying a new device. With the right tools, safety steps, and a little patience, anyone can do it at home. Always recycle old batteries responsibly and follow your model’s instructions for the best results. If you take care of your new battery, it will serve you well for years to come. For more details on battery recycling, check the EPA’s battery recycling guide. Enjoy your Shark vacuum’s extended life and cleaning power!