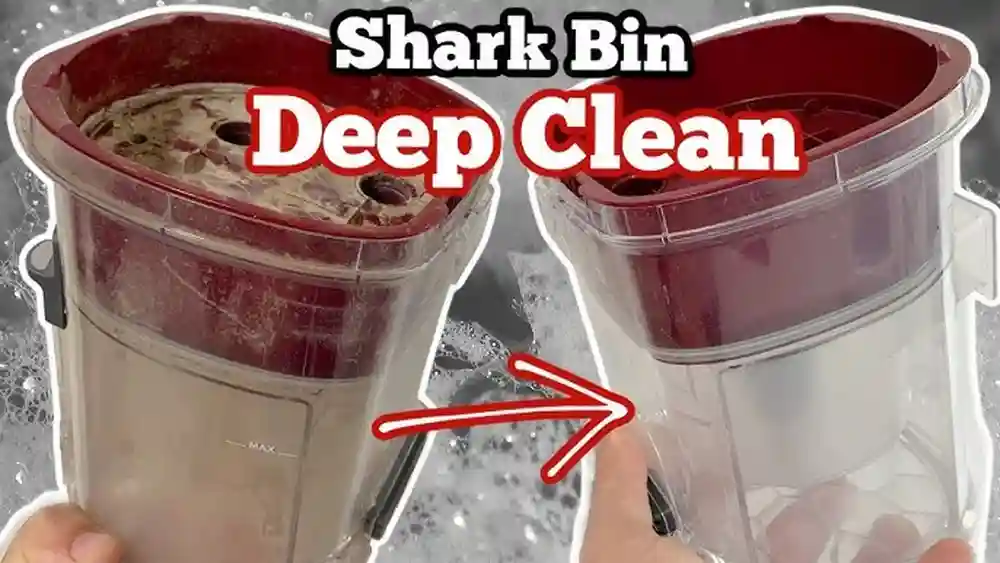
A Shark Navigator vacuum can be a game changer for cleaning your home, but over time, the brush roller can get worn out or tangled. When this happens, your vacuum may not clean as well as before. You might notice your carpet still has dust, or the vacuum makes strange noises. Learning how to change the brush roller on your Shark Navigator can help you keep your vacuum working at its best. Even if you are not used to fixing things, with the right steps and some patience, you can do this at home. In this article, you will learn everything you need to know about changing your Shark Navigator’s brush roller, from why it matters, tools you need, step-by-step instructions, and useful tips that many people miss. You’ll finish with clear answers to common questions and expert advice to make your Shark Navigator last longer.
Why Change The Brush Roller On A Shark Navigator?
A brush roller is the spinning bar with bristles under your vacuum. It helps lift dirt and hair from your carpet. Over time, the bristles wear down, hair wraps around the roller, and sometimes the roller gets stuck. When this happens, the vacuum’s cleaning power drops. Your floor may look dirty even after vacuuming. Ignoring these signs can also damage the vacuum’s motor or belt, which can cost a lot to repair.
Changing the brush roller is not just about cleaning better. It also protects your investment. The Shark Navigator is known for its long life, but like any machine, it needs care. Regularly checking and replacing the brush roller keeps the vacuum strong for years.
Many users only think to clean the dustbin and filters but forget about the roller. This is a common mistake that can lead to bigger problems.
Some people try to save money by using the vacuum with a broken roller, but this leads to poor cleaning and can even void your warranty. If you notice the roller isn’t spinning, or the bristles look flat and soft, it is time to change it.
This simple maintenance can make your old vacuum feel new again.
Understanding Your Shark Navigator Model
Before you start, you need to know your Shark Navigator model. Not every model has the same brush roller, screws, or panel design. The most popular models are:
- Shark Navigator Lift-Away (NV350, NV351, NV352, NV360)
- Shark Navigator Swivel Pro
- Shark Navigator Zero-M
- Shark Navigator DLX
Usually, the model number is printed on a sticker under the vacuum or on the back. Knowing your model helps you buy the right brush roller and find instructions that match.
Some models have self-cleaning brush rollers, while others have normal rollers that need more attention. The way you open the roller panel and remove the roller may be slightly different. Always check your user manual or the Shark website for model-specific tips.
If you use the wrong roller, it may not fit, or it could damage your vacuum. When buying a replacement, check the product description for your model number. Some online stores let you search by model. If you are unsure, contact Shark customer service for help.

Credit: www.youtube.com
Tools And Materials You Will Need
Changing the brush roller does not need special skills, but having the right tools makes it easier and safer. Here’s what you need:
- Replacement brush roller – Make sure it matches your Shark Navigator model.
- Phillips screwdriver – Most Shark Navigator vacuums use Phillips screws. A medium-size one works best.
- Flathead screwdriver – Useful for prying open snap panels or stuck parts.
- Scissors or utility knife – For cutting tangled hair or threads off the old roller.
- Tweezers or needle-nose pliers – To pull out hair or debris from the roller area.
- Soft cloth – For cleaning dust inside the vacuum.
- Small bowl or tray – To hold screws so you don’t lose them.
Some models may need a Torx screwdriver, but this is rare. Check the screws on your vacuum before starting. Having all tools ready saves time and avoids frustration.
Preparing Your Shark Navigator
Before you touch any screws or panels, prepare your vacuum for safe work:
- Unplug the vacuum – This is very important. Never work on the vacuum when it is plugged in.
- Move to a clean, flat workspace – Use a table or the floor, with enough space to lay out parts.
- Empty the dustbin – Keeps things cleaner and lighter.
- Lay the vacuum upside down – This gives easy access to the brush roller area.
- Take a photo – Use your phone to snap a picture of the brush roller and screws before starting. This helps you remember where everything goes.
Pro tip: If your vacuum is dusty, wipe it down before opening. Dust can get inside the motor if you are not careful.
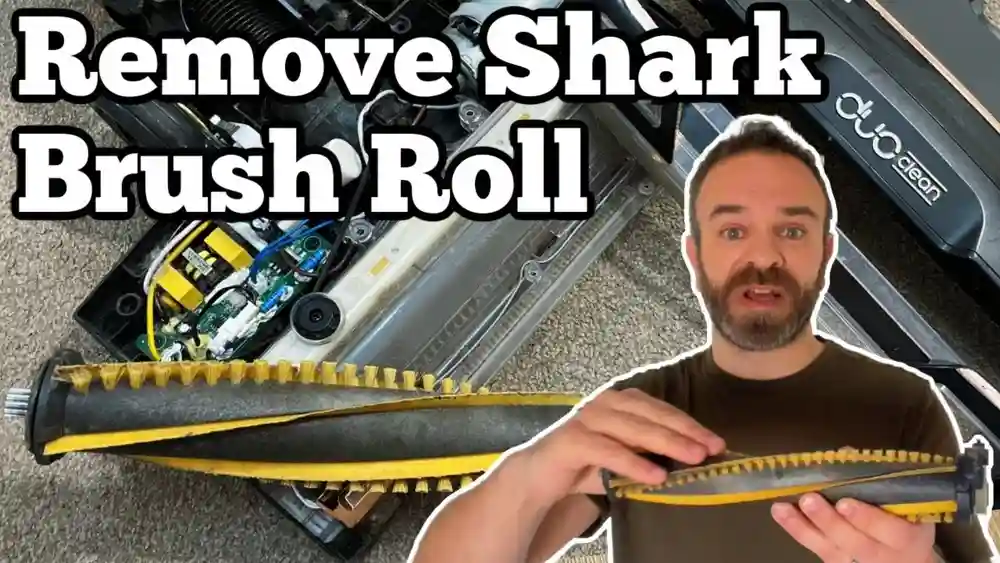
Removing The Brush Roller Cover
The roller cover protects the brush and keeps debris from entering the vacuum. You need to remove it to reach the brush roller. Here’s how:
- Locate the screws – Most covers have 4-10 screws. Look along the edges and near the wheels.
- Remove the screws – Place each screw in your bowl or tray. Some screws are different lengths, so remember where each one goes.
- Gently lift the cover – If it sticks, use a flathead screwdriver to pry it open. Do this slowly to avoid cracking the plastic.
- Set the cover aside – Keep it in a safe place.
Some models have snap tabs or clips instead of screws. If you feel resistance, check for hidden clips. Forcing the cover can break it.
Beginner insight: Many people lose screws or mix them up. Laying them out in the order you remove them makes reassembly much easier.
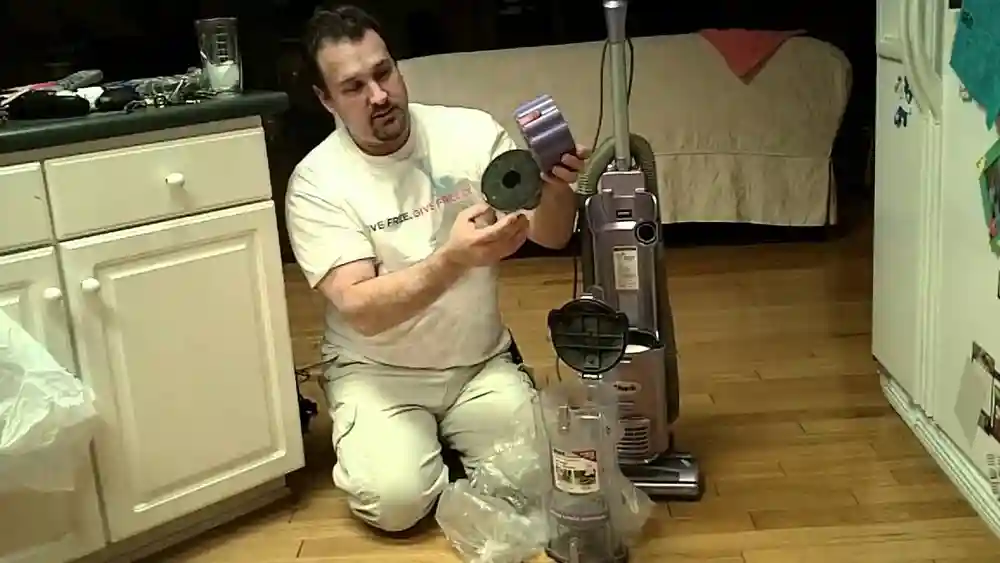
Removing The Old Brush Roller
Now you can see the brush roller. It is usually held in place by simple slots or a belt.
- Check for a belt – Some models use a rubber belt to spin the roller. Others have a direct drive.
- Slide the roller out – Gently lift one end of the roller. It should pop out. If a belt is attached, carefully slide the roller out of the belt loop.
- Remove any hair or threads – Use scissors or tweezers to cut and pull away hair wrapped around the roller ends.
- Clean the roller area – Dust and debris often build up here. Wipe with a soft cloth.
Sometimes the roller feels stuck. Do not force it. Wiggle gently, and check for screws or tabs holding it. For models with a belt, note how the belt fits on the roller and motor spindle. If the belt looks cracked or stretched, consider replacing it.
Non-obvious insight: If your old roller is very dirty, inspect the roller bearings. Dirty or stuck bearings make the roller hard to spin. Clean them with a dry cloth, but don’t use water.
Comparing Brush Rollers And Belts
It helps to know the differences between brush roller types and belts. Here’s a quick comparison:
| Type | Normal Roller | Self-Cleaning Roller |
|---|---|---|
| Design | Bristles only | Bristles + fins |
| Maintenance | Needs regular cleaning | Removes hair automatically |
| Lifespan | 6-12 months (average) | 12-18 months (average) |
| Common Models | NV350, NV360 | Zero-M, Lift-Away Speed |
Brush roller belts also differ:
| Belt Type | Material | When to Replace |
|---|---|---|
| Rubber | Flexible rubber | Every 6-12 months, or if loose/cracked |
| Cogged | Rubber with teeth | Every 12-24 months, or if teeth break |
| Direct Drive | No belt | N/A |
Checking your user manual can tell you which type you have.
Installing The New Brush Roller
Now that the old roller is out, it’s time to install the new one.
- Compare the old and new rollers – Make sure the length, end caps, and belt slot look the same.
- Fit the belt (if needed) – If your model uses a belt, loop the belt over the roller’s slot. The other end goes on the motor spindle.
- Insert the roller – Slide one end into its slot, then press the other end in. It should sit firmly, not loose.
- Spin the roller by hand – It should spin smoothly. If it’s hard to spin, check for misalignment or debris in the slot.
Expert tip: If you install the roller upside down, it won’t fit or spin well. The bristles should face outward and the notched end (if any) should align with the belt.
If your roller uses a self-cleaning system, ensure that the fins or combs are not bent during installation.
Reattaching The Roller Cover
With the roller in place, you need to close up your vacuum.
- Align the cover – Place it back in the same position as before.
- Insert the screws – Start with the corners, then the center. Do not overtighten, as this can crack the plastic.
- Double-check snaps or clips – Push down gently to lock any clips in place.
- Check for gaps – The cover should sit flush with the vacuum base.
If you have screws of different lengths, remember where each one goes. Using a long screw in a short hole can damage the housing.
Beginner insight: Many people forget to reinstall all screws, which can make the cover loose and allow dust to enter.
Testing The Shark Navigator After Replacement
Before you start vacuuming, test your work:
- Plug in the vacuum – Make sure you are in a safe area.
- Turn it on and off – Listen for normal motor sound. If you hear grinding, stop and check the roller.
- Look at the brush roller – Flip the vacuum (while off) and check that the roller spins freely.
- Vacuum a small area – See if the vacuum picks up debris better and the roller keeps spinning.
If the vacuum does not work as expected, unplug and recheck the roller and cover. Sometimes the belt slips off during reassembly.
Common Mistakes And How To Avoid Them
Many people run into problems when changing the brush roller. Here are some common mistakes and how to avoid them:
- Forgetting to unplug the vacuum – This is a safety risk.
- Mixing up screws – Place them in order or take a photo before removal.
- Installing the wrong roller – Always check your model number before buying.
- Forcing parts – If something does not fit, double-check the alignment. Do not use too much force.
- Not cleaning hair/debris – Clean the roller area before installing the new roller.
- Leaving the belt off – If your vacuum uses a belt, it must be in place for the roller to spin.
- Overtightening screws – This can crack plastic parts.
- Not testing before full use – Always test on a small area first.
Pro tip: If you find extra screws after reassembly, stop and check if you missed a screw hole. Running the vacuum with missing screws can damage the cover.
Maintenance Tips For A Longer-lasting Brush Roller
A new brush roller can last a long time if you take care of it. Here’s how:
- Cut hair or threads off the roller every month.
- Clean the roller area with a dry cloth every few months.
- Check the bristles for wear every 3-6 months.
- Replace the belt when it feels loose or cracked.
- Avoid vacuuming wet or sticky items. This can damage the roller and motor.
- Store the vacuum upright. This keeps the roller from bending.
Some people forget about the brush roller until the vacuum stops working well. Regular care saves you money and keeps your Shark Navigator strong.
Real-world Example: Changing A Brush Roller On The Shark Navigator Nv352
Let’s walk through a real example with the popular Shark Navigator NV352.
- Unplug the vacuum and lay it upside down.
- Remove eight Phillips screws holding the roller cover.
- Lift off the cover, set it aside.
- Slide the old roller out, noting the belt position.
- Remove hair with scissors and clean the area.
- Fit the new roller into the belt loop and place both ends in their slots.
- Spin the roller by hand to check smooth movement.
- Reattach the cover, insert all screws in their original positions.
- Plug in the vacuum, turn it on, and test on a small carpet area.
With the right steps, the process takes about 20-30 minutes. The difference in cleaning is usually easy to see right away.
Troubleshooting: What If The Roller Still Doesn't Spin?
Sometimes, even after changing the roller, it doesn’t spin. Here’s what to check:
- Is the belt on correctly? If the belt is off or loose, the roller won’t turn.
- Are the roller ends seated in their slots? Misaligned rollers can’t spin.
- Are the bearings stuck? Clean the end caps of the roller.
- Is the motor working? If the motor is silent, there could be an electrical issue.
- Is the roller cover blocking movement? Remove and reinstall the cover.
If you have checked all these and the roller still doesn’t move, contact Shark customer support or visit an authorized repair center.
When Should You Replace The Belt Too?
If your Shark Navigator uses a belt, replace it if:
- The vacuum makes a burning smell.
- The roller doesn’t spin, but the motor runs.
- The belt looks stretched, cracked, or broken.
- The vacuum is over 1 year old and used often.
A new belt is cheap and easy to install. Many people replace the belt and brush roller at the same time for best results.
Where To Buy The Right Brush Roller
You can buy Shark Navigator brush rollers from:
- Official Shark website – Guaranteed fit and quality.
- Major online stores – Amazon, Walmart, etc. Check model compatibility.
- Vacuum repair shops – They often sell parts and can offer advice.
- Local appliance stores – Some keep common parts in stock.
Always check reviews and look for genuine Shark parts. Using cheap copies can save money, but they often wear out faster or fit poorly.

Credit: www.ifixit.com
Cost Of Replacing A Shark Navigator Brush Roller
The price of a new brush roller depends on your model:
- Basic brush roller: $15 – $25
- Self-cleaning brush roller: $25 – $40
- Belt: $5 – $12
If you pay for repair service, labor can add $20 – $50. Most people change the roller themselves to save money.
Comparing Diy Replacement To Professional Service
Is it better to change the roller yourself or use a repair shop? Here’s a quick look:
| Option | Cost | Time | Pros | Cons |
|---|---|---|---|---|
| DIY | $15–$40 | 20–40 min | Cheap, learn new skill, fast | Must follow steps, risk of mistake |
| Professional | $35–$90 | 1–3 days | No work needed, warranty | Expensive, slower |
For most people, DIY is the best choice if you follow clear instructions. If your vacuum is still under warranty, check if professional service is free.

Credit: www.ifixit.com
Safety Precautions When Changing A Brush Roller
Safety is important when working with electrical devices:
- Always unplug the vacuum before opening.
- Keep screws and small parts away from children and pets.
- Do not use water or sprays inside the vacuum.
- If the vacuum smells like burning, unplug and check for stuck debris.
- Wear gloves if you have sensitive skin or allergies.
If you are unsure at any step, ask for help or check the Shark website’s support section.
Environmental Impact: Recycle Old Brush Rollers
When you remove an old brush roller, don’t just throw it in the trash. Many cities have recycling programs for small appliances and plastic parts. Check local guidelines. Some vacuum repair shops also collect old parts for recycling.
If the roller is very dirty, clean it before recycling. This helps reduce landfill waste and is better for the planet.
How Often Should You Change Your Brush Roller?
Most Shark Navigator owners should change the brush roller every 12–24 months, depending on use. If you vacuum pet hair, sand, or thick carpets, replace it more often. Worn bristles or a noisy roller are signs it’s time for a new one.
Mark your calendar or set a phone reminder to check the roller every 6 months. This small habit can extend your vacuum’s life.
Additional Resources For Shark Navigator Owners
If you need more help, Shark offers guides and support:
- The official Shark website has manuals and video tutorials.
- YouTube has many repair videos for specific models.
- Local repair shops can offer in-person advice.
For official instructions and troubleshooting, visit the Shark Support Center.
Frequently Asked Questions
How Do I Know If My Shark Navigator Brush Roller Needs Replacing?
If the bristles are worn down, the roller makes loud noises, or it doesn’t spin even after cleaning, it is time to replace it. Also, if your vacuum is not picking up dirt as well as before, the roller could be the problem.
Can I Use A Different Model’s Brush Roller In My Shark Navigator?
No, always use a roller made for your exact model. Different models have different lengths, end caps, and belt slots. Using the wrong roller can cause damage or poor cleaning.
Do All Shark Navigator Vacuums Use A Belt For The Brush Roller?
Most do, but some newer or premium models use a direct drive (no belt). Check your manual or look at the roller area to see if a belt is present.
What Should I Do If The Roller Is Stuck And Won’t Come Out?
First, check for hidden screws or clips. Gently wiggle the roller. If it still won’t move, check for wrapped hair or debris at the ends. If stuck, do not force it—this can break the vacuum. Consult your manual or contact support.
Can I Wash My Shark Navigator Brush Roller?
Some rollers can be rinsed with water, but always check your manual first. Never put a wet roller back in the vacuum. Let it dry completely. Washing the roller can damage the bearings if water gets inside.
Changing the brush roller on a Shark Navigator is a smart way to keep your vacuum strong and your home clean. With careful steps and attention to detail, you can do this yourself, save money, and avoid common mistakes. Remember, a little regular care goes a long way toward making your vacuum last for years.