If you own a Shark Vacuum Navigator, you know it makes cleaning your home easier. But to keep your vacuum working at its best, you must empty it regularly. Many users forget this step, or they do it incorrectly, which can lead to poor performance, bad smells, or even damage. If you want your Shark Navigator to last and clean efficiently, learning how to empty it the right way is essential.
In this guide, you'll discover every detail you need to know to empty your Shark Vacuum Navigator safely, quickly, and effectively. Whether you’re new to vacuum cleaners or you’ve used different models before, this article will answer your questions and help you avoid common mistakes.
We'll break down the steps, explain why they're important, and offer expert tips to keep your vacuum in top shape. Along the way, you’ll also learn some valuable habits to make your cleaning routine easier and safer for everyone in your home.
Why Regularly Emptying Your Shark Vacuum Navigator Matters
Many people underestimate the importance of emptying the dust cup. When the dust cup is full, your vacuum loses suction power. This means it won’t clean carpets or floors as well, and tiny dust particles can escape back into the air. Over time, a full or clogged dust cup can even put strain on the motor, leading to expensive repairs or a shorter lifespan for your vacuum.
A study by the Environmental Protection Agency (EPA) found that vacuums with full dust containers can release up to 20% more dust back into the room compared to properly maintained vacuums. Keeping the dust cup empty helps your Shark Navigator perform as designed, trapping dust and allergens, and keeping your home cleaner.
Another common issue is that a full dust cup can cause clogs deeper inside the vacuum, such as in the filters or the hose. These clogs are often harder to notice at first, but they slowly reduce suction and can make the vacuum louder or less effective.
In some cases, if the vacuum tries to work with a full cup, the motor has to work harder, which makes it heat up and may shorten its life.
Non-obvious insight: Regularly emptying your vacuum also reduces wear on the filters. When dust cups are emptied before they reach the max fill line, filters don’t get clogged as quickly, so you’ll have to wash or replace them less often.
Understanding Your Shark Vacuum Navigator’s Dust Cup
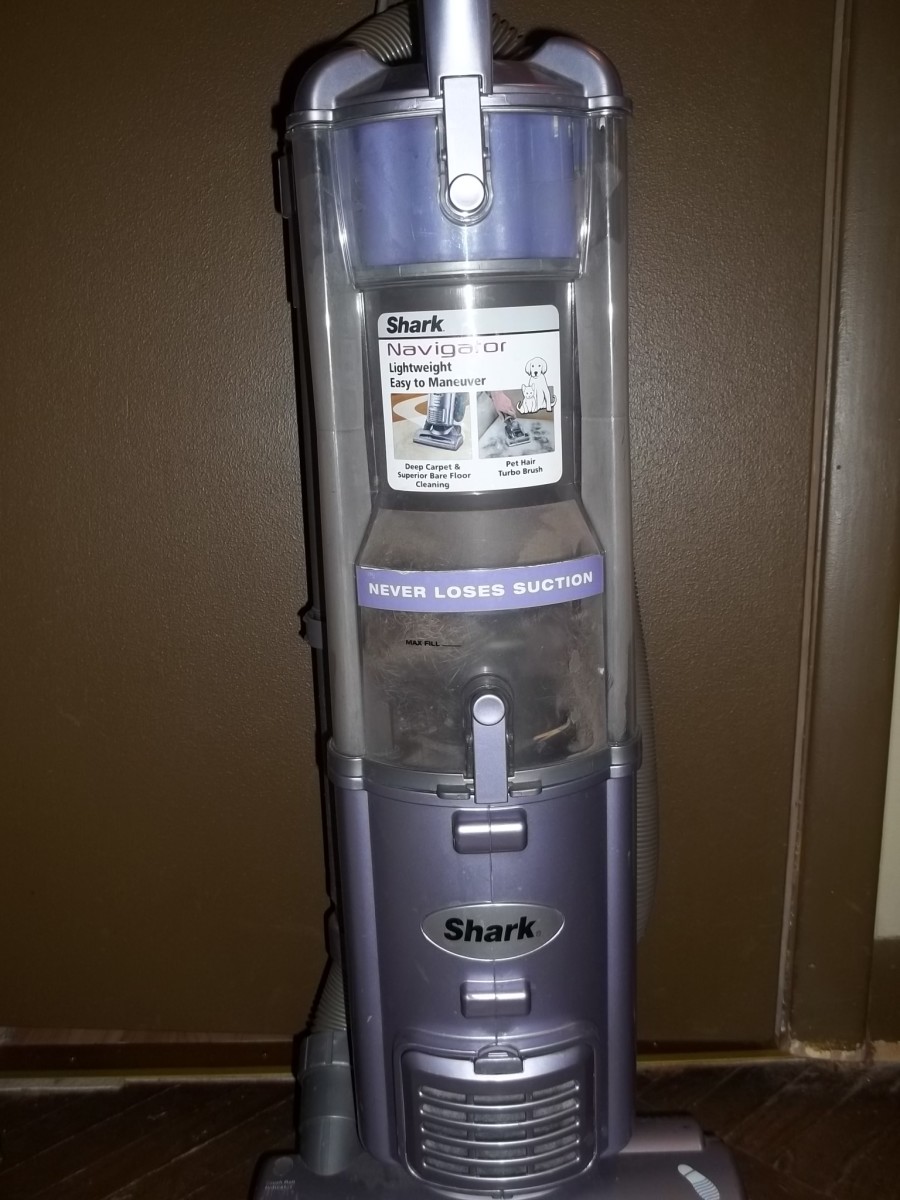
Before you can empty your vacuum, you need to know where the dust cup is and how it works. The dust cup is the clear, removable container that collects dust, dirt, and hair as you clean. Most Shark Navigator models have a transparent dust cup so you can see when it’s getting full.
You’ll find the dust cup attached to the main body of the vacuum. On upright models, it’s usually located near the handle or motor. On stick or lift-away models, it’s part of the removable pod. The cup often has a “Max Fill” line—when the dirt reaches this line, it’s time to empty.
Some Shark Navigator models have dust cups with a shape designed to direct debris away from the filter, helping to keep suction strong for longer. The clear design isn’t just for looks—it helps you spot large items that might accidentally get sucked up, like coins or small toys, so you can remove them before they cause trouble.
Non-obvious tip: Even if the cup isn’t full, emptying it after every large cleaning session prevents dust from becoming packed and hard to remove later. Overpacked dust can sometimes block the mechanism that opens the cup, making emptying messier.

Credit: www.ifixit.com
When Should You Empty Your Shark Vacuum Navigator?
It’s tempting to wait until the dust cup is completely full before emptying, but this isn’t ideal. For best performance:
- Empty the dust cup when debris reaches the Max Fill line.
- After vacuuming very dusty or dirty areas, empty the cup even if it’s not full.
- If you notice reduced suction, strange smells, or visible dust escaping, check the dust cup right away.
Some users wait too long, which causes clogs and reduces cleaning power. By emptying the cup regularly, you protect your vacuum and keep your home cleaner.
If you have pets, children, or live in a high-traffic home, you may find the dust cup fills up much faster. Pet hair, for example, can take up a lot of space and sometimes blocks airflow sooner than fine dust.
After vacuuming places like entryways, kitchens, or any area where dirt is tracked in, check the cup even if you think it’s not full. It’s also wise to develop a habit of checking the dust cup before starting any major cleaning, so you don’t have to stop midway.
Safety Precautions Before Emptying
Before you empty your Shark Navigator, keep these safety steps in mind:
- Turn off and unplug the vacuum from the wall outlet. This prevents accidental starts and protects you from electric shock.
- If you have allergies, wear a mask or empty the vacuum outside to avoid breathing in dust.
- Wash your hands after emptying the dust cup, especially if you handle pet hair or allergens.
Never try to empty the cup while the vacuum is running, and always handle the vacuum with dry hands to prevent slipping.
Another important precaution is to keep the vacuum on a stable, flat surface while removing the dust cup. This prevents tipping and accidental spills. If you need to carry the vacuum somewhere to empty it, hold it by the handle and use slow, careful movements.
Non-obvious insight: If your vacuum has just been used, let it cool for a few minutes before handling, especially if you’ve been cleaning for a long time. The motor and plastic parts can be hot, which increases the risk of burns or making mistakes due to rushing.
Credit: www.youtube.com
Step-by-step Guide: How To Empty A Shark Vacuum Navigator
Emptying your Shark Navigator is simple once you know the steps. Here’s a practical guide to follow:
1. Power Off And Unplug
Always start by switching off the vacuum and unplugging it. This makes the process safer and reduces the risk of damaging the machine.
If you have children or pets nearby, keep them away during this process to avoid accidental contact with dust or moving parts.
2. Locate The Dust Cup Release Button
Most Shark Navigators have a release button or lever near the handle or main body. This button unlocks the dust cup from the vacuum.
On some models, this button is labeled “Dust Cup Release” or has a small icon of a cup. If you’re not sure, check your manual or look for a button near where the cup attaches to the vacuum body.
3. Remove The Dust Cup
- Hold the vacuum with one hand.
- Use your other hand to press the release button.
- Gently pull the dust cup away from the vacuum until it comes free.
On some models, you may need to tilt or wiggle the cup slightly.
If the cup feels stuck, do not use force. Instead, check for any dirt or hair caught in the seams or around the release button. Sometimes running your finger gently along the edge can free small obstructions.
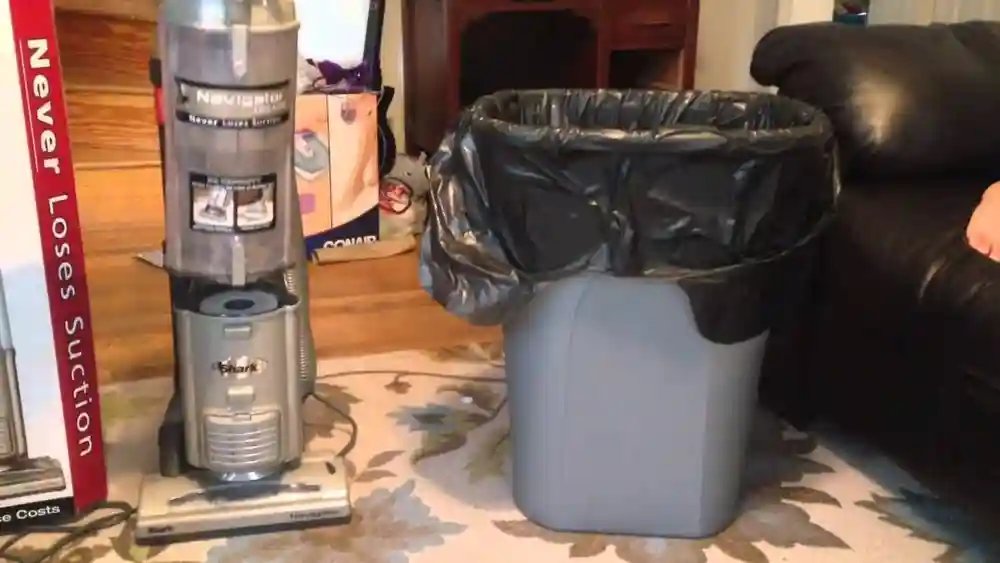
4. Hold Over Trash Bin
Take the dust cup to a trash bin. For best results, use a bin with a wide opening. If you have allergies, do this step outside.
If possible, hold the cup low inside the trash bin before opening to avoid dust clouds. For people with asthma or allergies, consider using a large trash bag: place the dust cup inside the bag, close the bag loosely around your hand, and empty the cup inside. This keeps dust from escaping into the air.
5. Open The Dust Cup Bottom Lid
- Find the bottom lid release (usually a button or latch) on the dust cup.
- Hold the cup over the bin and press the release.
- The bottom lid will open, releasing the dirt and debris.
If some debris gets stuck, gently tap the cup to loosen it, but never hit it hard.
If debris remains stuck along the edges or in corners, use a soft brush or an old toothbrush to sweep it out. Avoid using anything sharp, as it could scratch or damage the plastic.
6. Close The Lid And Reattach
- Make sure the bottom lid snaps shut securely.
- Check for any remaining dirt inside. If the cup still looks dusty, you may wipe it with a damp cloth.
- Reattach the dust cup to the vacuum, aligning it with the slots and pressing until it clicks into place.
Always double-check that the lid is fully closed before putting the cup back. A loose or open lid can lead to dust escaping during your next vacuum session.
7. Plug In And Test
Plug the vacuum back in and turn it on. Check that suction feels normal and there are no warning lights.
Pro tip: If you notice a musty smell, wash the dust cup with warm water and let it dry before reattaching. If you need to use the vacuum immediately, keep a spare dust cup on hand so you never have to wait for drying.
How To Empty Shark Navigator Models: Key Differences
Not all Shark Navigators are exactly the same. Here’s a quick comparison of how the emptying process differs among popular models:
| Model | Dust Cup Release Location | Bottom Lid Open Method | Special Notes |
|---|---|---|---|
| Navigator Lift-Away | Near handle | Button | Lift-away pod must be detached first |
| Navigator Swivel Pro | Side of cup | Latch | Cup is larger; empty more often for best results |
| Navigator Zero-M | Front panel | Push lever | Check self-cleaning brushroll for blockages, too |
Always check your model’s manual if you’re unsure. The location of buttons or levers can vary, but the overall process is similar.
Some models may have an extra safety catch or a more complex latch system, especially those with lift-away features. If you find your dust cup has more than one release, press them in the order given in the manual. With practice, you’ll remember the sequence and empty your vacuum faster.
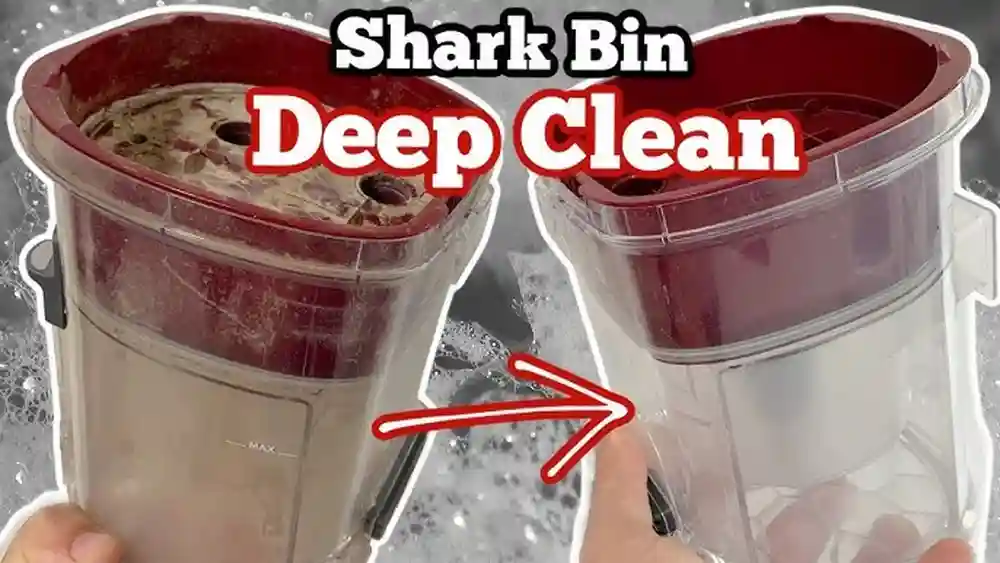
Cleaning The Dust Cup For Better Performance
Emptying the dust cup is only half the job. Over time, fine dust can stick to the sides, and hair can get wrapped around the cup’s inner parts. If you only empty the cup and never clean it, you may notice odors, poor suction, or even mold growth.
Here’s how to deep clean your Shark Navigator dust cup:
- Remove the dust cup as described above.
- Open both the bottom and top lids (if your model allows).
- Rinse the cup with warm water. Do not use soap unless the manual says it’s safe.
- Use a soft brush or cloth to gently scrub stubborn dirt.
- Shake out excess water and let the cup air dry completely before reattaching.
Important: Never put the dust cup back if it’s damp. Moisture can damage your vacuum’s motor or cause dust to stick inside.
You may also notice that odors build up faster in humid climates or if you vacuum up pet hair and food crumbs. Washing more frequently in these cases keeps your vacuum smelling fresher. For stubborn dirt, soaking the cup in warm water for 10 minutes can help loosen buildup.
Expert tip: Clean the dust cup every 1–2 months, or sooner if you vacuum up fine dust, pet hair, or allergens.
Extra insight: If your dust cup develops static cling (dust sticking to the sides), wiping it with a slightly damp microfiber cloth after washing can help. Avoid using dryer sheets or strong chemicals, as these can damage the plastic.
How Often Should You Empty And Clean?
For most homes, emptying the dust cup after every use is the best practice. If you have pets or a large house, you may need to empty it halfway through your cleaning session. Cleaning the cup itself can be done monthly, but in busy households, every two weeks is better.
Here’s a helpful schedule:
| Home Type | Emptying Frequency | Deep Cleaning Frequency |
|---|---|---|
| Small apartment, no pets | After 2–3 uses | Every 1–2 months |
| Large home, pets | Every use or mid-session | Every 2–4 weeks |
| Allergy sufferers | Every use | Every 2 weeks |
Adjust your schedule based on how much dust you see in the cup after cleaning.
For families with multiple pets or during times when shedding is high (like spring and fall), you may need to empty the dust cup more than once per cleaning. In homes with children who play outside often, dirt and grass can fill the cup quickly, so a quick check before each session is wise.
Common Mistakes When Emptying A Shark Navigator
Many users make small errors that lead to bigger problems down the road. Here are some mistakes to avoid:
- Letting the dust cup overfill. This reduces suction and can damage filters.
- Forgetting to unplug the vacuum. Electrical accidents can happen if you empty a plugged-in vacuum.
- Not closing the bottom lid tightly. Loose lids can cause dust to spill out during use.
- Putting a wet cup back in the vacuum. Moisture causes mold and can damage the motor.
- Ignoring debris stuck in the cup. Shake or tap gently, but never force debris out with sharp objects.
Another frequent mistake is trying to use the vacuum with the dust cup not seated properly. This can create gaps where dust escapes, or even stop the vacuum from working. Always listen for a clear “click” when reattaching the cup.
Non-obvious insight: If you notice a sudden drop in suction, check that the cup is properly installed before assuming there’s a bigger problem. Sometimes, just reseating the cup fixes the issue.
What To Do If The Dust Cup Is Stuck
Sometimes, the dust cup won’t come off easily. This can happen if dirt or hair is jamming the release mechanism, or if the cup hasn’t been removed in a long time.
- Check for visible blockages near the release latch.
- Gently wiggle the cup while pressing the release button.
- If it’s still stuck, lay the vacuum flat and try again.
- Never use tools or force, as this can break the plastic parts.
If the cup remains stuck after several tries, contact Shark customer support for advice.
For extra prevention, make a habit of cleaning around the release latch every few weeks. Hair and dust buildup can sneak into small crevices, making the cup harder to remove over time.
Dealing With Odors Or Mold
If you notice a bad smell or see black spots in the dust cup, you may have mold. This happens if you vacuum up wet debris or put the cup back before it’s dry.
To fix this:
- Remove the dust cup and wash it with warm, soapy water.
- Let it dry in sunlight if possible, as sunlight kills mold spores.
- Replace the cup only when completely dry.
For stubborn smells, use a mix of baking soda and water to clean, then rinse thoroughly.
Sometimes, smells can also come from what’s vacuumed—pet fur, food crumbs, or even spilled drinks. If you know you’ve vacuumed something damp, wash the cup and filters right away.
Non-obvious tip: Never vacuum up wet spills or liquids with your Shark Navigator. It’s designed for dry debris only.
If odors remain after cleaning, check the filters too. They can hold onto smells even when the dust cup is clean.
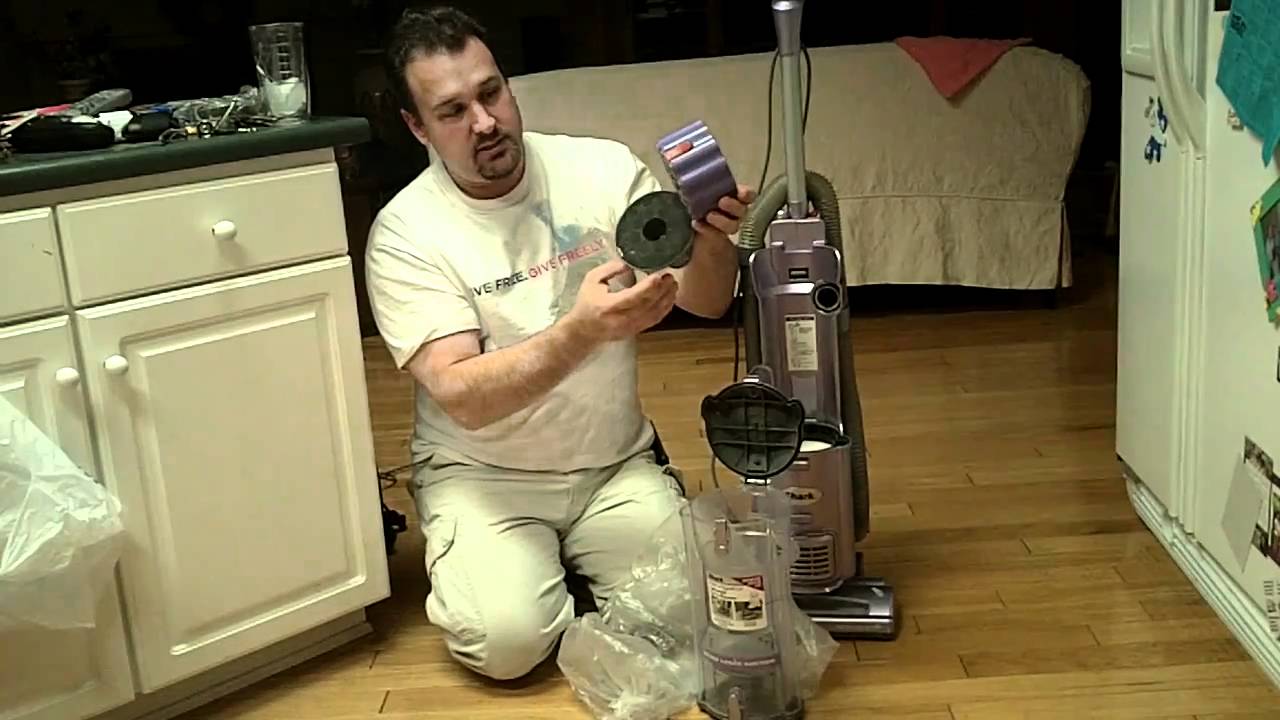
How To Maintain Other Parts While Emptying
While you have the dust cup out, it’s a good time to check other parts of your vacuum. Here’s what to look for:
- Filters: Most Shark Navigators have foam and felt filters under the dust cup. Tap these gently to remove dust, and wash with water if needed.
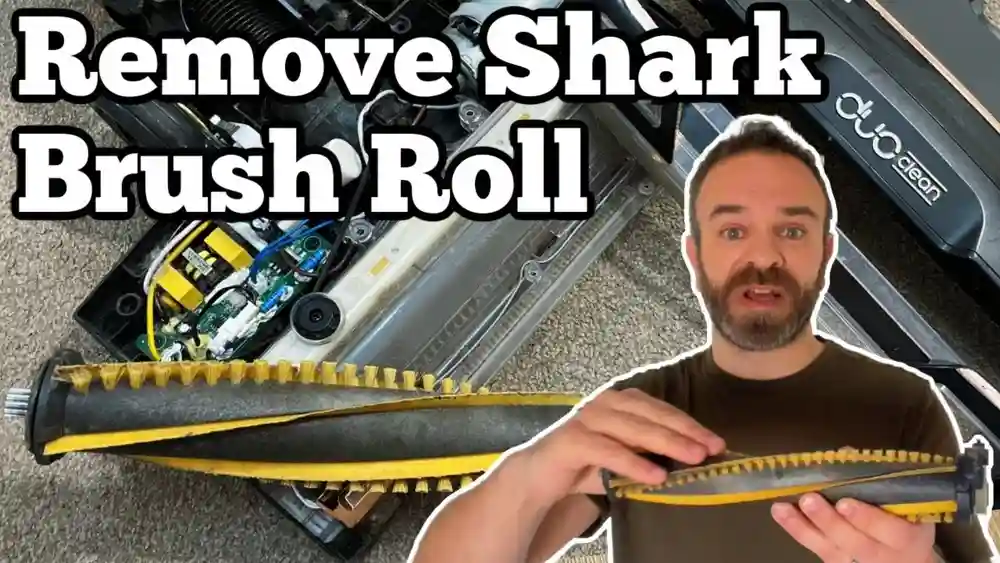
- Brushroll: Check for hair or strings wrapped around the brushroll. Cut them off carefully with scissors.
- Hoses and tubes: Look for clogs or blockages and clear them gently.
Regular checks keep your vacuum running smoothly and prevent bigger problems.
When cleaning filters, always let them dry completely before putting them back. Damp filters can ruin your vacuum’s motor or make dust stick to the inside.
Extra tip: Every few months, do a full checkup of all moving parts, especially if you notice changes in noise, smell, or suction.
Differences Between Shark Navigator And Other Models
The emptying process on a Shark Navigator is easier than many other brands. Some vacuums use bags, which are messier and more expensive to replace. Others have hard-to-remove cups or complicated latches.
Here’s a quick comparison:
| Vacuum Type | Emptying Process | Ease of Maintenance |
|---|---|---|
| Shark Navigator | One-touch release, bottom lid opens | Easy |
| Bagged upright | Remove and discard bag | Medium (messy, recurring cost) |
| Other bagless | Twist-off cup, may spill dust | Varies |
The Shark Navigator’s simple design makes maintenance quick and keeps your hands cleaner.
Some other brands require you to reach inside the cup to remove debris, which can be unpleasant and unhygienic. Shark’s bottom-lid design lets debris fall straight into the bin, minimizing contact with dust.
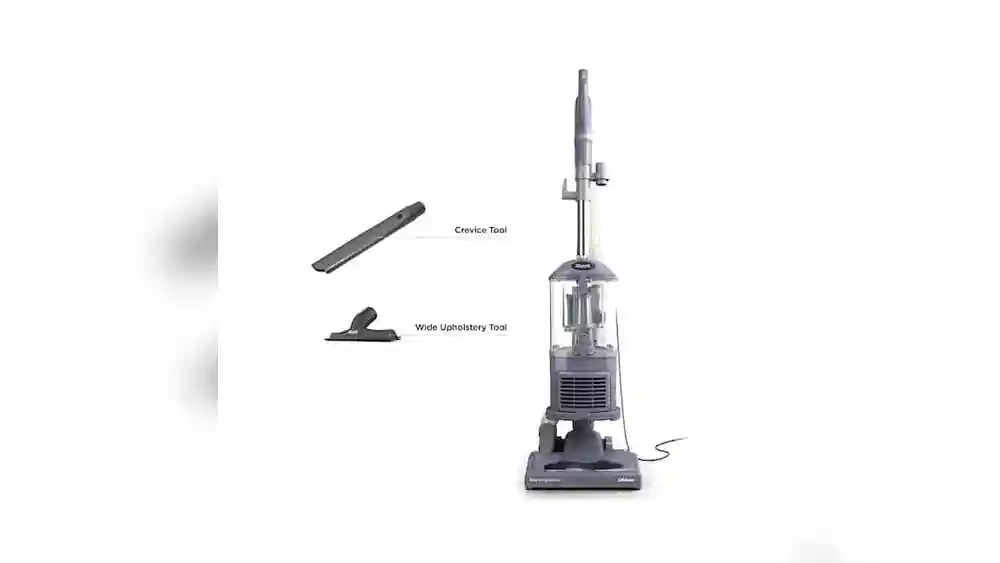
Useful Accessories For Easier Emptying
Some accessories can make emptying and cleaning your vacuum even simpler:
- Dust masks: For allergy sufferers, a mask prevents inhaling dust.
- Cleaning brushes: Soft brushes help remove stubborn debris from the cup and filters.
- Vacuum bags: Large bags can be used to empty the dust cup inside, trapping dust and allergens.
A small handheld vacuum can help clean inside the cup or around the release latches. For those who empty their vacuum outside, a small portable table or tray can keep the dust cup off the ground while you clean.
Extra tip: If you regularly deal with pet hair, consider a pair of rubber gloves. Rubbing the inside of the dust cup with a gloved hand can help pull out hair that sticks to the plastic.
Investing in these small items can make the emptying process faster and healthier.
Credit: discover.hubpages.com
How To Dispose Of Vacuumed Dirt Properly
Most dirt and dust from your vacuum can go straight into the household trash. However, if you vacuum up sharp objects, glass, or hazardous materials (like lead paint dust), handle them with care and follow your local disposal rules.
Tip: Seal the trash bag tightly after emptying the vacuum, especially if you have pets or young children.
If you vacuum up things like pet hair or food crumbs, consider using a double-bag system for your trash can. This contains odors and prevents insects from being attracted to your garbage. For people who compost, never add vacuumed dirt to your compost pile, as it may contain hair, synthetic fibers, or other non-biodegradable items.
Signs Your Dust Cup Needs Replacement
The dust cup is made from strong plastic, but it can crack or wear out over time. Replace the dust cup if you see:
- Cracks or holes
- Lids that won’t close tightly
- Warped or bent plastic
- Persistent bad smells even after cleaning
Replacement cups are available from Shark or authorized retailers.
If you notice the dust cup doesn’t fit as snugly as it used to, or it falls off during use, check for broken clips or worn-out seals. Using a damaged dust cup can reduce your vacuum’s performance and even allow dust to leak back into your home.
How To Teach Others In Your Home To Empty The Vacuum
If you share your home with family or roommates, it’s smart to show them how to empty the vacuum correctly. Walk them through the process the first time, and explain why each step matters.
For children, supervise closely and remind them to wash their hands after handling the dust cup.
Simple tip: Stick a reminder note on the vacuum about when to empty the cup, especially in busy households.
Another helpful idea is to set a regular cleaning schedule that everyone in the home can see. Whether it’s a calendar on the fridge or a shared phone reminder, this keeps everyone on the same page and prevents the vacuum from being forgotten until it’s too full.
Troubleshooting: If Your Shark Navigator Loses Suction After Emptying
Sometimes, after emptying and cleaning, your Shark Navigator may still have weak suction. Try these steps:
- Check if the dust cup is seated properly. Remove and reattach if needed.
- Inspect filters for clogs and clean as directed in the manual.
- Look for blockages in the hose or brushroll area.
- Test with a small amount of debris to see if suction improves.
If the problem continues, contact customer support or visit Shark’s official support page.
Occasionally, suction problems happen because the filters are wet or not installed correctly after cleaning. Double-check that every part is dry and in place. If you’ve cleaned every part and still have issues, there may be a deeper mechanical problem, and professional help will save time.
The Environmental Impact Of Regular Emptying
Emptying your vacuum on time doesn’t just keep your home clean—it also helps the environment. A well-maintained vacuum uses less energy because it doesn’t have to work harder to pick up dirt. This means lower electricity bills and a smaller carbon footprint.
When you clean the dust cup and filters regularly, you also extend the life of your vacuum, reducing waste in landfills.
Another benefit is that cleaner vacuums release fewer particles back into the air. This improves indoor air quality, which is especially important for children, the elderly, and anyone with allergies or asthma. By caring for your vacuum, you’re helping everyone in your home breathe easier.
Frequently Asked Questions
How Often Should I Empty The Dust Cup On My Shark Navigator?
For best results, empty the dust cup every time debris reaches the Max Fill line, or after every large cleaning session. If you have pets or allergies, empty it after each use.
Can I Wash The Dust Cup With Soap?
Yes, you can wash the dust cup with mild soap and warm water. Make sure to rinse thoroughly and let it dry completely before reattaching to avoid mold or motor damage.
What Should I Do If The Dust Cup Lid Won’t Open?
If the lid is stuck, check for debris blocking the latch. Tap gently to loosen, but never force it open. If it still won’t open, contact Shark support for assistance.
Is It Safe To Vacuum Liquids Or Wet Dirt?
No. The Shark Navigator is designed for dry debris only. Vacuuming liquids or wet dirt can cause mold, odors, and damage the motor.
My Shark Navigator Still Smells Bad After Cleaning. What Can I Do?
Try cleaning the dust cup with a baking soda solution, then rinse and let it dry in sunlight. Also, check and clean the filters. Persistent odors may mean the cup or filters need replacing.
Taking care of your Shark Vacuum Navigator by emptying and cleaning it regularly is simple, but it makes a big difference. By following these steps, your vacuum will clean better, last longer, and keep your home fresher. For more in-depth maintenance tips, always check your model’s user manual or visit Shark’s official website. With good habits, you’ll enjoy cleaner floors and healthier air every day.