A Shark robot vacuum can make life easier—until you see a "Drive Wheel Error" message. This error can bring cleaning to a stop and leave you frustrated. But don't worry. With the right steps, you can fix this problem at home, often without calling customer service.
This guide will show you how to solve the drive wheel error, explain why it happens, and give tips to prevent it in the future. Even if you're new to robot vacuums, you’ll find clear instructions and practical advice here.
What Is The Shark Robot Vacuum Drive Wheel Error?
The drive wheel error usually appears when your Shark robot vacuum detects a problem with one or both of its main wheels. Your robot needs these wheels to move, turn, and clean. If something blocks the wheels, or if the sensors or motors fail, the robot will stop and show an error.
This error can show up as a message on the vacuum, in the app, or as blinking lights. The most common signs are:
- "Drive Wheel Error" message
- The vacuum stops moving or spins in circles
- A series of beeps or flashing lights
Why does this error happen? Here are the main reasons:
- Debris stuck in the wheels
- Hair wrapped around the wheel axles
- Faulty or dirty sensors
- Problems with the wheel motor
- Wheel alignment issues
Fixing this issue is important. If you ignore it, your robot vacuum can't clean, and you risk damaging its parts over time.
Safety First: Preparing To Fix Your Shark Robot Vacuum
Before you start repairs, follow these safety steps:
- Turn off the robot. Press the power button and make sure it’s off.
- Unplug from charging base. If the robot is charging, remove it from the base.
- Flip the robot over. Place it on a soft towel to avoid scratches.
- Remove the dustbin. This makes the vacuum lighter and easier to handle.
Never work on the vacuum while it’s powered on. This keeps you safe and protects the vacuum’s electronics.
Quick Diagnosis: Is It A Simple Or Complex Problem?
Not all drive wheel errors are the same. Some are easy to fix, while others need more work. Start by looking for these quick clues:
- Is there visible debris or hair tangled around the wheels?
- Do the wheels move freely when you spin them by hand?
- Are the wheels uneven or sitting at an odd angle?
- Does the error return after you clean the wheels?
If you notice obvious blockages or tangles, a simple cleaning may be enough. If not, you may need to look deeper.
Common Causes Of Drive Wheel Error And How To Fix Each One
Let’s break down the most common reasons for the drive wheel error and explain how to fix them. Follow these steps in order for the best results.
1. Remove Tangled Hair And Debris
Hair and dust can wrap around the wheel axles, stopping them from turning.
How to fix:
- Flip the vacuum and locate the main drive wheels (usually two large wheels on the sides).
- Look for hair or threads wrapped around the axles.
- Use tweezers or small scissors to cut and pull out tangles.
- Spin the wheels by hand to check for smooth movement.
Tip: Even a small amount of hair can cause the error. Check carefully, especially if you have pets.
2. Clean The Wheel Wells
Dirt and crumbs can build up inside the wheel wells (the area around each wheel).
How to fix:
- Use a small brush or compressed air to clean out dirt and dust.
- Wipe the area with a dry cloth.
- Avoid using water, which can damage sensors or electronics.
Non-obvious insight: Dirt inside the wheel wells can block the sensors, not just the wheels. Always clean the area around the wheels, not just the wheels themselves.
3. Check For Stuck Objects
Small toys, stones, or plastic parts can get stuck under the robot and jam a wheel.
How to fix:
- Inspect under and around each wheel.
- Remove any foreign objects you find.
- Test wheel movement by hand after clearing objects.
4. Test The Wheel Movement
After cleaning, check if the wheels move freely.
- Spin each wheel forward and backward.
- They should move smoothly without resistance or grinding.
- If a wheel feels stuck, repeat cleaning or check for hidden debris.
Pro tip: If the wheel feels “bumpy” or has dead spots, internal gears could be dirty or worn.
5. Clean Or Reset The Wheel Sensors
Shark robot vacuums use optical or magnetic sensors to track wheel movement. If these get dirty, the robot thinks the wheel is jammed.
How to clean:
- Find the sensor area near each wheel. This is often a small window or slot.
- Use a cotton swab or soft brush to clear dust.
- Some models let you remove the wheel for better access. Check your manual.
If cleaning does not work:
- Try a reset by turning off the robot, waiting 1 minute, then restarting.
Non-obvious insight: Sensor issues can cause drive wheel errors even when the wheels look clean. Always check the sensor windows.
6. Check For Wheel Motor Problems
If the wheels are clean but still don’t move, the wheel motor could be faulty.
How to test:
- Power on the vacuum and start a cleaning cycle.
- Watch the wheels—do they try to spin but fail?
- Listen for clicking or grinding noises.
If you suspect a motor issue:
- Replacement motors are available, but installing them requires opening the robot. If you’re not comfortable, contact Shark support.
7. Wheel Alignment Issues
Sometimes, the wheels become misaligned after hitting furniture or getting stuck.
How to fix:
- Check if the wheels are level and straight.
- Press gently to see if they pop back into place.
- If a wheel is loose or wobbly, a screw may have come undone. Tighten with a small screwdriver.
Warning: Forcing a wheel can break it. Only use gentle pressure.
8. Software Glitches And Firmware Updates
Sometimes, the error is caused by software, not hardware.
Steps:
- Open the SharkClean app.
- Check for firmware updates. If one is available, install it.
- Reset the robot by holding the power button for 10 seconds.
Why this matters: Software bugs can cause false error messages. Keeping the firmware updated prevents many issues.
9. Try A Full System Reset
If cleaning and updates do not help, a full reset can clear stubborn errors.
How to reset:
- Turn off the vacuum.
- Hold the reset button (often a pinhole button) for 10-15 seconds.
- Wait for the robot to reboot.
Note: A full reset may erase Wi-Fi and schedule settings. You’ll need to set these up again.
10. When To Call Shark Support
If you’ve tried all these steps and the error still appears, the problem may be internal—like a broken wire, bad circuit board, or dead sensor.
What to do:
- Gather your robot’s model number and purchase details.
- Contact Shark support with a description of your problem and what you’ve tried.
- If your vacuum is still under warranty, repairs or replacements may be free.
Practical tip: Take photos of the error message and any obvious damage. This helps support diagnose the problem faster.

Credit: us.narwal.com
How To Prevent Drive Wheel Errors In The Future
Fixing a drive wheel error is good, but preventing it saves you time and effort. Here’s how to keep your Shark robot vacuum running smoothly:
Regular Maintenance Schedule
Set a cleaning routine for your vacuum’s wheels and sensors.
- Clean wheels and wheel wells every week.
- Remove hair and threads from axles.
- Wipe sensors with a dry cloth.
Keep Floors Clutter-free
Pick up small objects, toys, and cords before running your robot. This reduces the risk of jams.
Avoid Overloading The Dustbin
A full dustbin can spill debris into the wheels or sensors. Empty the bin after each cleaning.
Use The Robot On Suitable Surfaces
Shark robot vacuums work best on hard floors and low-pile carpets. Thick rugs or uneven surfaces can stress the wheels and cause errors.
Update The Software Regularly
Check for firmware updates in the app every month. Updates often fix bugs and improve performance.
Store The Robot Properly
When not in use, keep the vacuum on its charging base in a clean, dry area. Avoid damp locations, which can lead to corrosion or sensor issues.
Comparing Shark Robot Models: Which Are Most Prone To Drive Wheel Errors?
Some Shark robot vacuum models experience drive wheel errors more often than others. Here’s a quick comparison:
| Model | Wheel Error Frequency | Key Features |
|---|---|---|
| Shark IQ Robot | Medium | Self-empty base, mapping |
| Shark ION Robot | High | Basic navigation, budget-friendly |
| Shark AI Ultra | Low | AI navigation, better sensors |
Insight: Models with advanced sensors and navigation (like the AI Ultra) are less likely to have drive wheel errors, since they avoid obstacles better and self-correct more often.
Essential Tools For Fixing Shark Robot Drive Wheel Error
Having the right tools makes fixing your robot vacuum easier and safer. Here’s what you should have:
- Tweezers: For pulling out hair and threads.
- Small screwdriver set: For tightening screws or removing wheels.
- Soft brush: For cleaning dust and debris.
- Compressed air: For blowing out hard-to-reach dirt.
- Cotton swabs: For cleaning sensor windows.
- Phone flashlight: Helps you see small objects or dirt.
- User manual: Always useful for model-specific instructions.
Most of these tools are already in your home or can be bought cheaply.
How Much Does It Cost To Fix Drive Wheel Errors?
The cost to fix a Shark robot vacuum drive wheel error depends on the cause.
| Problem Type | DIY Cost | Professional Cost |
|---|---|---|
| Debris/Hair Removal | $0 (just time and tools) | $50–$100 (service fee) |
| Wheel Motor Replacement | $15–$40 (parts only) | $80–$150 (parts & labor) |
| Sensor Repair | $0–$10 (cleaning supplies) | $75–$120 |
Tip: Most issues are minor and can be fixed at home for free, but motor or sensor problems may need professional help.
Wheel Error Vs. Other Common Shark Robot Errors
It’s easy to confuse the drive wheel error with other common robot vacuum errors. Here’s how they compare:
| Error Message | Main Cause | Fix Method |
|---|---|---|
| Drive Wheel Error | Blocked wheel or sensor | Clean wheels, remove debris, check sensors |
| Side Brush Error | Hair tangled in side brush | Remove and clean side brush |
| Cliff Sensor Error | Dirty cliff sensors | Wipe sensors under robot |
| Bin Full Error | Full or clogged dustbin | Empty and clean dustbin |
Knowing which error you’re dealing with saves time and prevents the wrong fix.
When A Diy Fix Is Not Recommended
Most drive wheel errors are safe to fix at home. However, there are times when you should not attempt a repair yourself:
- The vacuum is under warranty. DIY repairs can void your warranty.
- You see sparks, smoke, or smell burning. Electrical issues are dangerous.
- The error happened after the robot fell down stairs or got wet.
- You are not comfortable opening electronics.
In these cases, contact Shark customer service or visit an authorized repair center.

Credit: www.reddit.com
Real-world Examples: Fixing The Drive Wheel Error
Let’s look at two real-life cases to show how these steps work.
Case 1: Pet Hair Jam
Anna’s Shark ION kept stopping with a drive wheel error. She noticed her dog’s long hair was wrapped around the left wheel. Using tweezers and scissors, she removed the hair, cleaned the wheel well, and wiped the sensor window. After restarting, the vacuum worked perfectly.
Case 2: Sensor Blocked by Dust
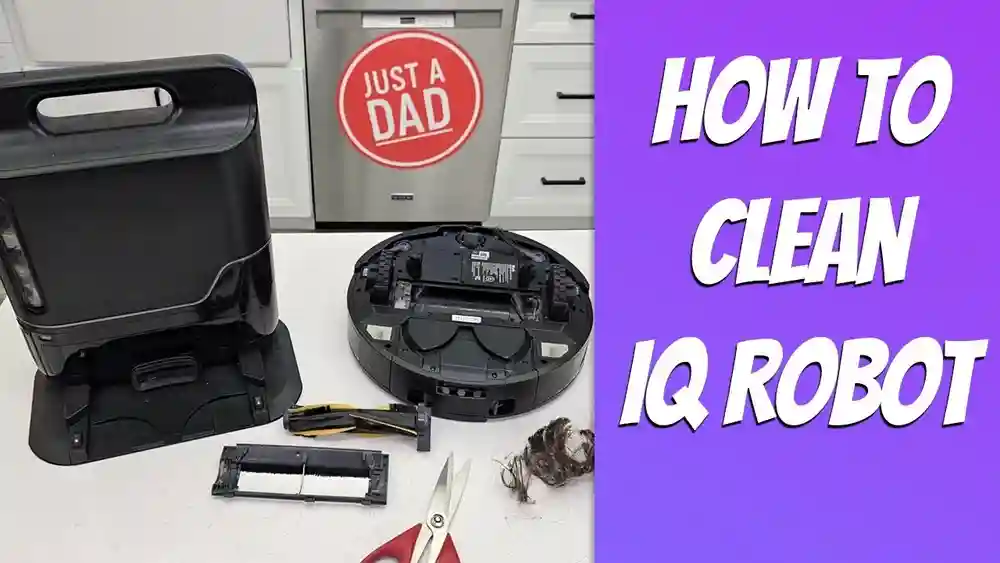
Mark’s Shark IQ Robot kept showing errors, even with clean wheels. He found a layer of fine dust blocking the optical sensor near the right wheel. Cleaning it with a cotton swab fixed the problem.
What beginners miss: Many new users focus only on visible debris and forget about cleaning the tiny sensors. Always check both.
Extra Tips For Shark Robot Owners
- Label your cleaning tools. Keep tweezers and brushes in a small box so you can find them quickly.
- Use a flashlight. Good lighting helps you spot hidden debris or tangled hair.
- Take photos before and after. It helps you remember how parts fit if you remove any wheels.
- Check for recalls or common issues. Sometimes, a model has a known defect. Search the Shark website or Consumer Reports for updates.

Credit: www.youtube.com
Frequently Asked Questions
Why Does My Shark Robot Keep Saying Drive Wheel Error?
The most common reason is hair or debris blocking the main wheels or their sensors. Less often, it can be due to a faulty wheel motor or a software bug. Clean the wheels, check for updates, and reset the robot.
Can I Fix A Drive Wheel Error Without Opening My Shark Robot?
Yes. Most drive wheel errors are caused by external blockages like hair or dirt, which you can remove without opening the vacuum. Only open the robot if you suspect a deeper problem and feel confident.
How Often Should I Clean The Wheels To Prevent Errors?
Clean the wheels and sensor windows once a week if you use the robot daily, or every two weeks for less frequent use. If you have pets, you may need to clean more often.
What If My Shark Robot Vacuum Is Still Under Warranty?
If your vacuum is under warranty, contact Shark support before trying any complex repair. DIY repairs can void your warranty. Cleaning the wheels and sensors is safe, but do not open the robot.
Is The Drive Wheel Error Dangerous For My Robot?
Ignoring the error can cause more damage over time, like burning out the wheel motor or damaging the sensors. Fix the problem as soon as you see the error to protect your vacuum.
A Shark robot vacuum is a helpful tool, but it needs regular care to work its best. By following these steps, you can fix most drive wheel errors at home and avoid expensive repairs. Remember to keep your robot clean, check for software updates, and avoid clutter on your floors.
With a little effort, your Shark vacuum will keep your home tidy for years.