Adding a new WiFi network to your Shark robot vacuum might sound simple, but many people run into problems or miss important steps. WiFi is essential for your Shark robot to access features like scheduling, voice commands, and remote control.
If you get stuck or use the wrong method, your robot won’t connect, and you’ll miss out on smart features. This guide will walk you through everything you need to know, from understanding WiFi requirements to troubleshooting advanced problems. Along the way, you’ll learn tips that even experienced users often overlook.
Whether you’re setting up your Shark robot for the first time or switching to a new router, you’ll find clear, step-by-step advice here.
Why Wifi Matters For Your Shark Robot
A Shark robot vacuum with WiFi can do much more than just clean floors. Connecting to WiFi unlocks remote control from your phone, integration with smart speakers, and automatic software updates. You can check cleaning history, set schedules, and even get alerts when the robot is stuck. If you skip WiFi setup, you lose most of these benefits.
Many people buy a smart robot but never use its full power because they skip WiFi setup or struggle to connect. Also, if your home WiFi changes, your robot won’t work until you update the connection.
Understanding Shark Robot Wifi Requirements
Before you start, it’s important to know what your Shark robot needs to connect to WiFi. Not all WiFi networks work, and sometimes the robot can’t “see” your network at all.
Supported Wifi Standards
Most Shark robots connect only to 2.4 GHz WiFi networks. They do not support 5 GHz networks. This is a common reason for connection failures. If your router broadcasts both 2.4 GHz and 5 GHz, make sure you connect to the 2.4 GHz network.
Passwords And Security
Your WiFi should use WPA2 or WPA3 security. Open networks (no password) or very old security types may not work. Your WiFi password should not have special symbols like %, $, or #, as some Shark robots struggle with these.
Network Name (ssid)
Keep your WiFi name (SSID) simple. Long or complex names can confuse the robot. If you have spaces or special symbols in your SSID, consider changing it before connecting the robot.
Internet Access
Your WiFi must have a working internet connection. The robot needs to reach Shark’s servers for setup and updates.
Device Compatibility Table
Here’s a quick reference for what WiFi features different Shark robots support:
| Model | 2.4 GHz | 5 GHz | WPA2 | WPA3 |
|---|---|---|---|---|
| Shark IQ R101AE | Yes | No | Yes | No |
| Shark AI Ultra | Yes | No | Yes | Yes |
| Shark ION Robot 750 | Yes | No | Yes | No |
Many users miss that most Shark robots do not support 5 GHz WiFi. This causes failed setups when people try to use a modern “smart” router that combines both bands.

Credit: www.reddit.com
Preparing To Add A New Wifi Network
A smooth setup starts with good preparation. Missing any detail here often leads to frustration later.
- Check Your WiFi Signal: Place your phone near the robot’s docking station and see if you have a strong signal. If your phone shows only one bar, your robot may fail to connect or disconnect often.
- Find Your WiFi Name and Password: Write them down exactly as they appear. Double-check for uppercase and lowercase letters.
- Update the Shark App: Go to the App Store or Google Play and update the SharkClean app. Many connection problems are fixed in app updates.
- Charge Your Shark Robot: Make sure the robot is on its dock and fully charged. Low battery can interrupt setup.
- Restart Your Router: Power cycling your router can fix invisible problems. Unplug it for 30 seconds, then plug it back in.
Advanced tip: If your router has “band steering,” temporarily split your network into separate 2.4 GHz and 5 GHz networks. This makes the process smoother.
Step-by-step Guide: Adding A New Wifi Network
Let’s go through the process in detail. Each step matters, so don’t rush.
1. Open The Sharkclean App
Download and open the SharkClean app on your phone. Log in with your Shark account. If you don’t have one, sign up using your email.
2. Put The Robot In Pairing Mode
Most Shark robots have a “Dock” and “Clean” button. To enter pairing mode:
- Press and hold both buttons at the same time for about 5-10 seconds.
- The WiFi light on the robot should start blinking. This means it’s ready to connect.
If your model is different, check the user manual or the Shark support site for the correct button combination.
3. Start Wifi Setup In The App
- In the app, tap the “+” or “Add Robot” button.
- Select your robot model from the list.
- Follow the on-screen instructions.
The app will ask you to confirm the robot is in pairing mode. The blinking WiFi light means you’re ready.
4. Connect To The Robot’s Temporary Wifi
Some models ask you to join the robot’s own WiFi network for setup. This network usually looks like “Shark_Robot_xxxx”.
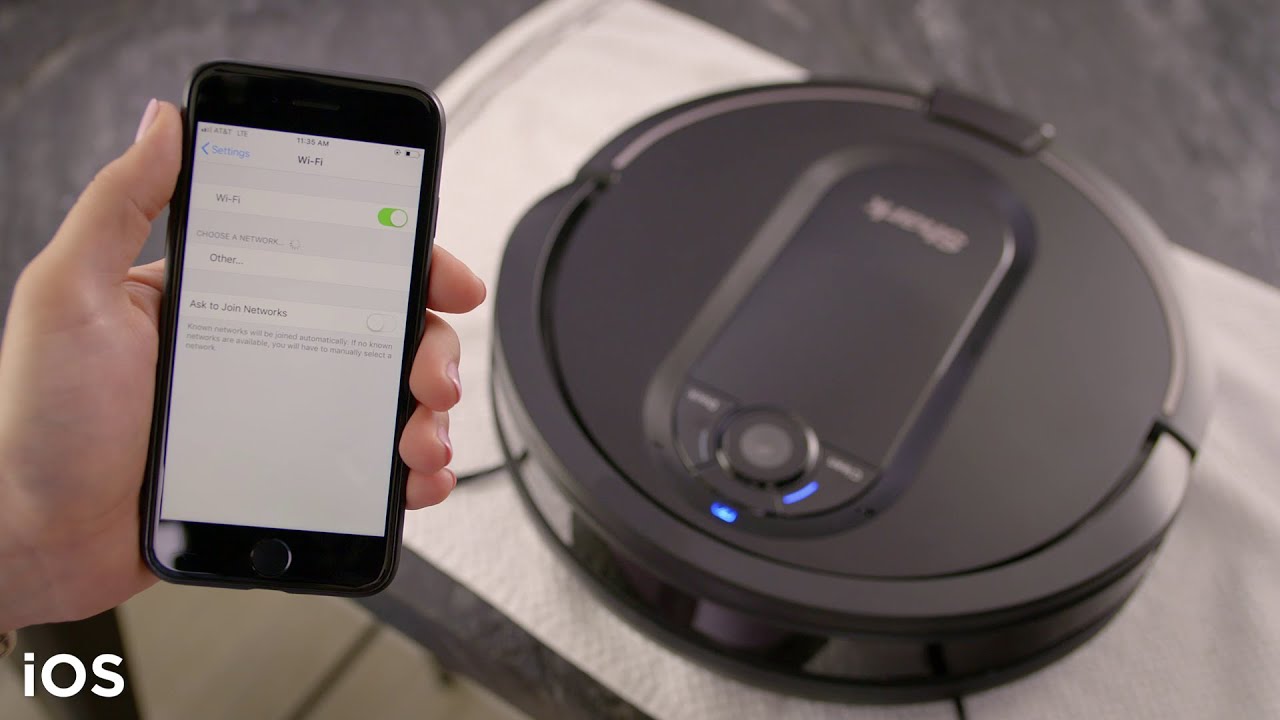
- Open your phone’s WiFi settings.
- Choose the Shark robot’s network.
- Return to the SharkClean app.
Not all models need this step, but if the app asks, follow it.
5. Enter Your Home Wifi Details
The app will prompt you to pick your home WiFi network and enter the password. Type carefully. Most failed setups are caused by a typo here.
- Make sure you select the 2.4 GHz network if you have more than one.
6. Complete The Setup
The robot will now try to connect to your WiFi. This can take up to 2 minutes. Do not close the app or move your phone too far from the robot.
- When successful, the app will say “Connected” and the robot’s WiFi light will turn solid (not blinking).
If it fails, the app will usually give you a reason or a code. Don’t panic—troubleshooting comes next.
Switching Shark Robot To A Different Wifi Network
Sometimes you need to move your Shark robot to a new network—maybe you got a new router, changed your WiFi name, or moved to a new home. The process is similar to the first setup but with a few extra steps.
- Delete the Old Network from the App: In the SharkClean app, find your robot and look for network settings. Tap “Remove” or “Forget network.”
- Factory Reset the Robot: Press and hold the “Dock” and “Clean” buttons for 15 seconds. The robot will play a sound or the lights will blink to show it is resetting.
- Repeat the Setup Steps: Go through the pairing and WiFi connection process as above, but enter your new WiFi details.
Important: Factory reset erases schedules and maps. If you want to keep your maps, try just updating the WiFi in the app first. Some newer models let you change WiFi without full reset.
Common Problems And How To Fix Them
Even if you follow every step, sometimes things don’t work. Here are common issues and real solutions.
The Robot Can’t Find My Wifi Network
- Check 2.4 GHz: Your robot cannot see 5 GHz networks. Make sure your phone is connected to 2.4 GHz during setup.
- SSID Hidden: If you hide your WiFi name, the robot cannot find it. Unhide your SSID during setup.
- Signal Too Weak: Move the robot and docking station closer to the router.
Incorrect Password Error
- Double-check your password: One wrong letter or extra space will fail.
- Special Characters: Avoid using symbols like %, &, or * in your WiFi password.
The App Freezes During Setup
- Update the app: Old versions can have bugs.
- Close and reopen: Force close the app and try again.
- Restart phone: Sometimes your phone’s WiFi gets stuck.
The Wifi Light Keeps Blinking
- Connection not finished: Wait up to 2 minutes.
- Try again: Reset the robot and repeat the steps.
- Factory Reset: As a last resort, reset the robot and start over.
Advanced Troubleshooting Table
If you have persistent issues, compare possible causes and solutions:
| Problem | Possible Cause | Solution |
|---|---|---|
| Robot not found in app | Robot not in pairing mode | Hold Dock + Clean until WiFi blinks |
| Setup fails at 99% | Router blocking device | Check router firewall or parental controls |
| WiFi disconnects often | Weak signal or interference | Move router closer or use WiFi extender |
Tips For A Stable Wifi Connection
A good connection means fewer headaches later. Here are some non-obvious tips:
- Place the docking station in an open area. Walls and metal objects can block WiFi.
- Update your router firmware. Old firmware can cause random disconnects.
- Limit interference. Keep the robot away from microwave ovens, cordless phones, and baby monitors.
- Use a guest network. Some routers let you create a separate network for smart devices. This keeps your main devices safer and avoids conflicts.
- Reserve an IP address. In your router settings, you can “reserve” an IP for your Shark robot. This prevents it from getting kicked off the network.
Many users forget that router settings matter. If you have a smart home, set aside 2.4 GHz just for devices like your Shark robot.
What To Do If You Move Or Change Internet Provider
Moving to a new home or changing your ISP means you’ll have a new WiFi name and password. Your Shark robot will lose connection and won’t work until you update its settings.
- Bring Your Robot and Dock: Set them up near your new router.
- Install the SharkClean App on Your New Phone (if needed): Log in with your Shark account.
- Reset WiFi Settings: Use the Dock + Clean button method to reset pairing.
- Follow the Full WiFi Setup Steps: As covered earlier.
Extra tip: If you have a floor map or cleaning schedule you want to keep, check if your model lets you update WiFi without full reset. This feature is available on some newer models.
How Wifi Affects Your Shark Robot’s Features
Without WiFi, your Shark robot will only do basic cleaning. Here’s a look at what you gain when you connect to WiFi:
| Feature | With WiFi | Without WiFi |
|---|---|---|
| Remote Start/Stop | Yes | No |
| Schedule Cleaning | Yes (app) | Sometimes (manual) |
| Smart Maps | Yes | No |
| Voice Control (Alexa/Google) | Yes | No |
| Software Updates | Yes | No |
| Error Alerts | Yes | No |
Connecting your Shark robot to WiFi unlocks features that make cleaning automatic and much more convenient.
Advanced Router Settings And Shark Robot
If you’re comfortable with your router’s control panel, you can make changes to improve Shark robot connectivity.
Band Steering
Many modern routers try to combine 2. 4 GHz and 5 GHz into one network name. This is called “band steering. ” However, your Shark robot will only work with 2. 4 GHz. If you run into problems, split your WiFi into two network names—one for each band—during setup.
Channel Selection
If your neighborhood has many WiFi networks, interference can cause drops. Change your 2. 4 GHz channel to 1, 6, or 11 in your router settings for best performance.
Mac Address Filtering
Some routers only allow known devices to connect. If your robot can’t connect, turn off MAC filtering, or add your robot’s MAC address to the allowed list. You can usually find the MAC address on a sticker under the robot or in the app.
Guest Network Setup
Creating a guest network just for smart devices can make your whole network more stable. Devices like Shark robots don’t need access to your personal files, so this also adds security.
Updating The Shark Robot’s Software
Software updates add new features and fix bugs. Most Shark robots update automatically over WiFi, but only when connected.
- In the SharkClean app, check for a “Software Update” section.
- If an update is available, start it when your robot is on the dock.
- Do not unplug or move the robot during the update.
Some advanced users set their robot to update only at night to avoid interruptions.
Using Voice Assistants With Shark Robot
Once your Shark robot is on WiFi, you can use Amazon Alexa or Google Assistant for hands-free control.
- In the SharkClean app, look for “Voice Assistant” setup.
- Link your Shark account with Alexa or Google Home.
- You can now say things like, “Alexa, ask Shark to start cleaning.”
If you change WiFi, you may need to re-link your robot in your voice assistant’s app.
Saving Time: Pro Tips For Fast Wifi Setup
If you want to finish setup quickly and avoid mistakes, keep these suggestions in mind:
- Write down your WiFi password ahead of time. Typos are the most common cause of failure.
- Use a simple SSID during setup. If your network name is long or complex, temporarily change it.
- Connect your phone to the same WiFi. If your phone is on a different network, setup may fail.
- Update both the app and your phone OS. Outdated software can block the process.
- Place the robot and phone near the router. A strong signal means faster, more reliable setup.
When To Contact Shark Support
If you’ve tried everything and your Shark robot still won’t connect, it’s time to call in the experts.
- Gather your robot model number, serial number, and app version.
- Describe the problem clearly. Note any error messages or codes.
- Contact Shark customer support via their official website or phone number.
Many issues can be solved with a firmware update or a replacement part, so don’t get discouraged.
Credit: kismac-ng.org
The Most Common Mistakes People Make
Learning from others can save you hours of frustration. Here are common errors and how to avoid them:
- Trying to use 5 GHz WiFi: Shark robots only support 2.4 GHz.
- Entering the wrong password: Double-check, especially on phones with auto-correct.
- Robot not in pairing mode: Hold the correct buttons until the WiFi light blinks.
- Outdated app: Always update the SharkClean app before starting.
- Poor WiFi signal: Place the robot close to the router during setup.
- Hidden SSID: Unhide your network during setup.
- Special characters in SSID or password: Use only letters and numbers if possible.
- Not resetting after router change: Always reset pairing when you get a new router.
Real-world Examples: Successful Shark Robot Wifi Setups
Let’s look at two real situations where users successfully added new WiFi to their Shark robot.
Case 1: New Router, Old Robot
Jessica upgraded her home internet. Her new router only offered a combined 2. 4/5 GHz network. Her Shark IQ robot couldn’t connect. She split her network into two names—one for 2. 4 GHz, one for 5 GHz. After that, the robot appeared in the app and connected within minutes.
Case 2: Moving to a New Apartment
Raj moved to a new apartment with a different WiFi setup. He reset his Shark ION robot, entered pairing mode, and followed the SharkClean app’s instructions. He had to re-enter his cleaning schedule, but his robot worked perfectly on the new network.
These examples show that small details—like network bands and app updates—often make the biggest difference.
Keeping Your Shark Robot Secure On Wifi
Security is important for any smart device. Here’s how to keep your Shark robot and your home network safe:
- Use a strong, unique WiFi password. Don’t use default or simple passwords.
- Keep your SharkClean app updated. Updates fix bugs and security holes.
- Update your router firmware. New versions protect against hackers.
- Create a guest network for smart devices. This isolates them from your main devices.
- Don’t share your Shark account password.
If your robot or app ever acts strangely, reset your passwords and check for updates.
Future-proofing: Preparing For Wifi Changes
Technology changes fast. Here’s how to stay ready for future WiFi changes:
- Write down your robot’s model and serial number. You’ll need these for support or upgrades.
- Keep your router’s manual. You may need it to change settings.
- Backup your cleaning maps and schedules in the app if possible.
- Check for app and robot updates regularly. New versions may support more WiFi types in the future.
- Bookmark the Shark support site for quick help.
By preparing ahead, you can avoid problems when you get a new phone, move home, or upgrade your internet.
Credit: www.youtube.com
Frequently Asked Questions
Why Won’t My Shark Robot Connect To My 5 Ghz Wifi?
Most Shark robots only support 2.4 GHz WiFi networks. They cannot detect or connect to 5 GHz networks. Check your router and make sure you have a separate 2.4 GHz network available. If your router combines both bands under one name, split them during setup.
Can I Connect My Shark Robot To A Hidden Wifi Network?
No, Shark robots generally cannot connect to hidden SSIDs. The WiFi network must be broadcasting its name. If your network is hidden, unhide it during setup. Once the robot is connected, you can usually hide the SSID again, but this may cause future issues.
What Should I Do If I Change My Wifi Password?
If you change your WiFi password, your Shark robot will lose connection. Open the SharkClean app, put the robot in pairing mode, and update the WiFi settings with the new password. In most cases, you do not need a full factory reset—just update the network.
How Do I Know If My Shark Robot Is Connected To Wifi?
Check the WiFi light on your robot. A solid (not blinking) light means it is connected. In the SharkClean app, you should see the robot as “Online.” If the light blinks or the app says “Offline,” the robot is not connected.
Where Can I Find More Help For My Shark Robot?
For official guides and support, visit the Shark Clean Support Center. They offer manuals, troubleshooting, and live help.
Getting your Shark robot on WiFi is key to enjoying all its smart features. With careful setup, attention to detail, and the tips above, you can avoid common pitfalls and keep your robot cleaning smarter, not harder.