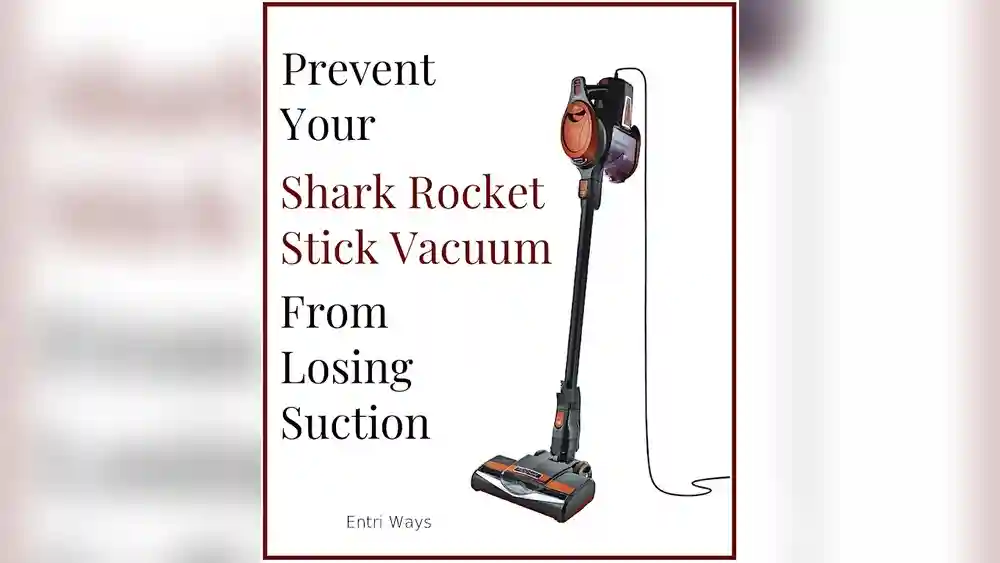
If you own a Shark Rocket vacuum, you probably expect strong suction and easy cleaning. But sometimes, you notice a strange problem: the dust cap is not filling as you vacuum. This can be confusing and frustrating. After all, if the dust cup stays empty, where is all the dirt going? Why is your vacuum not working as it should? Many Shark Rocket owners face this problem at some point, and it can make cleaning your home much harder.
Understanding why the dust cap does not fill is important, not just for getting your vacuum to work, but also for protecting the life of your machine. Ignoring this issue can lead to bigger problems, like overheating, motor damage, or even complete failure of your vacuum. In this article, you’ll find clear explanations, real-world examples, and step-by-step solutions to fix the Shark Rocket vacuum problem: dust cap not filling. You’ll also learn some insights that most beginners miss, and discover how to prevent this from happening in the future.
How The Shark Rocket Vacuum Works
Before we dive into the reasons why the dust cap isn’t filling, it helps to know how the Shark Rocket vacuum is designed to work. This way, you can spot where problems might start.
The Shark Rocket uses a strong motor to create suction. Dirt and dust are picked up from the floor, sucked through the nozzle, and travel up a series of tubes and filters before reaching the dust cap. The dust cap (or dust cup) collects all the dirt until you empty it. Filters along the way keep the air clean and protect the motor.
Here’s a simple breakdown of the path dirt takes:
- Nozzle or brushroll picks up dirt from the floor.
- Suction tube carries the dirt upwards.
- Pre-motor filter traps fine dust before it reaches the motor.
- Dust cap collects the main dirt and debris.
- Post-motor filter cleans the air before it exits the vacuum.
If the dust cap is not filling, something is going wrong along this path. The problem could be a blockage, a leak, or a mechanical fault.
Common Causes: Why The Dust Cap Is Not Filling
Several things can stop the dust cap from filling with dirt. Below are the most common reasons, along with real examples to help you understand each cause.
1. Blocked Air Path
Blockages are the number one cause. If dirt cannot travel freely from the floor to the dust cap, it will get stuck somewhere. This can happen in the floor nozzle, suction tube, or filters.
- Example: You vacuum up a large piece of paper or pet hair, which gets stuck in the tube. Now, dirt cannot pass through, so the dust cap stays empty.
- Signs: You may hear the motor working harder, or suction feels weak.
2. Clogged Filters
Filters are important for clean air, but when they get clogged with dust, they can block airflow. If air cannot pass through the filters, dirt cannot reach the dust cap.
- Example: The pre-motor filter is full of fine dust. Airflow drops, and dust never makes it to the dust cap.
- Signs: The vacuum may sound strained. You may notice dust escaping from other parts.
3. Incorrect Assembly
If you do not put the vacuum back together correctly after cleaning it, the dust cap might not seal. This can create air leaks, so suction is lost before dirt reaches the dust cap.
- Example: After washing the dust cap, you reattach it but do not lock it in place. Air leaks out, and dirt cannot fill the cap.
- Signs: You hear a hissing noise or notice weak suction.
4. Cracked Or Damaged Parts
Cracks in the suction tube, dust cap, or seals can let air escape. Even a small crack can cause a big drop in suction.
- Example: The plastic dust cap has a hairline crack. Air escapes, and dirt never collects inside.
- Signs: You see visible cracks or feel air blowing where it shouldn’t.
5. Overfilled Or Dirty Dust Cap
If the dust cap is already too full, or if dirt is stuck inside, new debris cannot enter. The vacuum may have a built-in shut-off if the cap is overfilled.
- Example: You forget to empty the dust cap for several uses. Now, dirt blocks the entrance, and nothing new gets inside.
- Signs: Dust stays at the nozzle, and the cap looks full but dirt is not moving inside.
6. Worn Or Misplaced Gaskets
Gaskets are soft rubber rings that help seal parts of the vacuum. If a gasket is missing, out of place, or worn out, air leaks can occur.
- Example: After cleaning, the gasket falls off the dust cap. You put it back together but forget the gasket. Now, dirt cannot make it to the dust cap.
- Signs: You may see the gasket loose or missing, and suction feels weak.
7. Motor Or Suction Issues
Rarely, the problem is with the motor itself. If the motor is failing, it cannot create enough suction to move dirt into the dust cap.
- Example: After years of use, the motor gets weak. Suction drops, and the dust cap stays empty.
- Signs: The vacuum sounds quieter than usual, and little or no dirt is collected.
8. Wrong Attachments Or Accessories
Using the wrong nozzle or attachment can sometimes block airflow. Some attachments are not meant for heavy dirt and can clog easily.
- Example: Using a small crevice tool on thick carpet. Dirt gets stuck in the narrow tool, so nothing reaches the dust cap.
- Signs: Attachments feel hard to use, and no dirt moves inside.
9. Internal Hose Detachment
Inside some Shark Rocket models, there’s a hidden hose that connects the base to the dust cap. If this hose comes loose, dirt cannot reach the dust cap.
- Example: After dropping the vacuum, the internal hose disconnects. Now, suction works at the base, but dirt stays stuck.
- Signs: Suction at the base but empty dust cap.
10. Wet Debris Or Sticky Dirt
Vacuuming up wet messes or sticky dirt can cause blockages, or dirt may stick inside tubes and never reach the dust cap.
- Example: Sucking up wet cereal or mud. The mess sticks inside the tube, blocking the way.
- Signs: You see wet dirt near the nozzle, but nothing reaches the cap.
Each of these problems can stop your Shark Rocket from working properly. But don’t worry—most can be fixed at home.
How To Diagnose The Problem
Finding the real cause of the dust cap not filling can be tricky. Here is a practical process to help you check your vacuum, step by step.
Step 1: Visual Inspection
Start by unplugging your vacuum. Look over the whole machine:
- Check the dust cap for visible cracks or damage.
- Look for missing or loose gaskets.
- Inspect the suction tubes for dirt or blockages.
- Check that all parts are attached and locked.
Step 2: Test Suction At Each Point
Turn on the vacuum (without the dust cap attached, if possible), and test suction:
- At the nozzle/floor head
- At the end of the suction tube
- At the dust cap opening
If you feel strong suction at the nozzle but not at the dust cap, the blockage is between these two points.
Step 3: Remove And Check Filters
Take out all filters. Look for heavy dirt or dust buildup. Hold each filter up to a light. If you can’t see light through it, it’s clogged and needs cleaning or replacing.
Step 4: Check For Hidden Blockages
Sometimes, blockages are hidden deep inside tubes or hoses. Use a flashlight to look inside. Gently push a straightened wire hanger or a flexible cleaning brush through the tubes to clear any stuck dirt.
Step 5: Listen For Air Leaks
Turn on the vacuum and listen. If you hear hissing or whistling, air might be leaking from a crack or loose seal.
Step 6: Check Attachments
Try removing all attachments and running the vacuum with only the main nozzle. If the dust cap starts to fill, the problem is likely with one of the attachments.
Step 7: Review Recent Changes
Think back: Did you recently clean or reassemble the vacuum? Did you drop it or hit it against something? Sometimes, problems start after maintenance or accidents.
By following these steps, you can usually find out why the dust cap isn’t filling.
Solutions: How To Fix The Dust Cap Not Filling
Once you’ve found the problem, here’s how to fix it. Each solution matches one of the causes above.
Clearing Blockages
If you find a blockage:
- Unplug the vacuum.
- Remove the nozzle, suction tube, and dust cap.
- Use a flexible brush, wire hanger, or compressed air to push out dirt.
- Check both ends to make sure the path is clear.
Pro tip: Some blockages are deep inside the tube. Try shining a light from one end. If you can’t see the light at the other end, there’s still a blockage.
Cleaning Or Replacing Filters
If filters are clogged:
- Take out all filters (check your manual for their locations).
- Rinse foam or felt filters under lukewarm water. Do not use soap.
- Let filters dry fully for at least 24 hours before putting them back.
- If HEPA filters are dirty, replace them (do not wash unless the manual says it’s safe).
Insight: Many people put wet filters back too soon. This can cause mold or even damage the vacuum. Always wait until they are fully dry.
Reassembling Properly
If you think the problem is from incorrect assembly:
- Remove and reattach the dust cap, making sure it clicks into place.
- Check that all gaskets and seals are present and not pinched or twisted.
- Follow the user manual for proper assembly.
Fixing Cracked Or Damaged Parts
If you find cracks:
- Small cracks in plastic can sometimes be fixed with strong tape as a temporary measure.
- For bigger cracks, order replacement parts from Shark or an authorized dealer.
- Never use glue inside the dust cap, as fumes can be harmful.
Non-obvious tip: Even tiny cracks can cause big problems. Sometimes, you’ll only notice a hairline crack after looking very closely with a flashlight.
Emptying And Cleaning The Dust Cap
If the dust cap is full or dirty:
- Remove the dust cap and empty all debris.
- Wash the dust cap with mild soap and water.
- Let it dry completely before reattaching.
Fixing Gaskets And Seals
If gaskets are missing or out of place:
- Find the correct gasket or order a replacement.
- Make sure the gasket sits flat and covers the entire edge where it’s needed.
- Reassemble carefully, checking for a tight seal.
Expert insight: Gaskets sometimes fall out during cleaning and are easy to overlook. Always double-check after maintenance.
Motor Or Suction Problems
If the motor is weak:
- Try all above fixes first (most problems are not the motor).
- If suction is still weak, the motor may need professional repair.
- Contact Shark customer service or a local repair shop.
Using The Right Attachments
If attachments are causing problems:
- Remove all accessories and try vacuuming with only the standard nozzle.
- Clean attachments with warm water and a brush.
- Do not use small or narrow tools for large dirt or heavy debris.
Reattaching Internal Hoses
If an internal hose is loose:
- Open the vacuum body (check your manual).
- Find the hose and reattach it firmly.
- Make sure there are no cracks or holes in the hose.
Avoiding Wet Or Sticky Dirt
Never vacuum up wet or sticky messes unless your Shark Rocket is made for wet cleaning.
- If you accidentally do, unplug the vacuum and clean all tubes and dust cap with warm water.
- Let everything dry fully before use.
Surprising tip: Even slightly damp dirt can cause blockages over time. Always wait for spills to dry before vacuuming.
Preventive Maintenance: Keeping Your Shark Rocket In Top Shape
Most dust cap not filling problems can be avoided with regular care. Here’s how to keep your Shark Rocket working at its best:
- Empty the dust cap after every use. Don’t wait until it’s full.
- Clean filters every month, or more often if you have pets.
- Check for blockages regularly, especially if you notice weak suction.
- Inspect gaskets and seals during every cleaning.
- Avoid vacuuming large objects, wet messes, or sticky dirt.
- Store the vacuum upright in a dry place to avoid accidental damage.
- Replace worn parts as soon as you notice problems.
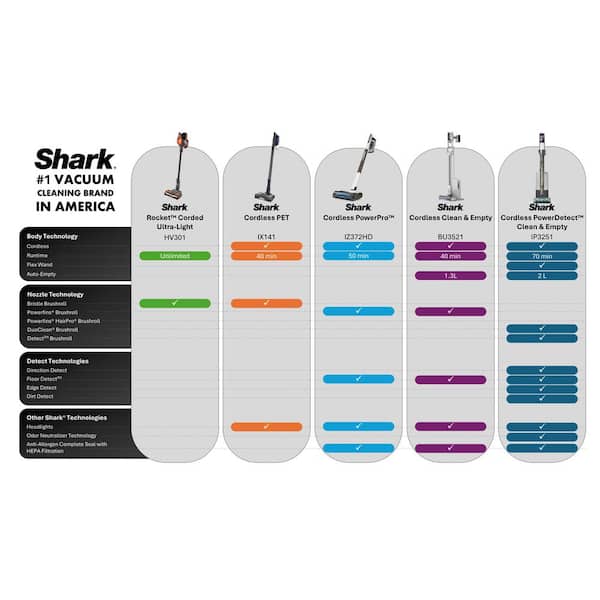
Differences Between Shark Rocket Models
Not all Shark Rocket vacuums are exactly the same. Some models have different dust cap designs, filter placements, or hose setups. This can affect how you diagnose and fix problems.
Here’s a simple comparison of common Shark Rocket models and their dust cap features:
| Model | Dust Cap Size | Filter Type | Common Issues |
|---|---|---|---|
| Shark Rocket HV302 | Small | Foam & Felt | Blockages, filter clogs |
| Shark Rocket HV382 | Medium | Foam & HEPA | Gasket wear, hose detachment |
| Shark Rocket DuoClean | Large | HEPA | Seal leaks, wet debris issues |
Note: Always check your model number before ordering parts or following repair steps, as filter size and dust cap design can be different.
Non-obvious Insights Most People Miss
When fixing Shark Rocket vacuums, there are a few things most beginners never think about. Here are two important insights:
1. Micro Blockages in the Elbow Joint:
Many Shark Rocket models have an elbow joint where the tube bends. Dirt can build up here in small amounts, not enough to totally block the vacuum but enough to stop dirt from reaching the dust cap. Always check this spot if you have repeated problems.
2. Filter Placement Matters:
If you put filters back in the wrong order, air cannot flow correctly. Some filters look similar, but only fit one way. Double-check your manual or look for arrows or notches on the filter.
Real-world Example: Solving A Shark Rocket Dust Cap Problem
Let’s look at a real example to see how these steps work in practice.
Case:
Maya noticed her Shark Rocket stopped collecting dust. The dust cap stayed empty, but suction at the nozzle felt weak.
Her process:
- She unplugged and checked for visible blockages—nothing found.
- She removed the dust cap and cleaned it, but still no improvement.
- Next, she took out the filters. They looked clean, but she washed and dried them anyway.
- When she reassembled the vacuum, she saw a small rubber ring (gasket) on the floor.
- She realized this was from the dust cap and put it back in place.
- After reassembly, the vacuum worked perfectly and the dust cap filled as normal.
Lesson:
Even tiny parts, like a gasket, can stop your vacuum from working. Always keep track of small pieces during cleaning.
When To Call For Professional Help
Most Shark Rocket problems can be fixed at home, but sometimes you need a professional. Here’s when you should get expert help:
- The motor will not start, or there is a burning smell.
- Cracks in the main body or internal parts that cannot be taped or glued.
- Electrical problems, like sparking or flickering lights.
- Repeated blockages that you cannot clear.
Always use an authorized repair service or contact Shark customer support for serious issues.
Cost Comparison: Diy Fixes Vs. Professional Repair
Many people wonder if it’s cheaper to fix the vacuum themselves or call a professional. Here’s a quick comparison:
| Repair Type | DIY Cost | Professional Cost | Time Needed |
|---|---|---|---|
| Filter Cleaning | Free | $30-$50 | 1 hour |
| Replacing Dust Cap | $15-$35 | $60-$90 | 30 minutes (DIY) |
| Clearing Blockage | Free | $40-$80 | 15-60 minutes |
| Motor Repair | N/A | $100-$200 | 1-2 days |
Tip: Most dust cap problems are quick and cheap to fix at home.
How To Avoid Shark Rocket Dust Cap Problems In The Future
Prevention is always better than repair. Here are some habits that can help you avoid dust cap issues:
- Check and empty the dust cap after each use.
- Clean or replace filters on a regular schedule.
- Inspect the vacuum for cracks or leaks monthly.
- Do not overfill the dust cap—empty it when it reaches the “max fill” line.
- Keep an eye on gaskets and seals—replace them if they look worn.
- Use the right attachment for the job.
- Never vacuum up water or wet dirt with a dry vacuum.
These habits not only keep your Shark Rocket running smoothly but also help it last longer.
Frequently Asked Questions

Credit: mashable.com
What Should I Do First If My Shark Rocket Dust Cap Is Not Filling?
Start by checking for blockages in the suction tube and nozzle. Unplug the vacuum, remove the dust cap, and look for any visible dirt or objects blocking the path. Also, check that the dust cap and filters are clean and correctly installed.
How Often Should I Clean The Filters In My Shark Rocket Vacuum?
Most Shark Rocket models recommend cleaning foam and felt filters at least once a month. If you have pets or a lot of dust, you may need to clean them every 2-3 weeks. Always let filters dry fully before reusing.
Credit: www.homedepot.com
Can A Missing Gasket Really Stop My Vacuum From Working?
Yes, a missing or damaged gasket can cause air leaks, which leads to a loss of suction. Without proper suction, dust and dirt will not reach the dust cap. Always check for gaskets after cleaning or repairs.
Is It Safe To Use Glue To Fix A Cracked Dust Cap?
It’s best not to use glue inside the dust cap because fumes can be harmful and may not create a lasting fix. For small cracks, use tape as a temporary solution. For larger cracks, order a replacement dust cap from Shark Clean or an authorized dealer.

Credit: mashable.com
What If None Of These Solutions Fix My Vacuum?
If you’ve tried all the above steps and your Shark Rocket dust cap still doesn’t fill, the problem may be with the motor or internal components. In this case, contact Shark customer service or visit a professional repair shop.
A Shark Rocket vacuum is a powerful tool, but like any machine, it needs the right care to work well. If your dust cap is not filling, don’t panic—most problems are simple to diagnose and fix. With regular maintenance, careful use, and quick attention to small issues, your vacuum can keep your home clean for years to come.